

The Developer's Guide to Building with Fauna: From Local Testing to Production
In this post, we’ll explore how the Fauna engineering team uses Fauna itself to develop, test, and deploy features—including how to spin up a local Fauna environment, write and enforce schemas, run tests, and integrate Fauna with a CI/CD pipeline. Applying these best practices to your own environment will help you build and iterate quickly while maintaining the integrity of your data.
Be sure to check out the video overview of this functionality for further explanation.
Why Build on Fauna Using Fauna?
Many of Fauna’s own “control plane services”—like exporting logs, integrating with Datadog, or performing backups—are built on top of Fauna. This ensures Fauna’s engineers have real-world insights into how developers can best use these tools. It also means that when you work with Fauna, you’re accessing the exact same workflows we rely on internally.
Defining Your Schema with FSL
Fauna Schema Language (FSL) is at the heart of defining collections, fields, types, constraints, and even computed values within Fauna. Much like a traditional database DDL (data definition language), FSL enforces type safety and data integrity at the database level.
Example FSL Collection Definition
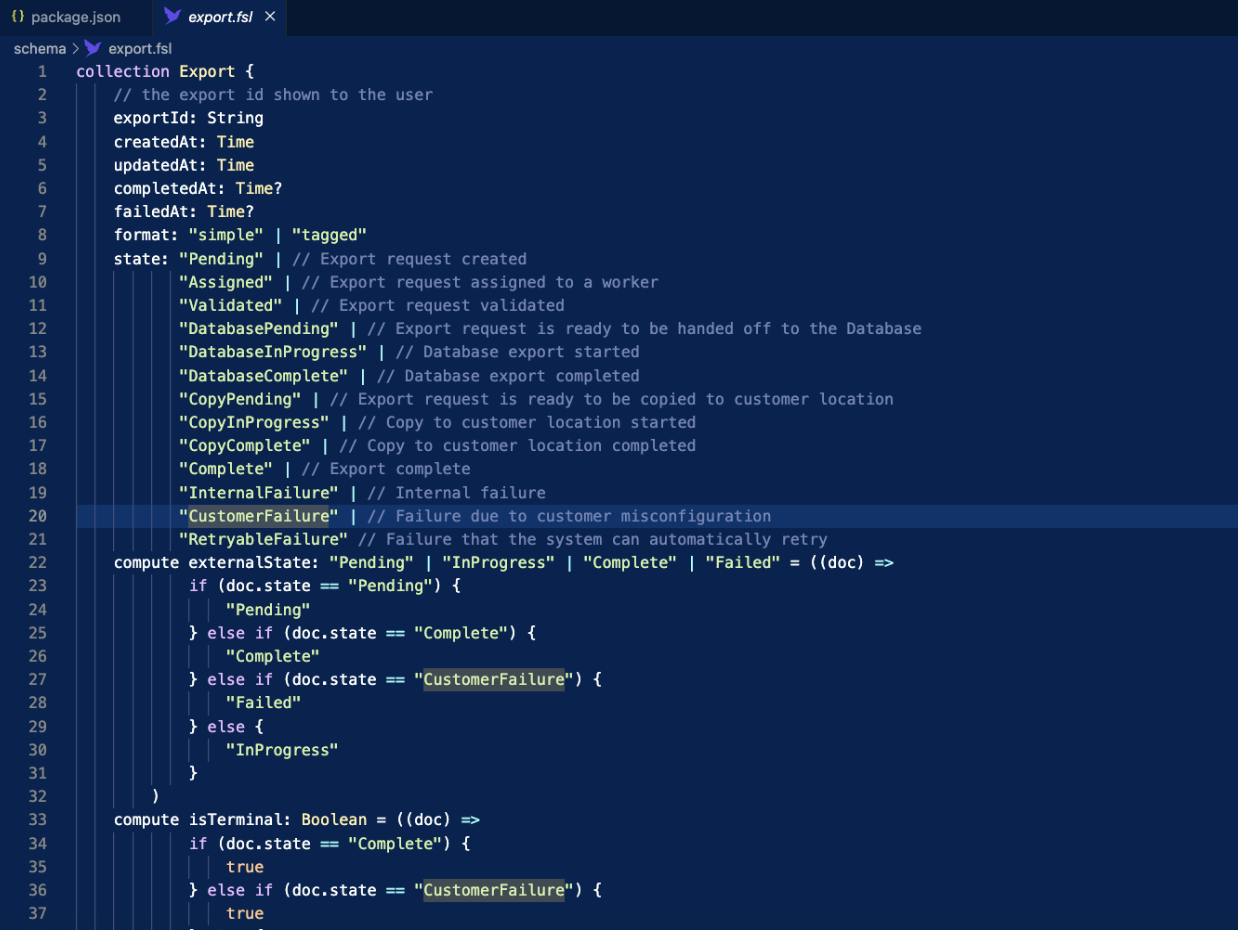
This schema enforces the structure of any document created in the collection, including acceptable string values, computed fields, and more. With strict type checking, Fauna rejects data that doesn’t conform, so you never have to worry about silently corrupting your records.
Writing Logic in User-Defined Functions (UDFs)
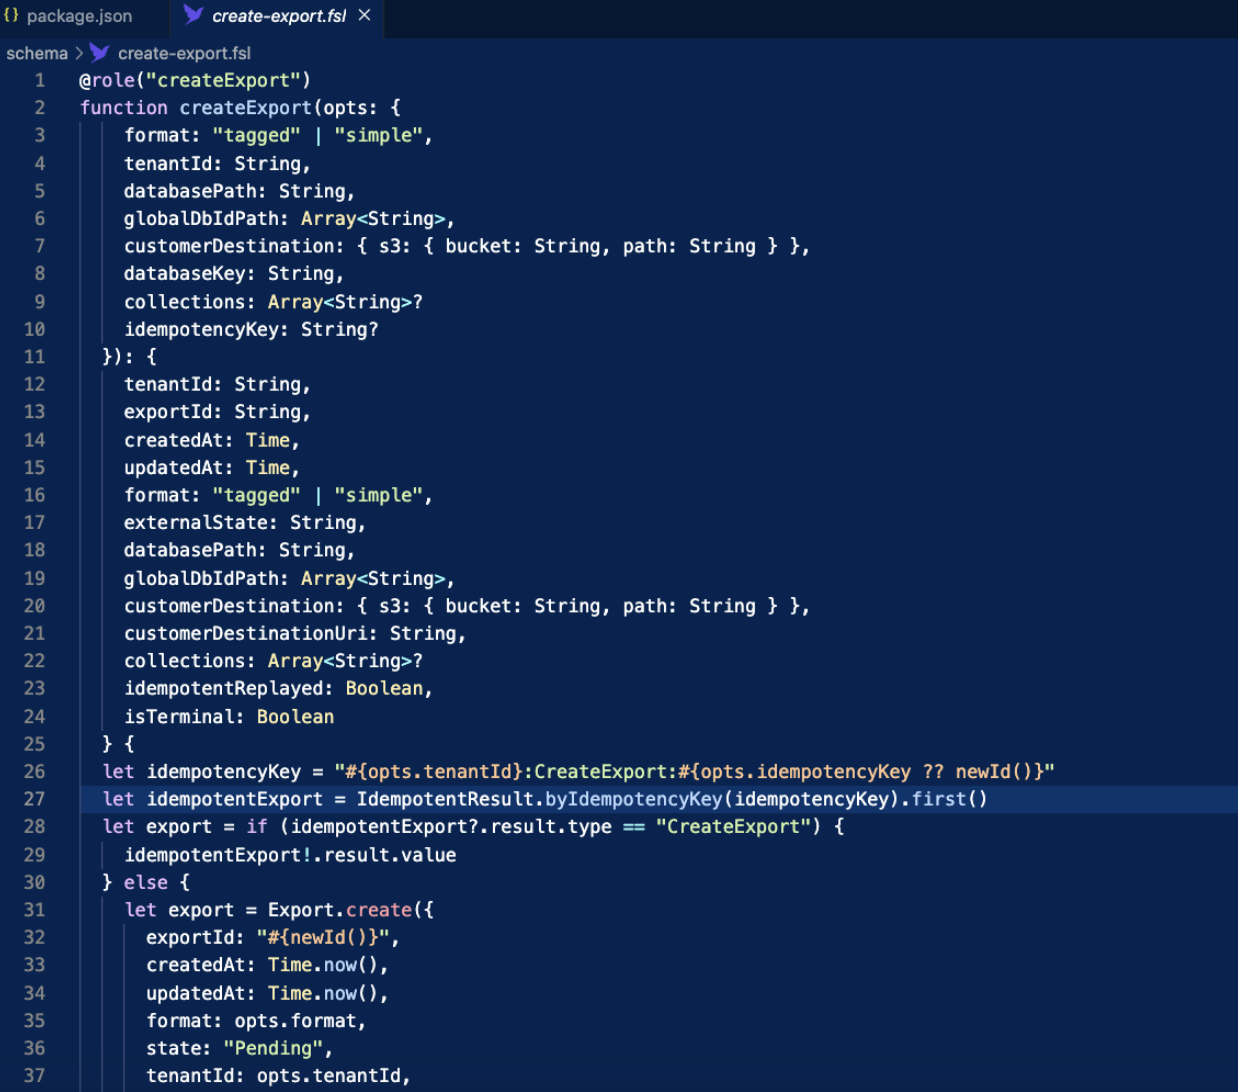
Rather than embedding logic in a separate service layer, Fauna encourages developers to write key operations as user-defined functions(UDFs), which are written in Fauna Query Language (FQL), and run inside of Fauna. For instance, a “create export” function might include:
- Idempotency: Preventing duplicate exports by checking for a matching key.
- Relationships: Creating multiple related documents in multiple collections.
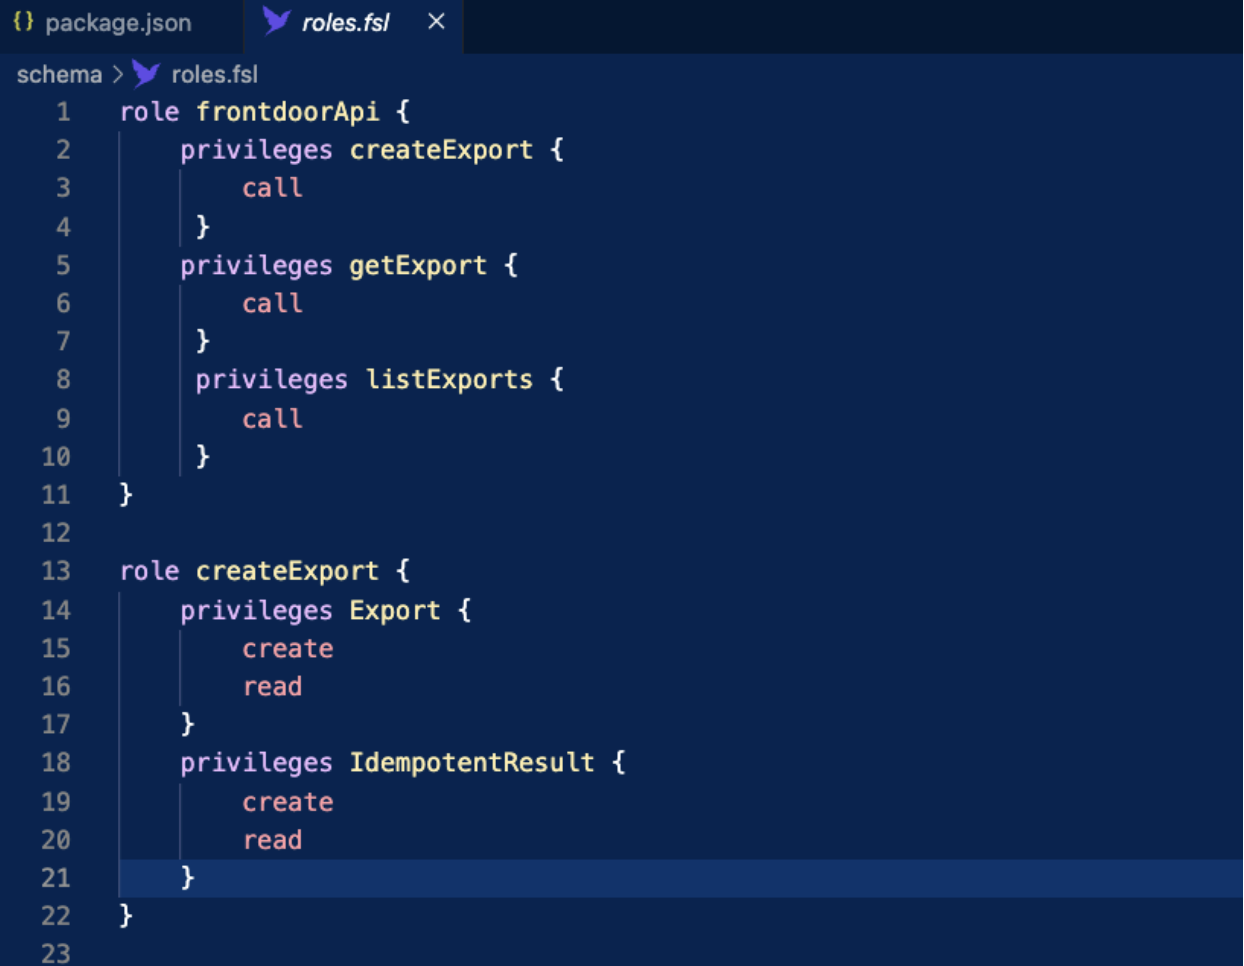
By assigning roles with minimal privileges to these UDFs, you lock down their permissions. Your application or service layer then calls the UDFs—ensuring consistent enforcement of data rules and security.
Example UDF Implementation
Running Fauna Locally with Docker
A major benefit of Fauna’s new CLI is the ability to spin up Fauna in a Docker containerfor offline, local development. This workflow is ideal for experimentation, rapid prototyping, or traveling engineers without reliable internet.
You can do so with a single command (assuming you have Docker installed):
fauna local --database MyLocalDb --dir ./schemaWhat Happens Under the Hood?
- Starts a Docker container running Fauna.
- Installs the schema located in ./schema into a newly created database (
MyLocalDB). - Enforces type checking (by default) so all operations respect the types in your FSL schema. You can use
--no-typecheckedto opt out of type checking.
Once this is complete, you can use the Fauna CLI or any Fauna driver to interact with your local database.
Testing Your UDFs and Schema
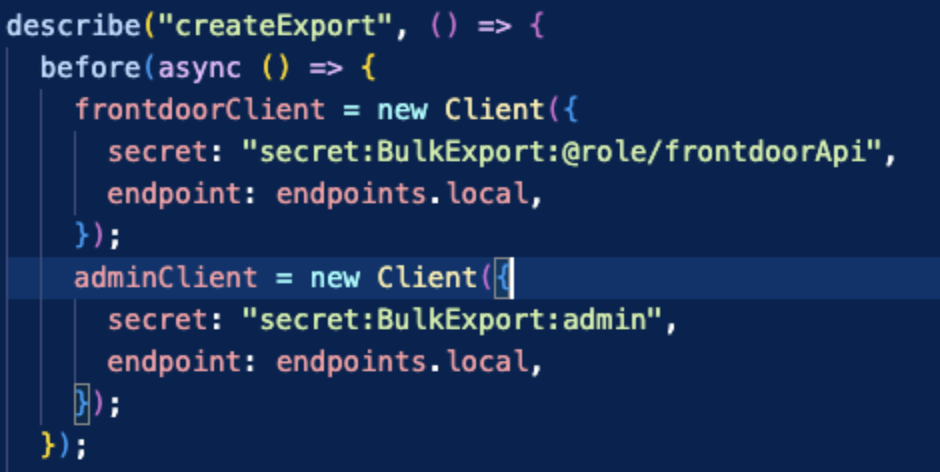
Local testing in Fauna is straightforward. Because your business logic resides in UDFs, you can systematically verify them: the first thing to note is how easy it is to create a Fauna client that works with a Fauna container started with the CLI. Support is built in, all you have to do is use the ‘local’ endpoint of your driver (available in any of our supported languages).
Here are the steps:
- Create an Admin Client: Used for loading test data and cleaning up between tests.
- Create a Restricted Client: Mimics the role your application will use in production.
- Run Queries: Call the UDFs with valid and invalid inputs to ensure type constraints and logic work as intended.
Below you can see that one admin client and one restricted client are created in this manner:
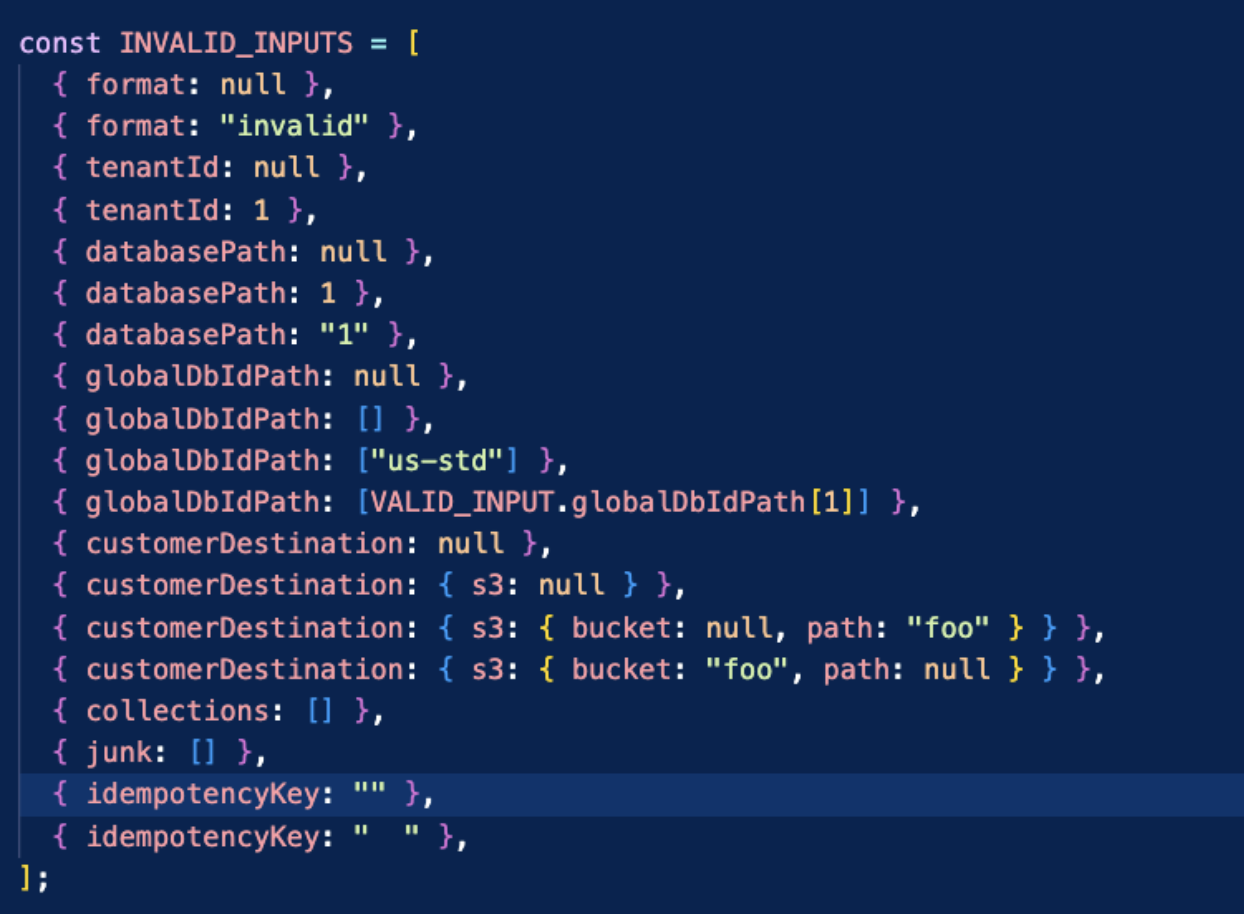
We can use those clients to run tests. Below we show some basic invalid input tests. What’s great about strong typechecking in our collections and functions, is that Fauna queries will hard-fail if I provide inputs with bad types! Each of the INVALID_INPUTS members below is such data. The test code is dead simple - try to call with garbage data and confirm Fauna throws an error. Data sanity is easy.
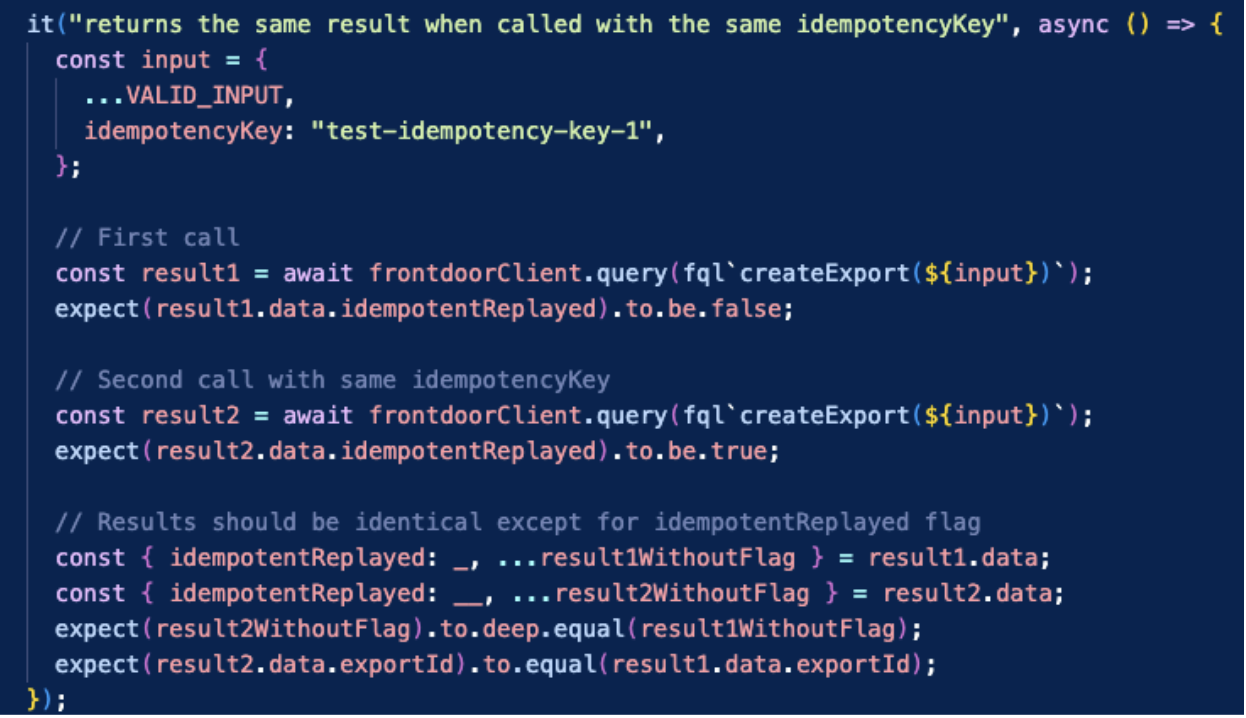
Finally, it is also easy to do ‘happy path’ tests that actually succeed. We can use the same clients. Below is a simple example:
When tests pass locally, you gain confidence that your schema constraints, roles, and UDF logic are aligned.
Integrating with CI
To automate validation on every commit, Fauna’s CLI and Docker-based approach work seamlessly with GitHub Actions (or any CI service):
- Test Workflow:
- Spin up a Fauna container in Actions.
- Install the schema from your branch.
- Run tests to confirm everything works.
- Backward Compatibility Workflow:
- Deploy the existing schema on main/master to a local container.
- Load some sample data.
- Deploy the new schema from your branch.
- Fail the workflow if migrations are incompatible.
To do this:
- We take a dependency on the Fauna CLI in our repository. We use node to manage and test Fauna schema, so you can see this in a snippet of our package.json.
- We define a script, ‘start’, in package.json.. This script uses the CLI to start a fauna container and deploys the schema in the ‘./schema’ onto a ‘BulkExport’ database.
- We define a script, ‘test’, in package.json that runs a test suite against the local container. Each fauna driver can be easily configured to talk to the ‘local’ endpoint the CLI starts.
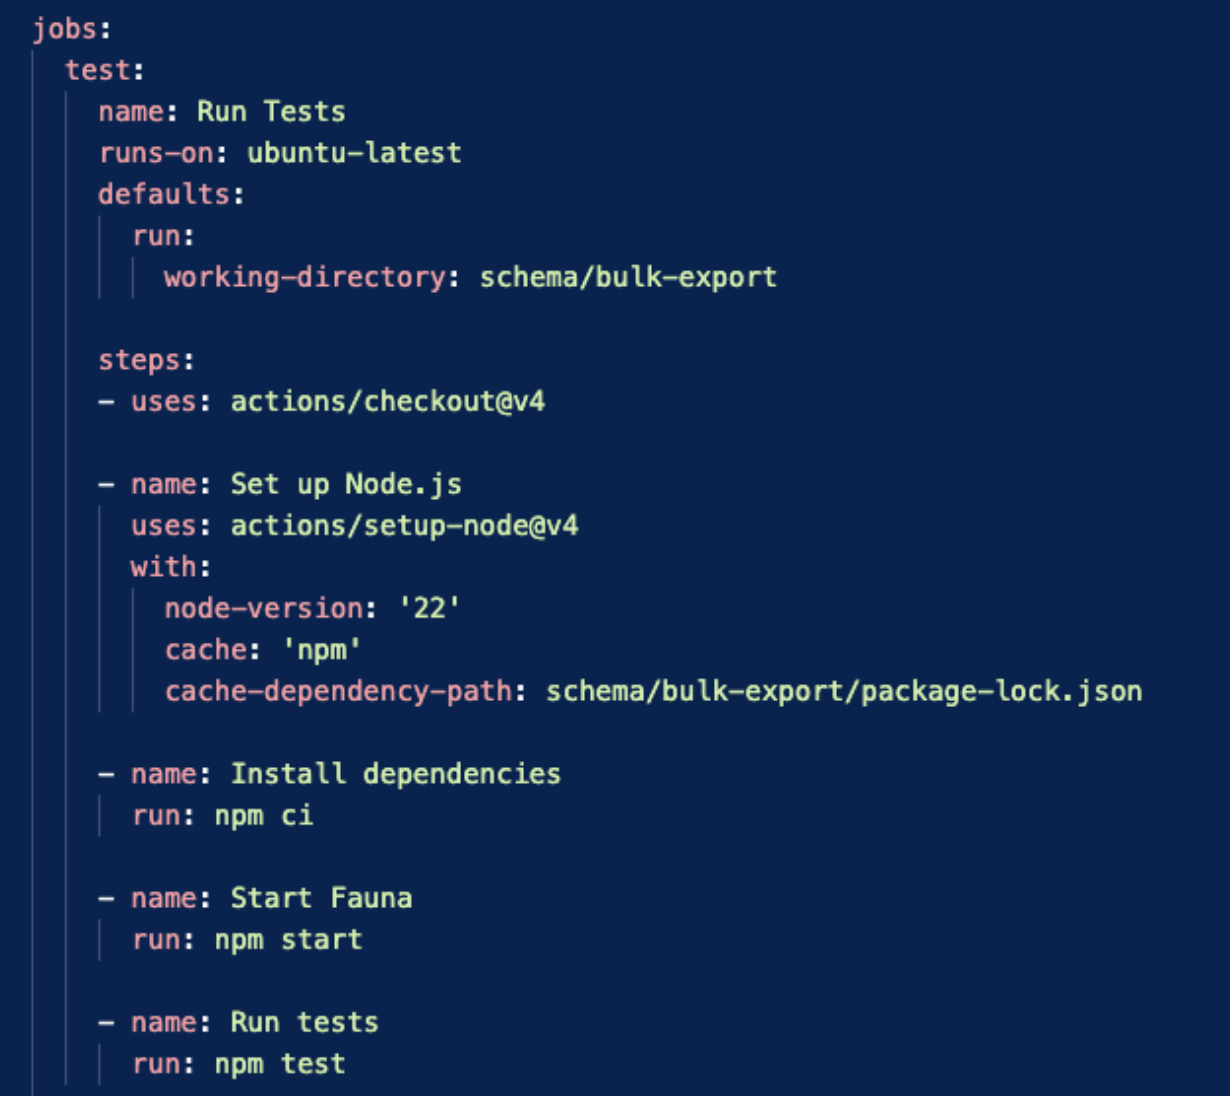
We then define a GitHub workflow that starts Fauna, installs the schema and runs the tests:
Sweet, we have this check that will prove our code works. But what if we introduce a backward-incompatible schema change without including a migration? It would be great if we could catch this in a pull request.
Fortunately, it’s easy to do this! All we need to do is:
- Deploy the schema found in our base branch in a database.
- Load some data into this database.
- Deploy the schema found in the pull request. This step will only pass if the schema change is valid and includes any needed migrations.
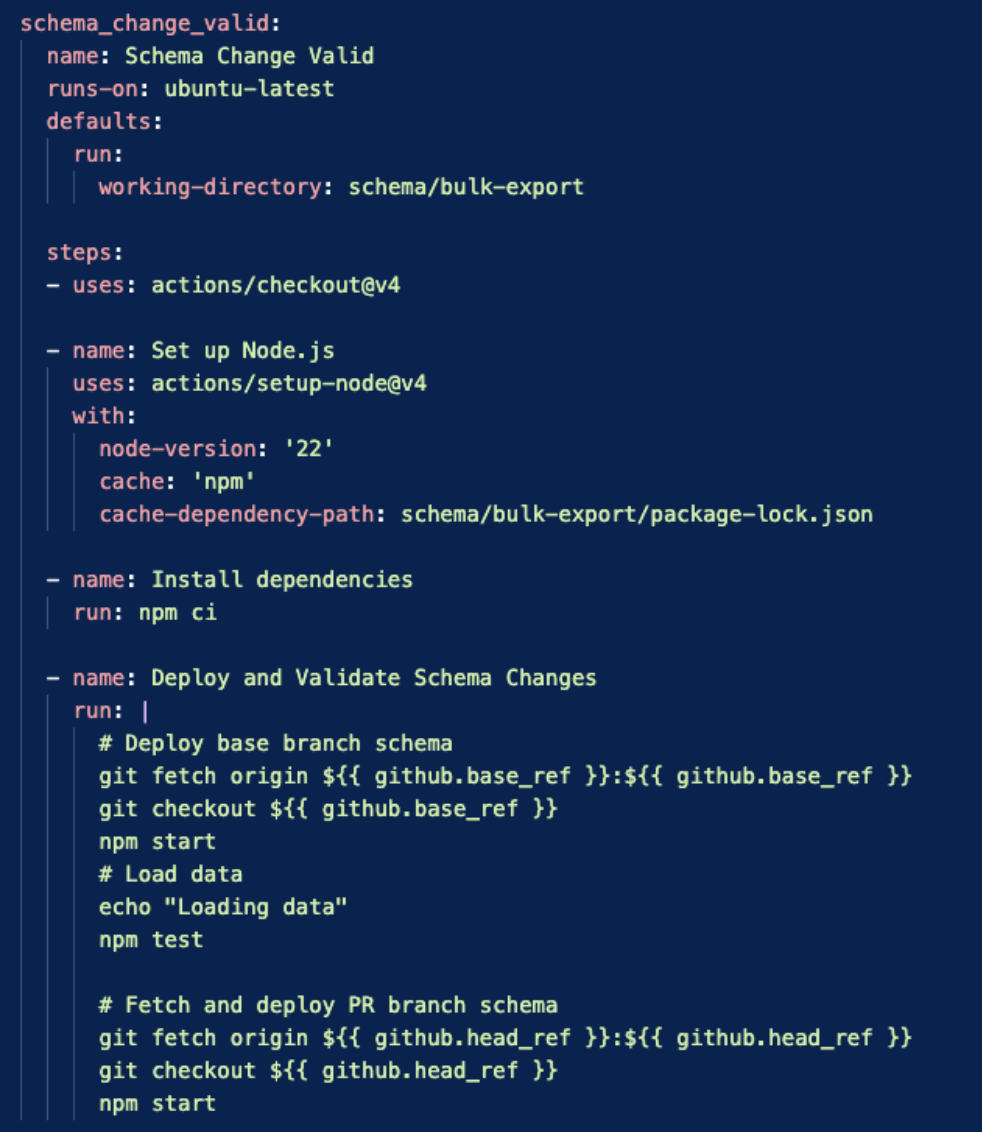
Perfect! You can do this using a GitHub workflow as shown below. Recall that our package.json has two scripts:
start- to start Fauna in a container, create a database and install the schematest- to run tests against that database. This loads data.
This is all we need to test schema changes. The GitHub workflow below does this by:
- Running
starton the base branch of our repo, thus deploying the schema found in base. - Running
testto load data onto this schema. - Running
startagain but with our PR’s branch. This contains our proposed change. This will succeed if and only if the schema change is valid.
Voila! We have test automation confirming schema changes before we ever attempt to deploy.
This ensures no breaking changes sneak into production unnoticed.
Deploying to Production with CD
After successful local and CI tests, you can push your schema to dev, staging, and production environments as part of your continuous deployment pipeline. This is easy to do using the Fauna CLI’s schema push command.
We simply call the CLI as follows:
fauna schema push --no-input --active --secret <our-dbs-secret> --dir schemaThis pushes the schema found in the ./schema directory to the database associated with
<our-db-secret>. The --no-input flag tells the CLI that automation is calling this and thus not to bother with any confirmation dialogues.--active instructs the CLI to push this schema change against what is actively serving traffic. Fear not! This will not incur an outage. Any migrations or index builds will happen in the background and your application will carry merrily along.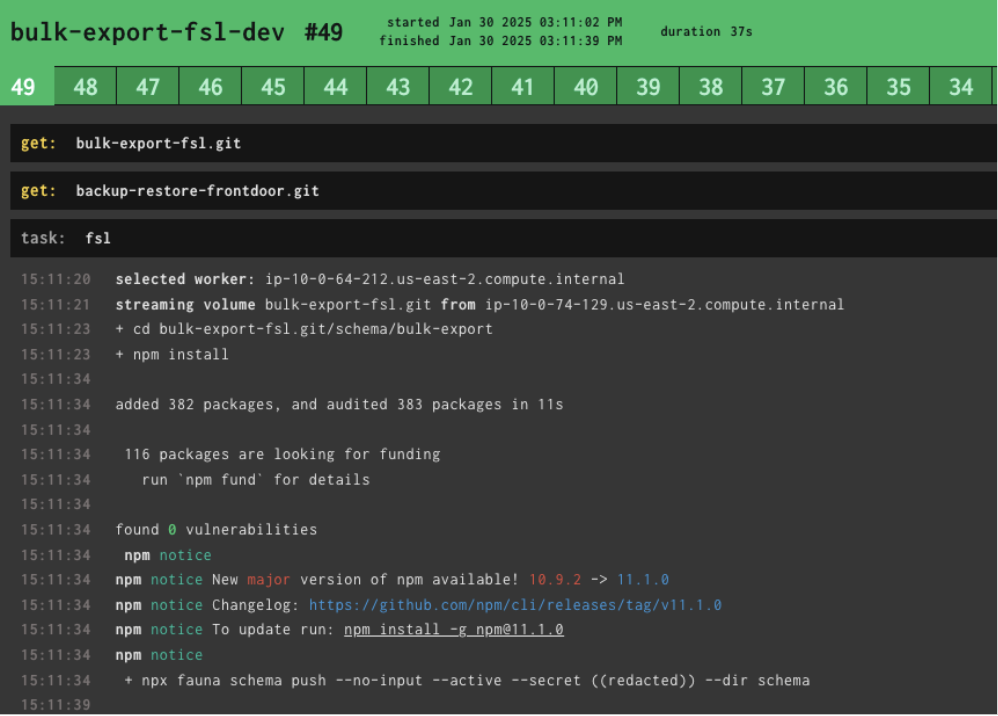
A typical pipeline (whether Concourse, Jenkins, or GitHub Actions) will:
1. Deploy to dev and run integration tests.
2. Promote to staging for further validation.
3. Deploy to production once confident.
This method uses the exact same Fauna CLI commands used locally—meaning consistent tooling across all environments.
Key Takeaways
- Centralized Logic: By placing your core application functionality into Fauna UDFs, you gain inherent type safety, role-based security, and simpler code.
- Local Development: The Fauna CLI + Docker combination allows you to develop offline, test quickly, and avoid risking changes on production data.
- Schema Migrations: FSL and the Fauna CLI handle schema migrations and enforce backward compatibility, so you catch breaking changes early.
- CI/CD Integration: From GitHub Actions to production pipelines, Fauna’s tooling is built to simplify continuous testing and deployment.
Conclusion
Whether you’re new to Fauna or a seasoned user, these workflows offer a streamlined way to develop, test, and safely push changes. By leveraging FSL for schema definitions, UDFs for business logic, and Docker + CI/CD for automation, you ensure reliable, type-safe, and easily maintainable applications—all powered by Fauna.
The Fauna service will be ending on May 30, 2025. For more information, read the announcement and the FAQ.
Subscribe to Fauna's newsletter
Get latest blog posts, development tips & tricks, and latest learning material delivered right to your inbox.