

Build a global, serverless REST API with Cloudflare and Fauna
Ensuring speed, reliability, and accessibility for your applications across the globe isn't just an option anymore — it's a necessity. Supercharging your application's performance and delivering lightning-fast responses is easier than you think. Cloudflare's CDN paired with Fauna's globally distributed database gives you the power to build REST APIs that offer unparalleled speed, reliability, low-latency and scale across the globe. Cloudflare Worker and Fauna backends are ideal for applications that require low latency, global distribution and scale. Fauna has a serverless delivery model accessed via an API, which allows it to seamlessly integrate with ephemeral compute functions like Cloudflare Workers delivered via HTTP. Examples of such applications include real time data analytics platform, gaming backends, chat applications, video and music sharing platforms, and e-commerce applications. This article demonstrates how easy it is to build a global REST API with Cloudflare Workers and Fauna.
Learning goals
- How to store and retrieve data from Fauna in your Cloudflare Workers function
- How to use the Wrangler command line interface (CLI)
- How to locally run and test a Cloudflare Workers function
If you want to follow along quickly, you can find the complete code for this tutorial on GitHub. You can also watch the corresponding tutorial on YouTube.
Why Cloudflare Workers and Fauna
Building with Fauna and Cloudflare Workers enables you to create a globally distributed, strongly consistent, fully serverless REST API in a single code repository. You can develop your application as if it were a monolith but gain the resilience and reduced latency of a distributed application running at the edge.
Although many backend data persistence options exist, Fauna is particularly well-suited for these types of applications. It is a low latency, strongly consistent, globally distributed document-relational database that provides a powerful yet easy TypeScript-inspired query language called FQL.
Getting started with Cloudflare Workers
To get started, make sure you have a Cloudflare account. We will use the Wrangler CLI to create a new Cloudflare Workers project. Run the following command to install the Wrangler CLI globally so you can use it with other projects:
$ npm i wrangler -g Once installed, create a new Wrangler Worker project:
$ npx create cloudflare@latestThe CLI will ask for a project directory name; enter any name to continue.
Next, the CLI will prompt you to select the type of application you want to build; select the
"Hello World" Worker option: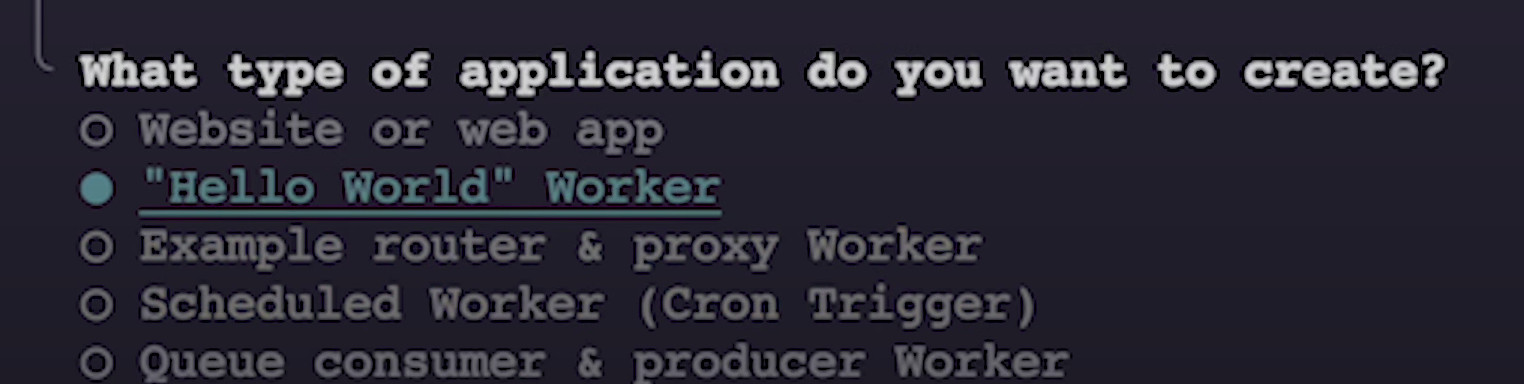
The CLI will also prompt you to use TypeScript and Git; select
Yes for both of these options. Once the project is created, change the directory to the project folder you’ve just created:
$ cd <your-project-directory>Now, run the application with the following command:
$ npm run startVisit
http://127.0.0.1:8787/ and make sure that the worker function is working as expected. Getting started with Fauna
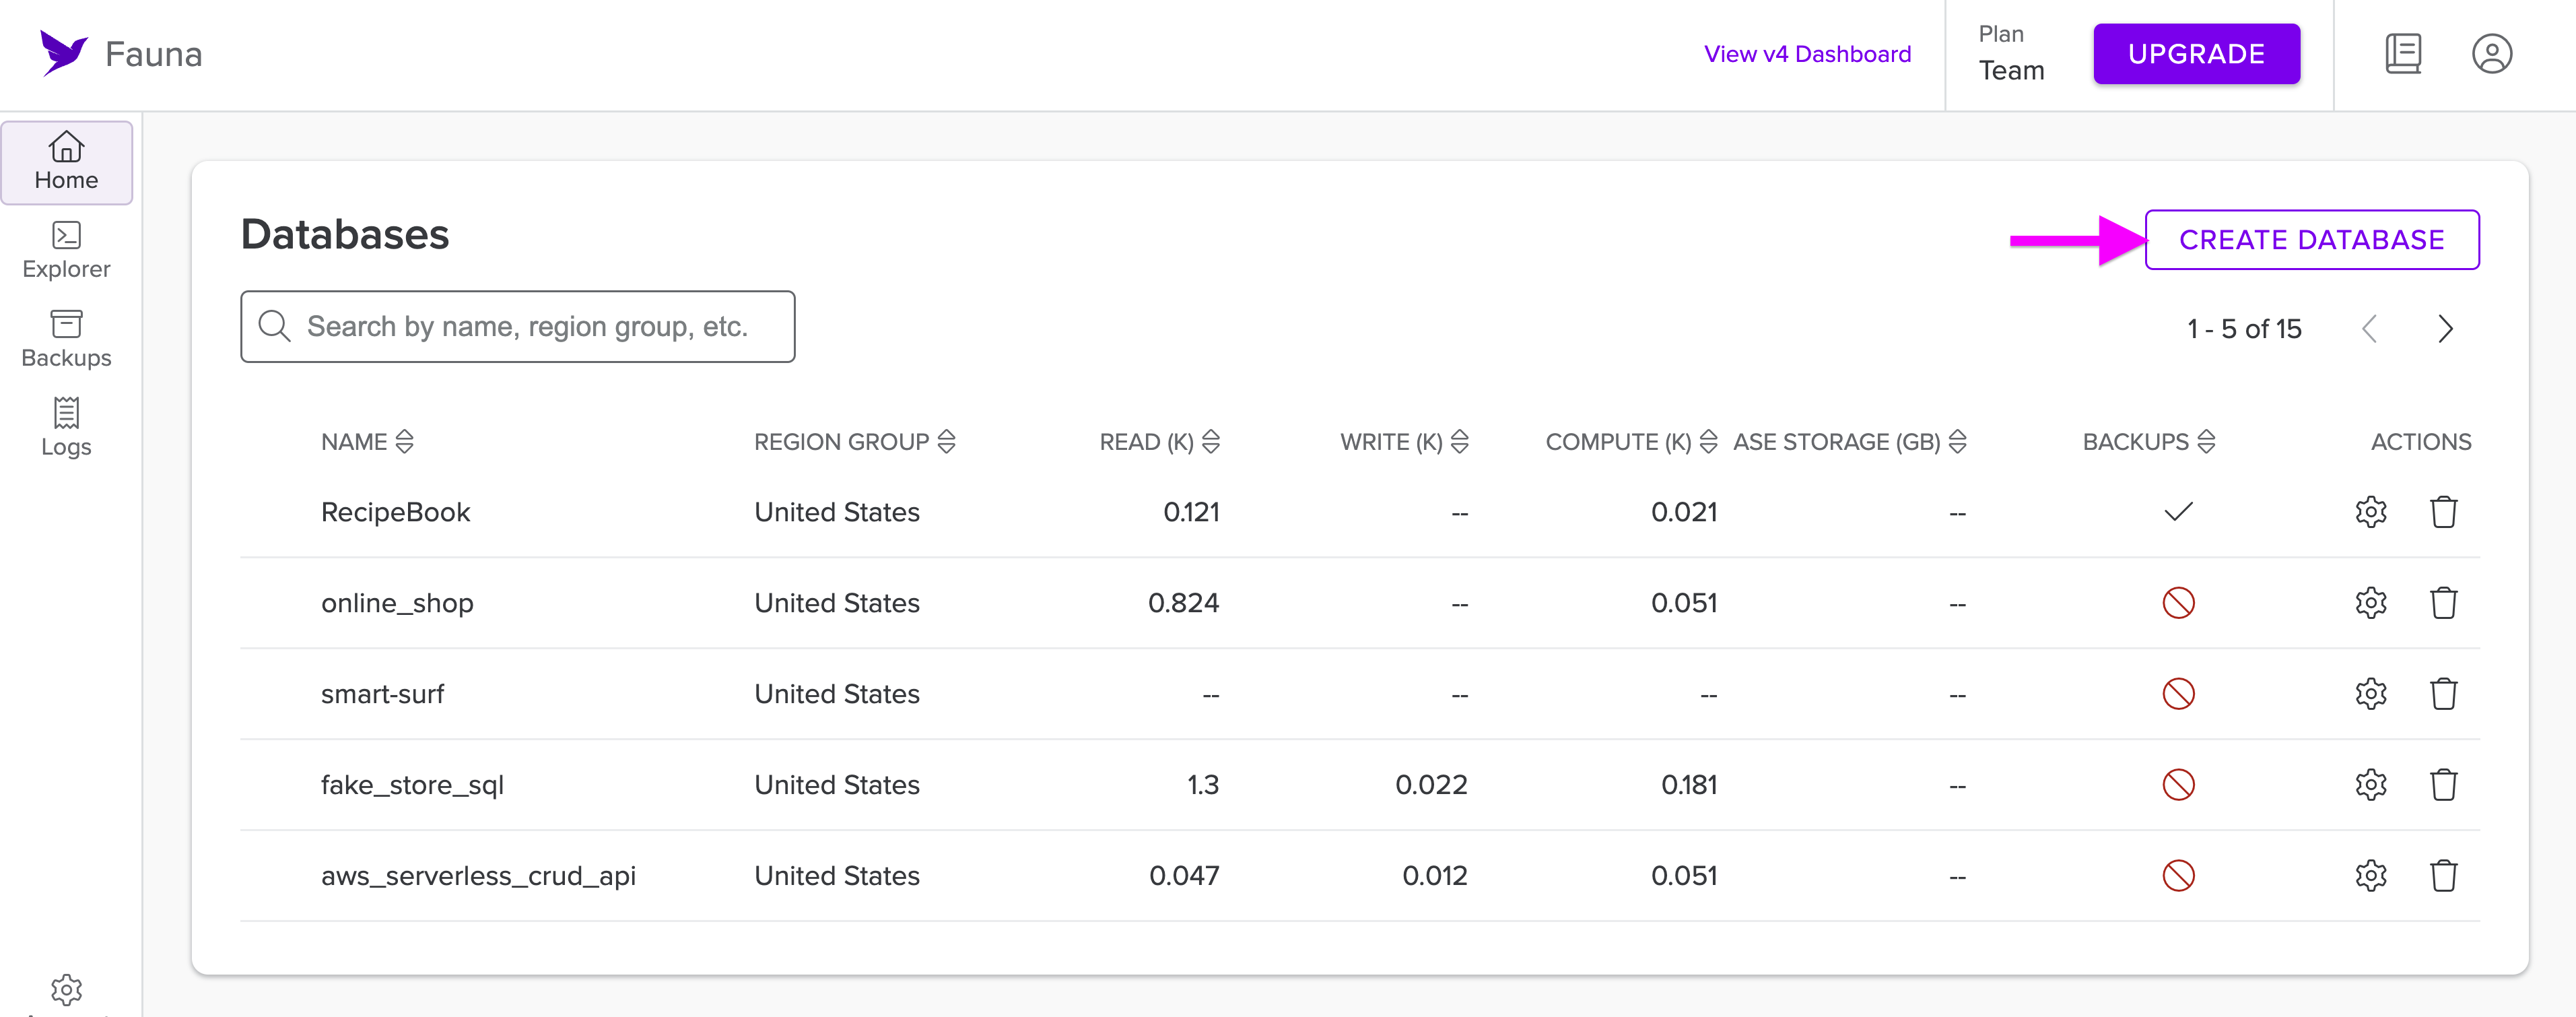
Head over to dashboard.fauna.com/login and create a new database. You can create a new database by selecting the Create Database option.
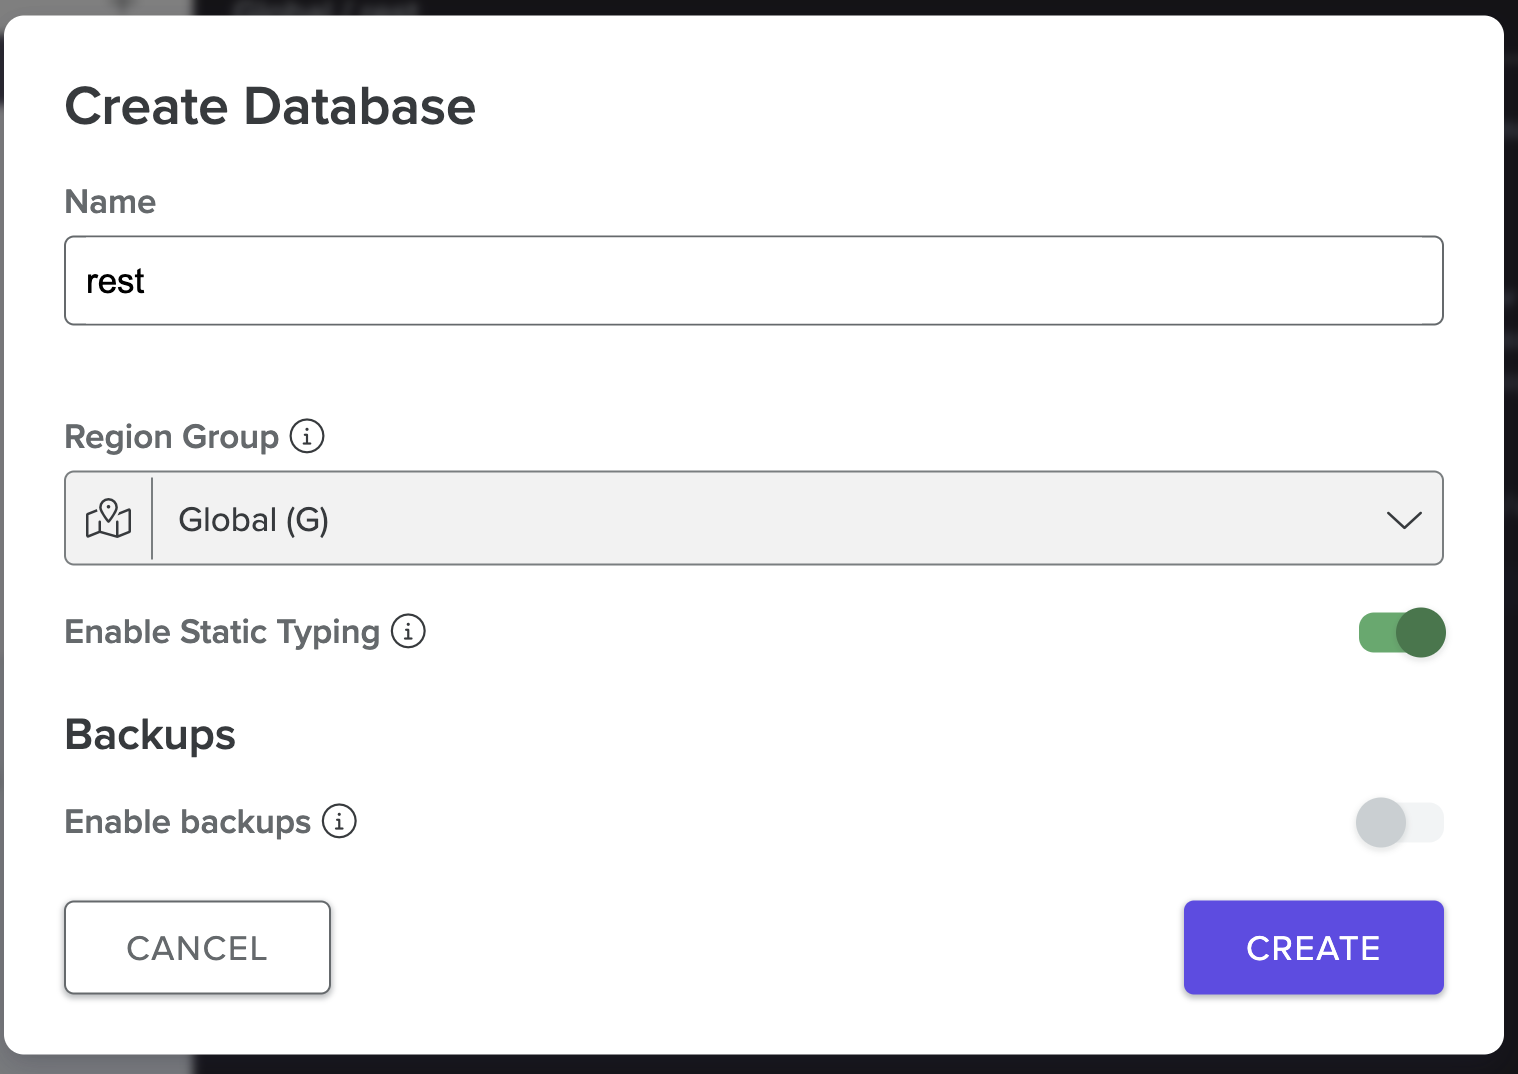
Give your database a name, select the Global Region Group, and then select Create. You can turn off backups for this particular sample application.
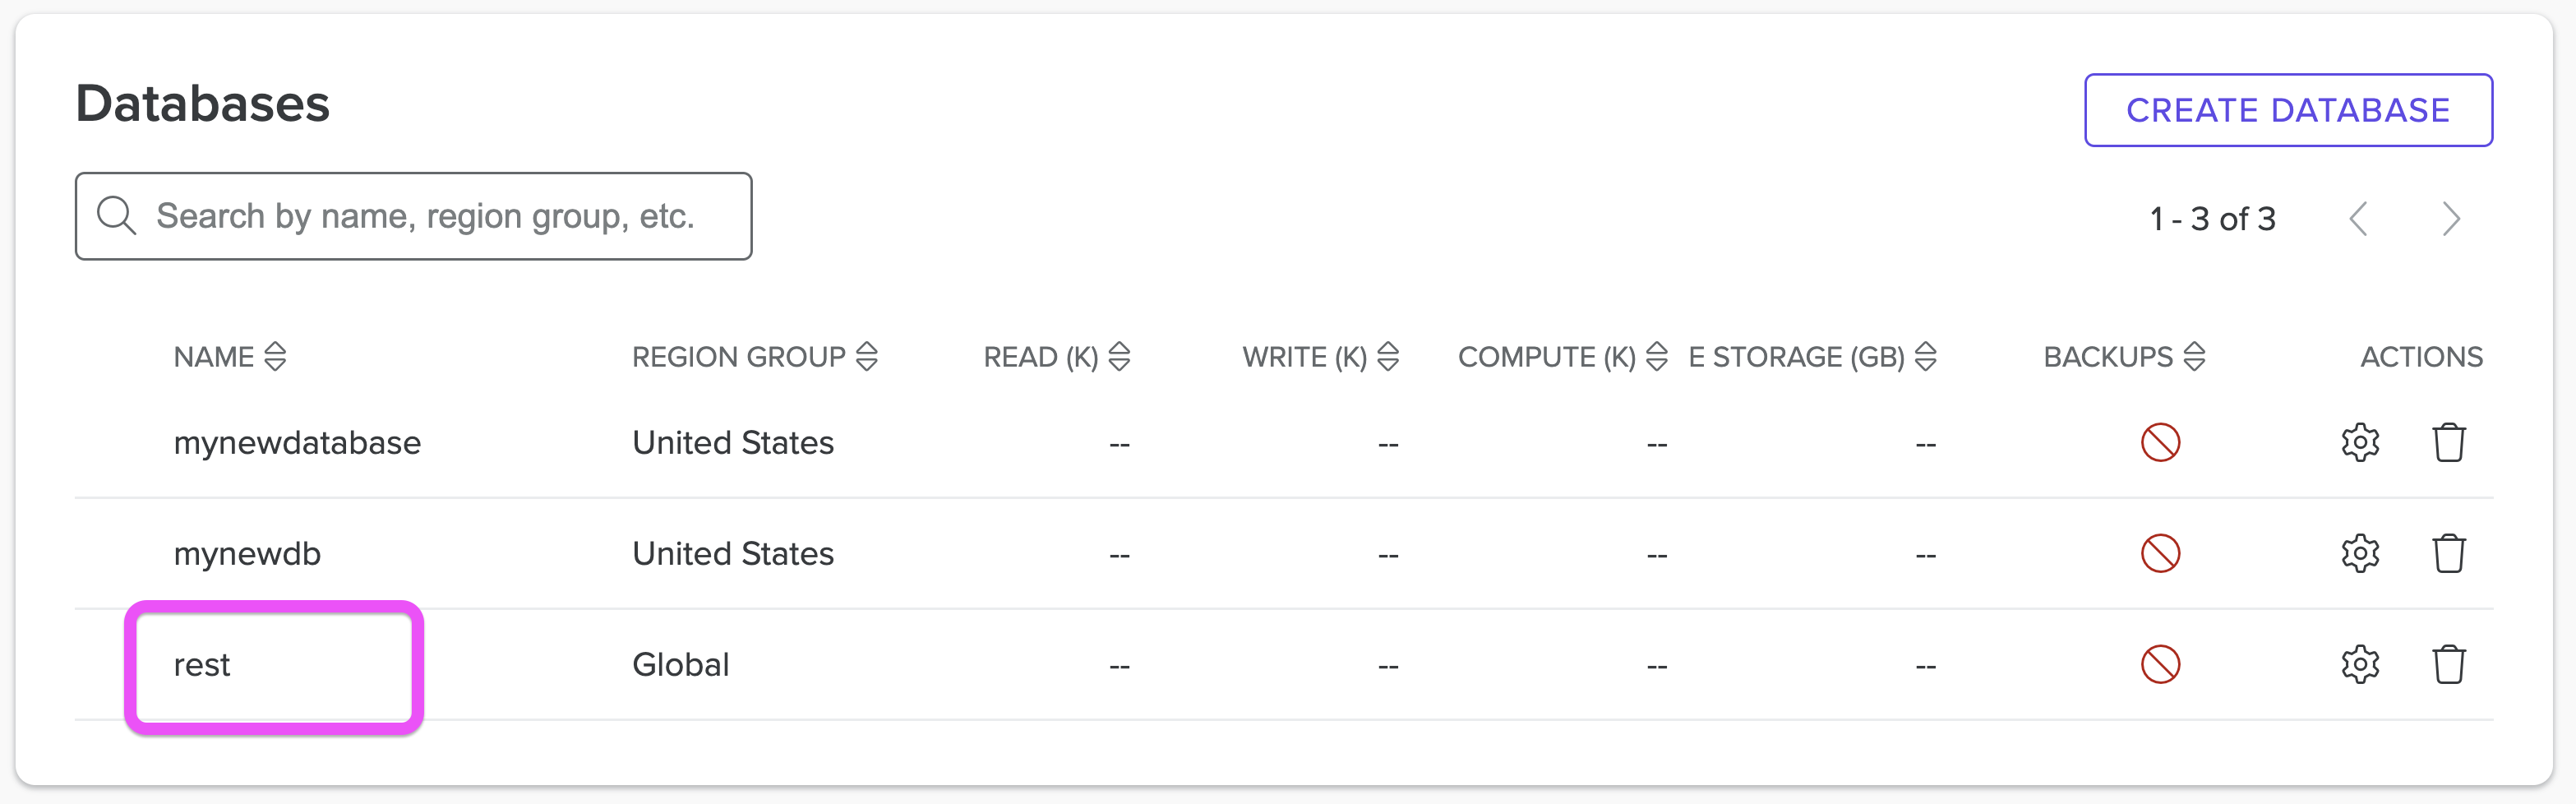
Once the database is created, select the newly created database from the list. It will take you to the database explorer menu.
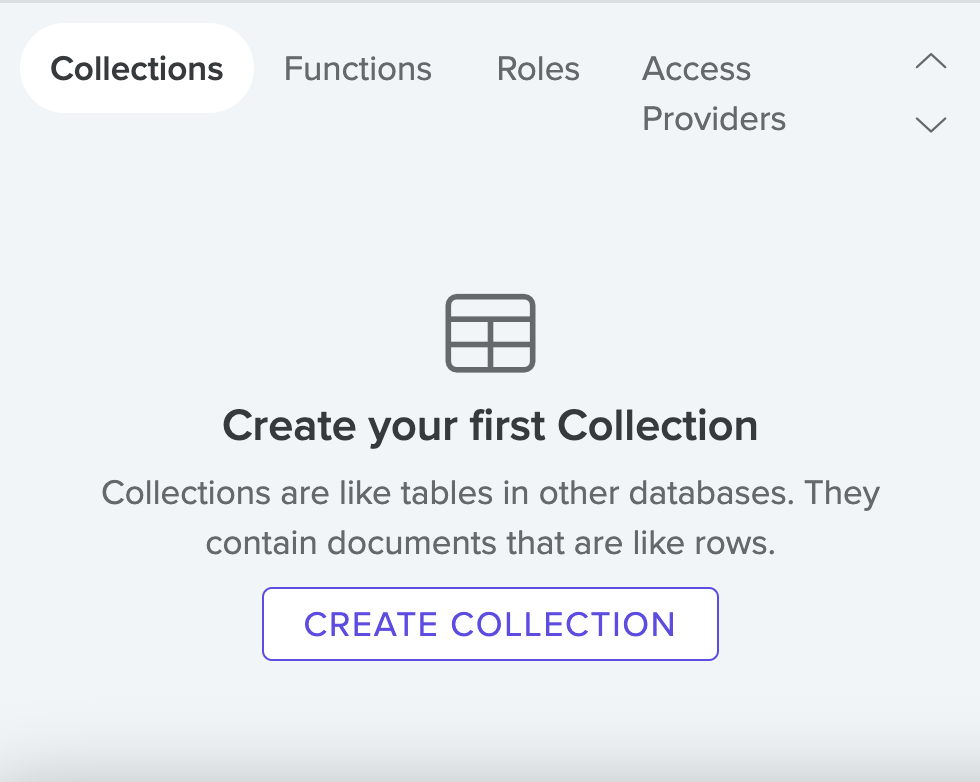
Next, select your database, and then from the bottom left menu select Create Collection.
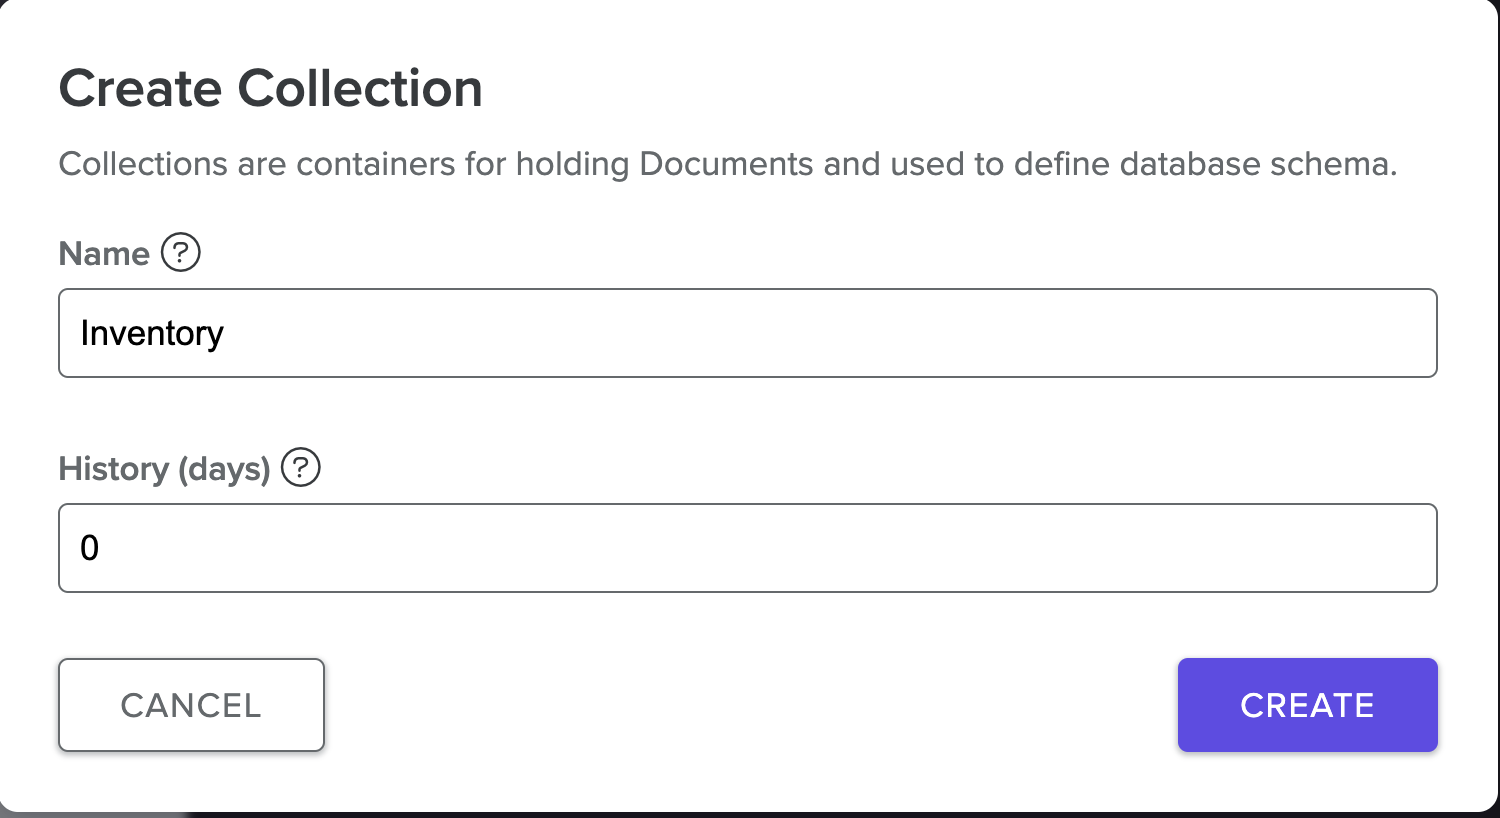
Name your collection Inventory and select Create.
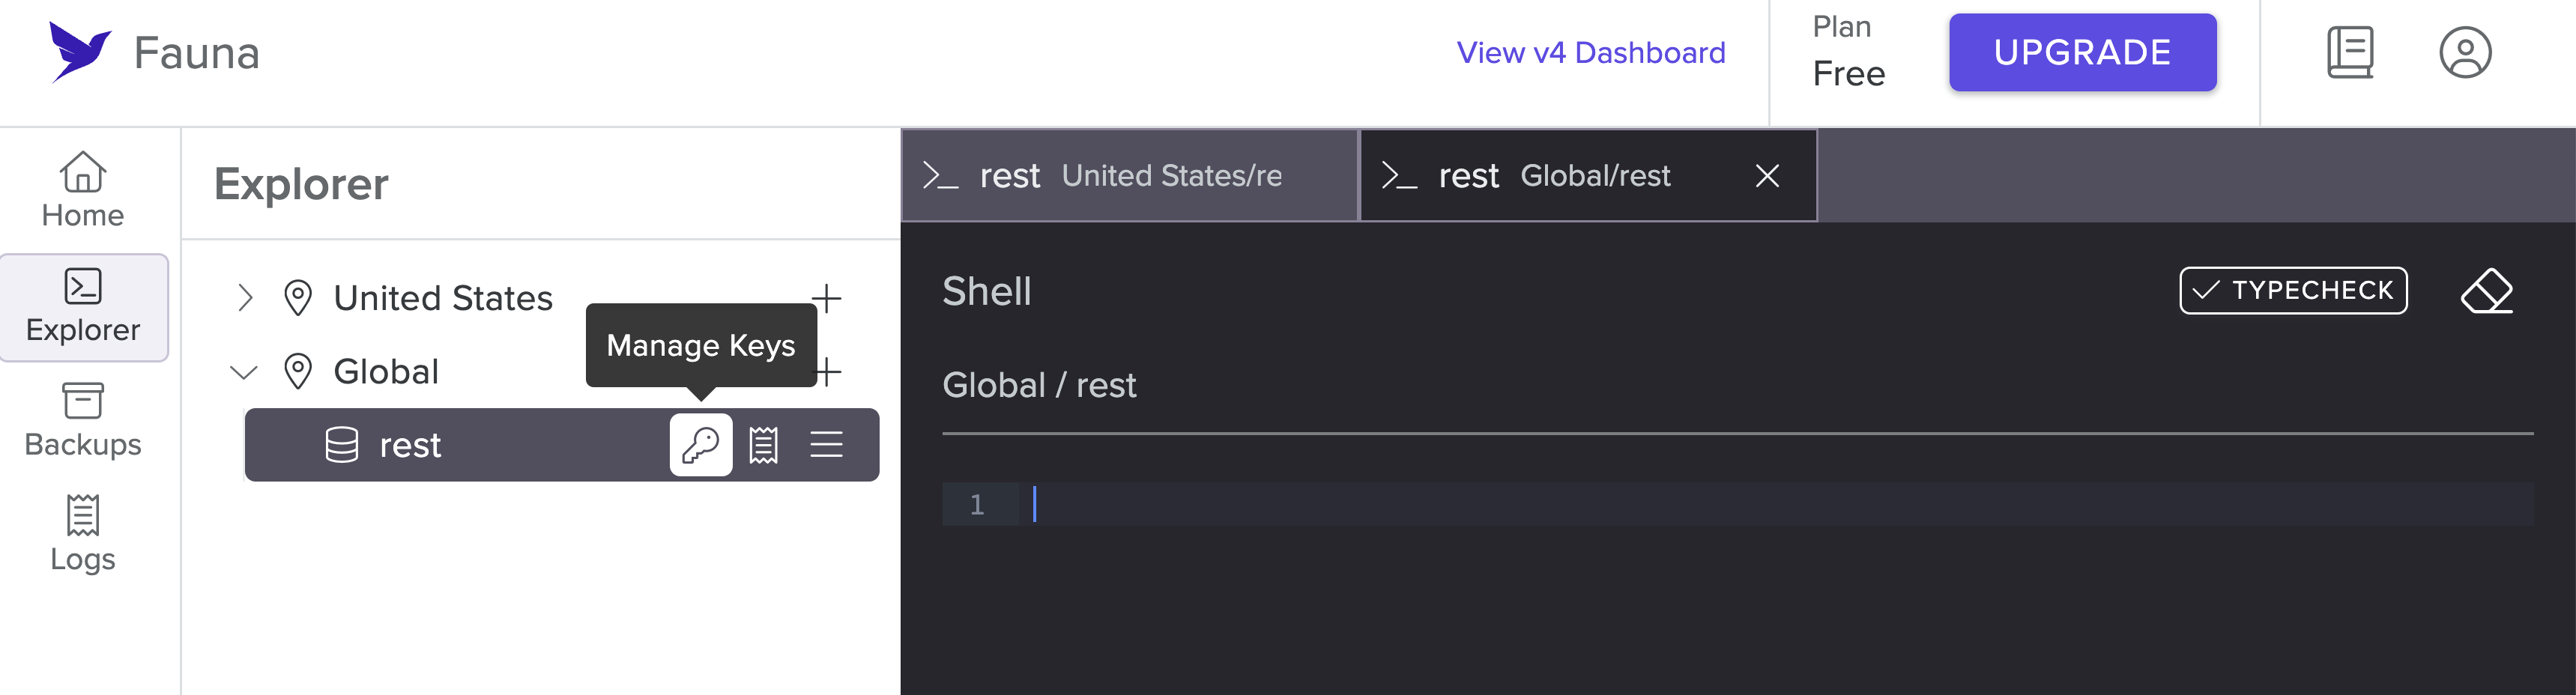
In the database explorer, hover over the database you just created. Notice you have a Manage Keys option. Select it.
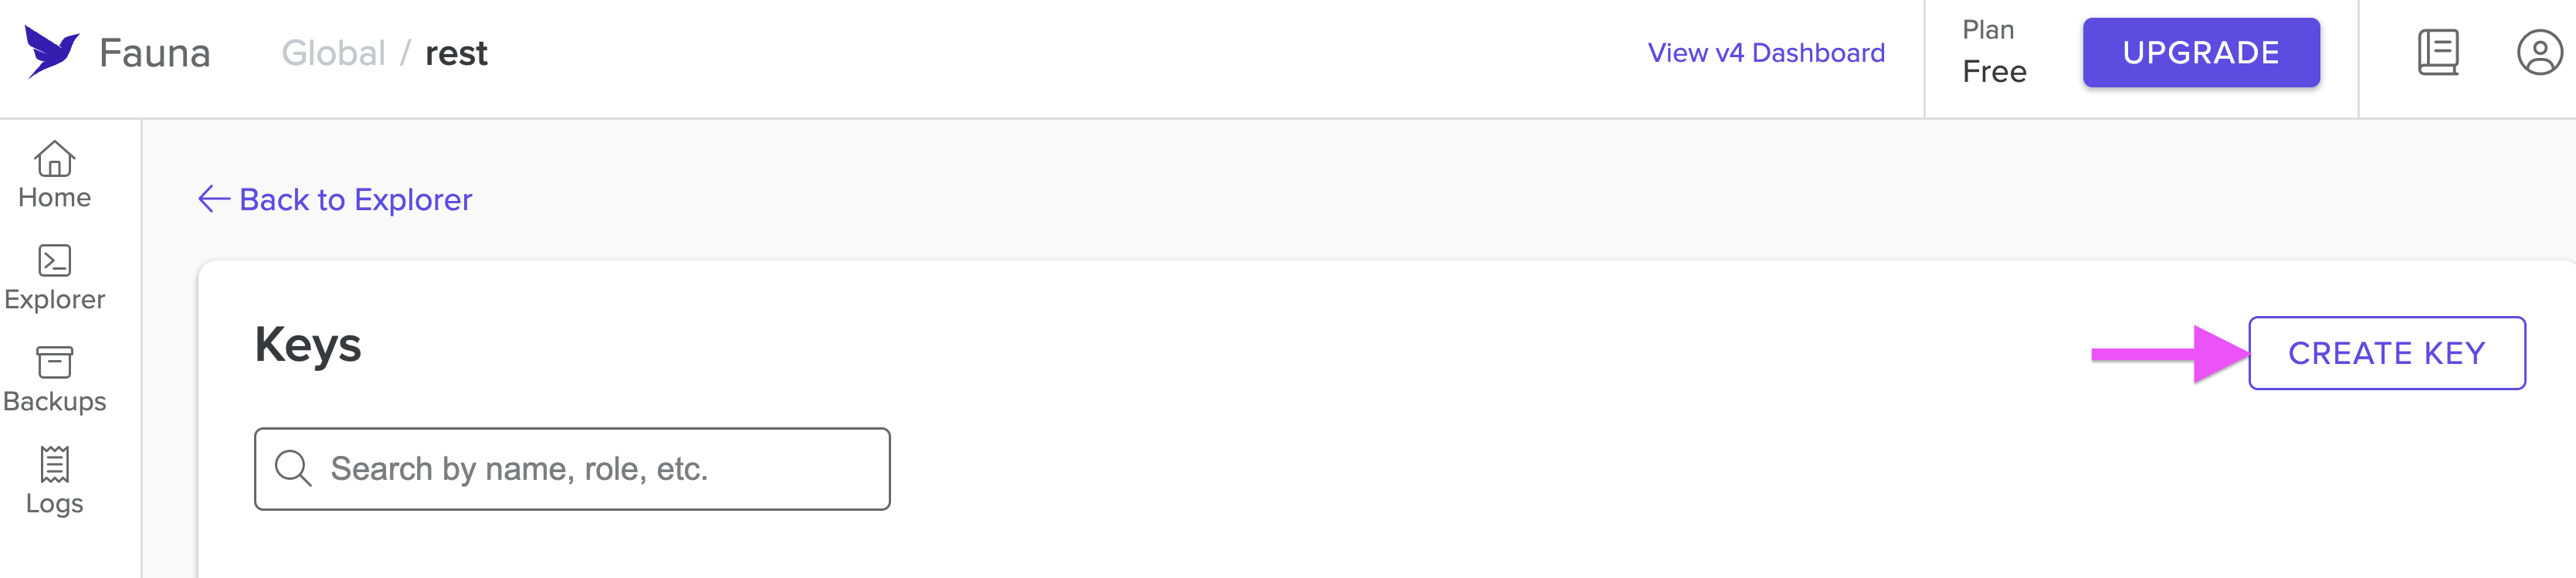
It will take you to the Keys menu for this database. Select Create Key to create a new key for this database.
Select the Server role option while creating your key. Give your key a name and then select Save.
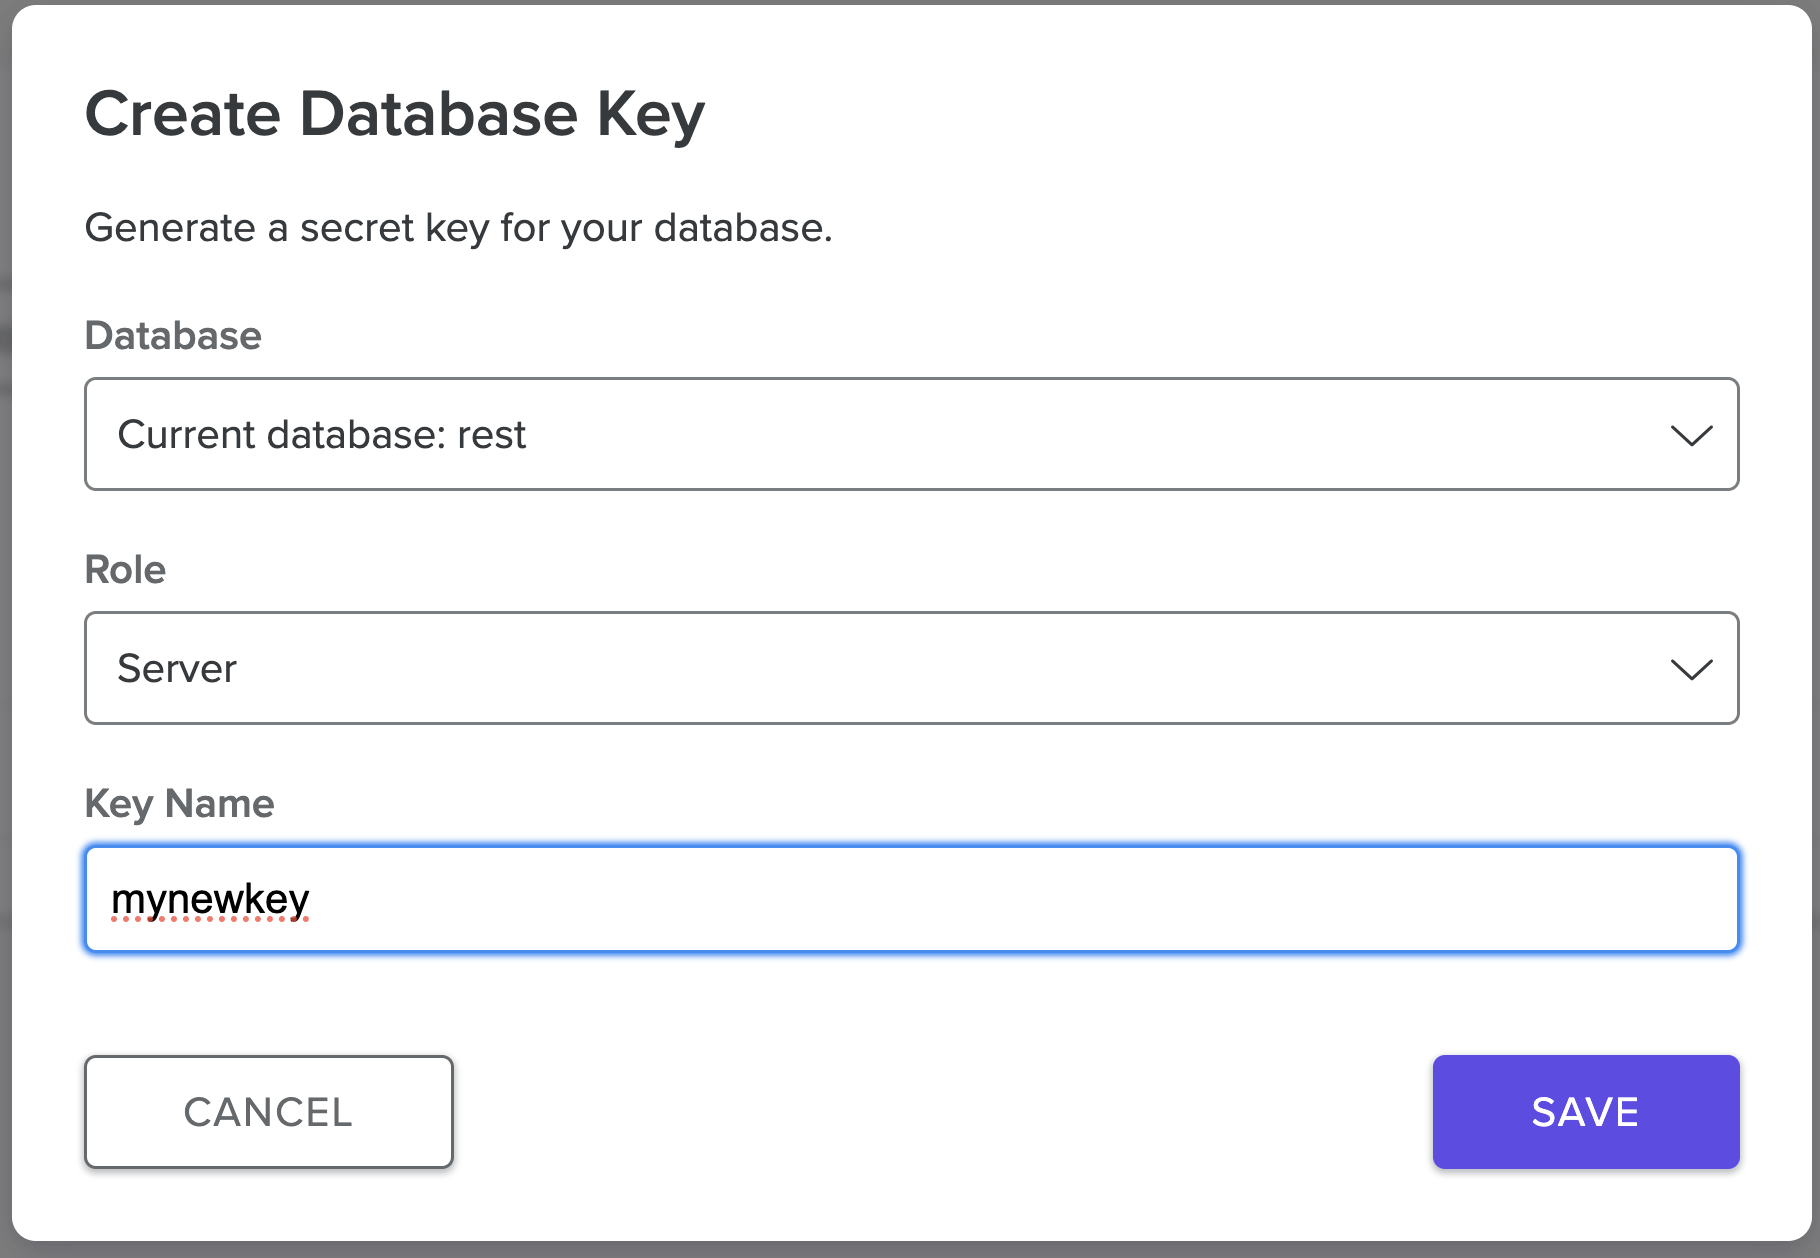
A new secret key will be generated. It is a long text string that starts with
fn. Copy this key as you will be using this in your Cloudflare Workers function to connect to your database. Configure database in Cloudflare Workers
Go back to your local terminal and run the following command to add the Fauna
npm package to your project.$ npm i fauna --saveOpen your wrangler.toml file and add a new environment variable called
FAUNA_SECRET.# wrangler.toml
# ... rest of the file
[vars]
FAUNA_SECRET = "<Your Fauna Key Goes Here>"Writing the code for REST endpoints
Open the
src/worker.ts file. We are going to add all the REST API endpoints in this file. You can explore this file's complete code in GitHub.Now, let's go though this function code. This is the skeleton for the REST API:
import { Client, fql} from "fauna";
export interface Env {
  FAUNA_SECRET: string;
}
interface InventoryData {
  item: string;
  quantity: number;
  price: number;
}

export default {
  async fetch(request: Request, env: Env, ctx: ExecutionContext): Promise<Response> {
	const client = new Client({
		secret: env.FAUNA_SECRET,
	});

    switch (request.method) {
      case 'GET':
        // TODO: Implement GET all items and GET item by ID
      case 'POST':
        // TODO: Implement POST to add a new item to the inventory
      case 'PUT':
        // TODO: Implement PUT to update an existing item in the inventory
      case 'DELETE':
        // TODO: Implement DELETE to remove an item from the inventory
      default:
        return new Response('This is the default response!', { status: 404 });
    }
  },
};
In the previous code block, we import
Client and fql from the fauna library. We initialize a new Fauna client instance with the provided secret from the environment variables.This switch statement in the main function checks the HTTP method of the incoming request and decides what code to execute. Right now, each case has a
TODO comment indicating what needs to be implemented, but the actual implementation is missing.The
default case returns a 404 response, which means that if the method of the request doesn't match any of the predefined cases (GET, POST, PUT, DELETE), the function will send back a "This is the default response!" message with a 404 status code.Implementing the GET endpoint
Next, we’ll implement the
GET endpoint. We should be able to get all the items in the inventory collection and individual items by their ID. Update the code as follows:// ...rest of the file
export default {
// ...
switch (request.method) {
case 'GET':
const getUrl = new URL(request.url);
const getId = getUrl.pathname.split('/').pop();
try {
if (getId) {
const response = await client.query(fql`Inventory.byId(${getId})`);
return new Response(JSON.stringify(response));
} else {
const response = await client.query(fql`Inventory.all() {
id,
quantity
item
}`);
return new Response(JSON.stringify(response));
}
} catch (error) {
console.error(error);
return new Response('Error fetching data', { status: 500 });
}
case 'POST':
// ....
}
},
};The code in the
GET switch case block serves two primary functions within the Inventory stored in the Fauna database.Firstly, when an
id parameter is appended to the request's URL, the system retrieves a specific item from the Inventory collection. This is achieved by parsing the request.url, extracting the id value from it, then querying the Fauna database using Inventory.byId(${id}) query. The database's response, representing the item, is then relayed back to the requester in JSON format. Without an
id parameter, the code shifts its objective to fetch the entirety of the Inventory. This is executed with a straightforward database query, Inventory.all(), with the collective dataset being dispatched back as a JSON string.Implementing the POST endpoint
Add the following code block to the
POST case of the switch statement. When a request is sent to the POST endpoint, it anticipates the request body to be structured in JSON format. This data is promptly parsed and then used in an FQL query to create a document in the Fauna database:// ... rest of the code
export default {
async fetch(request: Request, env: Env, ctx: ExecutionContext): Promise<Response> {
// ....
switch (request.method) {
case 'GET':
// ...
case 'POST':
try {
const requestPostData = await request.json() as InventoryData; // Parse the incoming JSON data
const item = requestPostData.item;
const quantity = requestPostData.quantity;
const price = requestPostData.price;
const response = await client.query(fql`
Inventory.create({
item: ${item},
quantity: ${quantity},
price: ${price}
})
`
);
return new Response(`A new item has been added to the inventory: ${JSON.stringify(response)}`);
} catch (error) {
console.error(error);
return new Response('Error adding item', { status: 500 });
}
// ... rest of the code
}
},
};Implementing the PUT endpoint
Add the following code block to the
PUT case to update an item by id:// ... rest of the file
export default {
async fetch(request: Request, env: Env, ctx: ExecutionContext): Promise<Response>
// ....
switch (request.method) {
case 'GET':
// ...
case 'POST':
// ...
case 'PUT':
const putUrl = new URL(request.url);
const putId = putUrl.pathname.split('/').pop();
if (putId) {
try {
const requestPutData = await request.json() as InventoryData;
const item = requestPutData.item;
const quantity = requestPutData.quantity;
const price = requestPutData.price;
const response = await client.query(fql`
let itemToUpdate = Inventory.byId(${putId});
itemToUpdate!.update({
item: ${item},
quantity: ${quantity},
price: ${price}
})`
);
return new Response(`Updated item with ID ${putId} in the inventory: ${JSON.stringify(response)}`);
} catch (error) {
console.error(error);
return new Response(`Error updating item`, { status: 500 });
}
} else {
return new Response('Missing ID to update item', { status: 400 });
}
case 'DELETE':
// TODO: Implement DELETE to remove an item from the inventory
default:
return new Response('This is the default response!', { status: 404 });
}
},
};Upon receiving a request, the code first extracts the
id from the request's URL to determine which inventory item is being targeted for an update. If this id is present, the code proceeds to parse the request body, expecting attributes such as item, quantity, and price. These attributes are then incorporated into an FQL query, specifically aiming to identify the designated item with the extracted id and update its corresponding details in the database.Implementing the DELETE endpoint
Finally, make the following changes in the code to implement the
DELETE endpoint: // ...
export default {
async fetch(request: Request, env: Env, ctx: ExecutionContext): Promise<Response> {
switch (request.method) {
case 'GET':
// ...
case 'POST':
// ...
case 'PUT':
// ....
case 'DELETE':
const deleteUrl = new URL(request.url);
const deleteId = deleteUrl.pathname.split('/').pop();
if (deleteId) {
try {
await client.query(fql`
let toDelete = Inventory.byId(${deleteId})
toDelete!.delete()`
);
return new Response(`You have deleted the item with ID: ${deleteId} from the inventory`);
} catch (error) {
console.error(error);
return new Response(`Error deleting item`, { status: 500 });
}
} else {
return new Response('Missing ID to delete item', { status: 400 });
}
default:
return new Response('This is the default response!', { status: 404 });
}
},
};The
DELETE endpoint extracts the id of an item to be deleted from the URL and then runs the relevant FQL query to delete the item from the Fauna database.Implementing REST best practices with itty-router
itty-router is a small and powerful router for Cloudflare Workers that can help you organize your codebase by isolating specific routes into separate functions. Using itty-router can make your code more modular, easier to read, and easier to maintain.When building a production API, using a library like
itty-router to manage and better organize our code is always a good idea. So, let’s implement itty-router in our solution.
Add the itty-router package by running the following command.$ npm itty-router --saveThe following is a refactored version of your original Cloudflare Workers code using
itty-router.import { Client, fql } from "fauna";
import { Router, withParams } from 'itty-router';
export interface Env {
FAUNA_SECRET: string;
}
interface InventoryData {
item: string;
quantity: number;
price: number;
}
const router = Router();
// GET: fetch all inventories
router.get('/inventory', async (request: Request, dbClient) => {
try {
const response = await dbClient.query(fql`Inventory.all()`);
return new Response(JSON.stringify(response.data));
} catch (error) {
console.error(error);
return new Response('Error fetching data', { status: 500 });
}
});
// GET: fetch a single inventory item by ID
router.get('/inventory/:id', withParams as any, async (request, dbClient) => {
const { id } = request.params;
try {
if (id) {
const response = await dbClient.query(fql`Inventory.byId(${id})`);
return new Response(JSON.stringify(response));
}
return new Response('Missing ID to fetch item', { status: 400 });
} catch (error) {
console.error(error);
return new Response('Error fetching data', { status: 500 });
}
});
// POST: Create a new inventory item
router.post('/inventory', async (request: Request, dbClient) => {
try {
const requestData = await request.json() as any;
const response = await dbClient.query(fql`Inventory.create(${requestData})`);
return new Response(`A new item has been added to the inventory: ${JSON.stringify(response)}`);
} catch (error) {
console.error(error);
return new Response('Error adding item', { status: 500 });
}
});
// PUT: Update an existing inventory item by ID
router.put('/inventory/:id', withParams as any, async (request, dbClient) => {
const { id } = request.params;
if (!id) return new Response('Missing ID to update item', { status: 403 });
try {
const requestData = await request.json() as any;
const response = await dbClient.query(fql`
let item = Inventory.byId(${id})
item!.update(${requestData})
`);
return new Response(`Updated item with ID ${id} in the inventory: ${JSON.stringify(response)}`);
} catch (error) {
console.error(error);
return new Response('Error updating item', { status: 500 });
}
});
// DELETE: Delete an inventory item by ID
router.delete('/inventory/:id', withParams as any, async (request, dbClient) => {
const { id: deleteId } = request.params;
if (!deleteId) return new Response('Missing ID to delete item', { status: 400 });
try {
await dbClient.query(fql`
let item = Inventory.byId(${deleteId})
item!.delete()
`);
return new Response(`You have deleted the item with ID: ${deleteId} from the inventory`);
} catch (error) {
console.error(error);
return new Response('Error deleting item', { status: 500 });
}
});
export default {
async fetch(request: Request, env: Env, ctx: ExecutionContext): Promise<Response> {
const dbClient = new Client({
secret: env.FAUNA_SECRET,
});
return router.handle(request, dbClient);
}
};You can find the complete code in GitHub.
Note that after making this change you have to make the API request with
/inventory path, so the POST request will look like this:curl --location 'http://127.0.0.1:8787/inventory' \
--header 'Content-Type: application/json' \
--data '{
"item": "Phone",
"quantity" : 20,
"price" : 568.99
}'Your code is now complete. Experiment with different requests and inspect the database on the dashboard to verify your documents got inserted or updated as you intended.
Conclusion
In this tutorial, you learned how to use Fauna with Cloudflare Workers to create a globally distributed, strongly consistent, next-generation serverless REST API that can serve data quickly and accurately to a worldwide audience.
We have also built a Fauna Cloudflare workshop to help you in your journey to build production-ready applications. For more learning resources check out the Fauna Workshops page.
The Fauna service will be ending on May 30, 2025. For more information, read the announcement and the FAQ.
Subscribe to Fauna's newsletter
Get latest blog posts, development tips & tricks, and latest learning material delivered right to your inbox.