Community Contribution
Using Fauna's streaming feature to build a chat with Svelte
⚠️ Disclaimer ⚠️
This post refers to a previous version of FQL.
This post refers to a previous version of FQL (v4). For the most current version of the language, visit our FQL documentation.
Today we're going to take a look into Fauna's new streaming feature by building a small chat using Svelte.
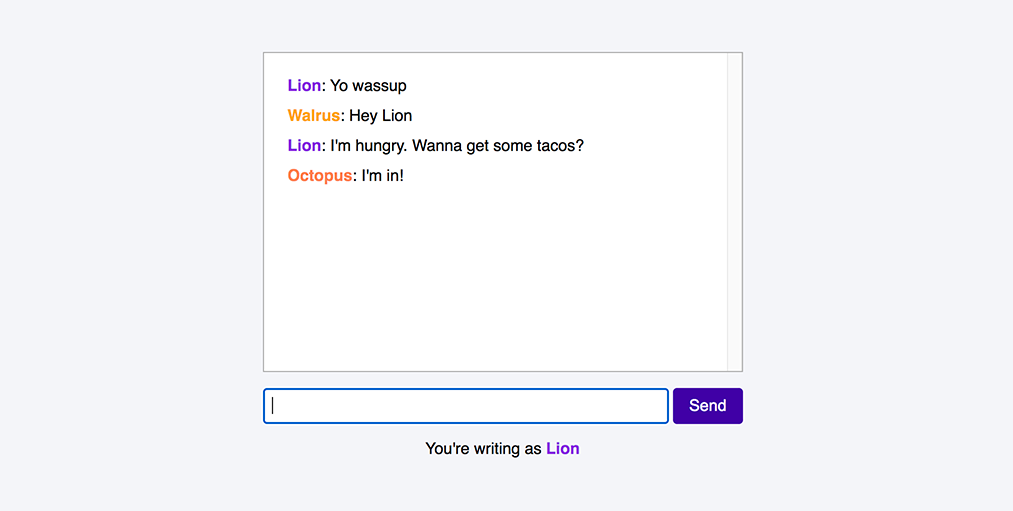
Streaming allows our applications to subscribe to changes in Fauna. At this time we can only subscribe to documents, but subscription to collections and indexes are planned for the future.
Note that streaming in Fauna is still in alpha stage. Bugs and changes in the API should be expected before the final release.
The finished project is on this Github repository which you can use to follow along.
One last thing. If you've never used Fauna or FQL before, it would be a good idea to at least take a quick look at this introductory article.
In this article:
- Setting up Fauna
- Configuring Rollup
- Fauna logic
- Application state
- The Svelte user interface
Setting up Fauna
First, we're going to configure everything we need in Fauna.
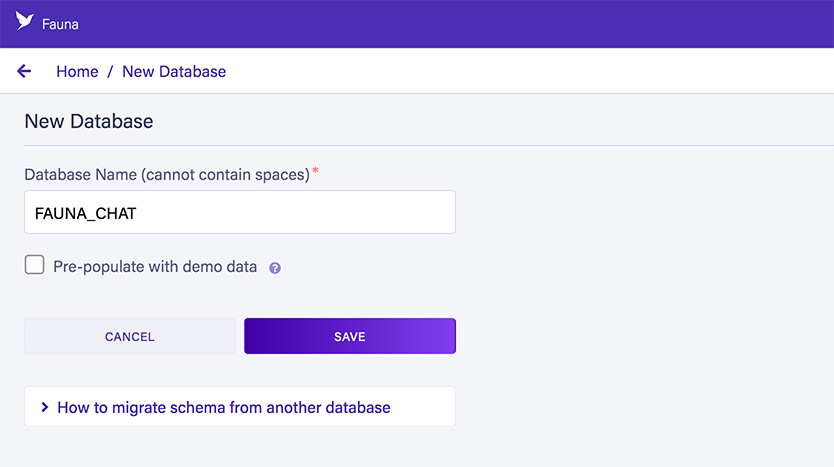
If you haven't already done so, create a free Fauna user and login to the dashboard. Then create a new database with any name you prefer:
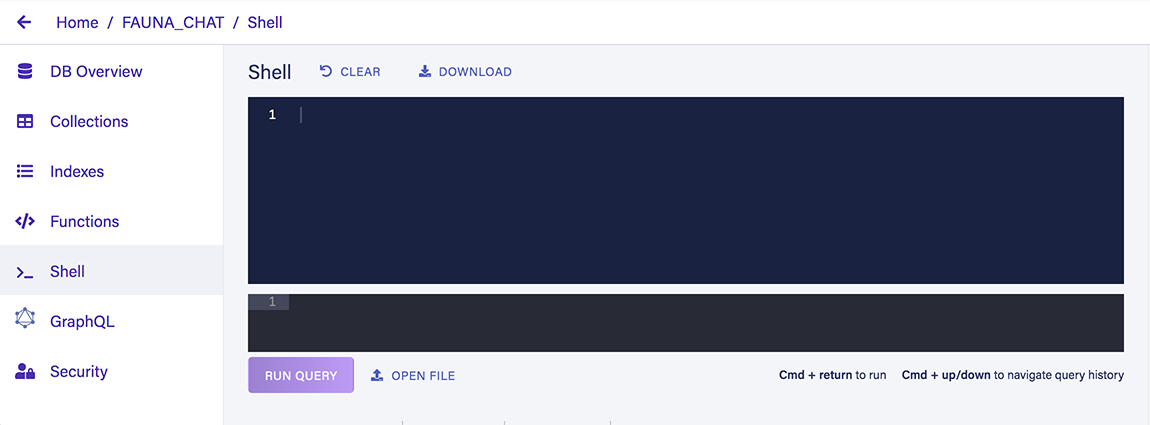
We're now ready to start writing FQL queries in the dashboard's shell:
Our data model is very simple:

In terms of streaming, our chat application(s) will subscribe to the document of the chat room. We'll notify our users they have new messages by simply updating the ts (timestamp) of that document.
First, let's create our collections:
CreateCollection({
  name: "ChatRooms"
})
CreateCollection({
name: "ChatMessages"
})Let's also create a single chat room document. We're giving it an id of 1 so that we can reference it easily later on:
Create(
  Ref(Collection("ChatRooms"), "1"),
  {
    data: {
      name: "Fauna chat"
    }
  }
)

{
  ref: Ref(Collection("ChatRooms"), "1"),
  ts: 1608136745905000,
  data: {
    name: "Fauna chat"
  }
}
We're also going to need an index to retrieve messages:
CreateIndex({
  name: "ChatMessages_by_chatRoomRef",
  source: Collection("ChatMessages"),
  values: [
    { field: ["ts"] },
    { field: ["data", "authorName"] },
    { field: ["data", "authorColor"] },
    { field: ["data", "message"] },
    { field: ["ref"] }
  ],
  terms: [{ field: ["data", "chatRoomRef"] }]
})
As you can see in the terms settings, this index accepts a reference to be able to get messages from a single chat room.
This index also has a values setting that will return indexed data of the documents in the ChatMessages collection. By default, when no values are configured, indexes do not return documents but document references. This requires an extra read operation for each document we want to read.
Obviously, our chat application is going to be super popular and have millions of users. By having our index return some values instead of document references, we're reducing the number of read operations on the documents themselves. The drawback is that now each message will occupy more storage space, the document itself plus the indexed data.
To test our index let's create a new message:
Create(
  Collection("ChatMessages"),
  {
    data: {
      authorName: "Pier",
      authorColor: "tomato",
      message: "Hello there",
      chatRoomRef: Ref(Collection("ChatRooms"), "1")
    }
  }
)
As expected, if we query our index we will be getting the values from this document back:
Paginate(
  Match(
    Index("ChatMessages_by_chatRoomRef"),
    Ref(Collection("ChatRooms"), "1")
  )
)

{
  data: [
    [
      1608141339175000,
      "Pier",
      "tomato",
      "Hello there",
      Ref(Collection("ChatMessages"), "285089452953436680")
    ]
  ]
}
Authorization rules
For simplicity's sake, we're not going to implement user authentication in this demo. Instead, we're going to create a custom role with limited privileges that our application will use.
Go to the security tab of the dashboard and create a new role with the name of FrontEnd. Add the two collections and the index we've created with these privileges:
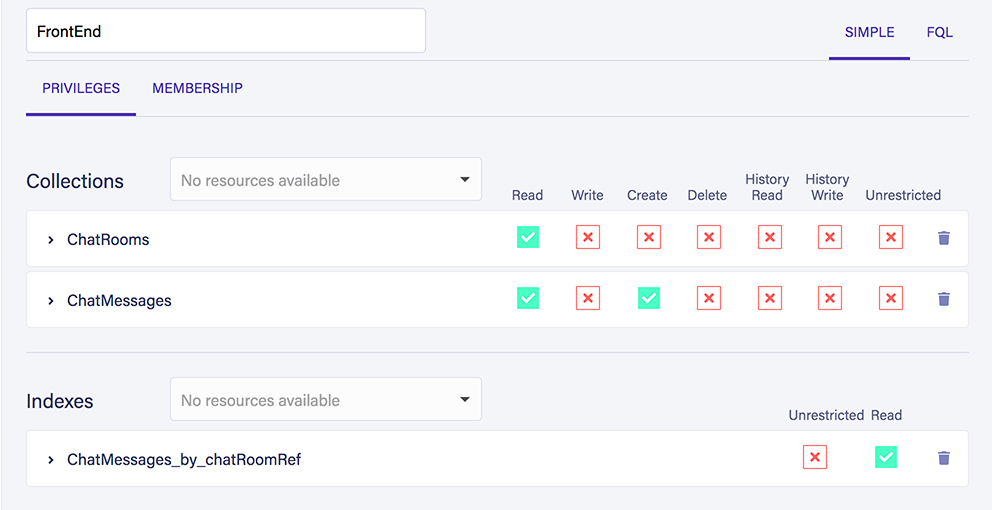
In plain English, our application won't be able to create new chat rooms but will be able to read existing ones. It will also be able to create and read chat messages. Finally, it will be able to read the results from our index.
We don't need to configure the membership settings for this role because we won't use authentication of users in our application. Instead, this role will be used by an application key. Check this article for more information on authentication and authorization with Fauna.
You can save your role now and go back to the security tab to create a new key using the FrontEnd role:
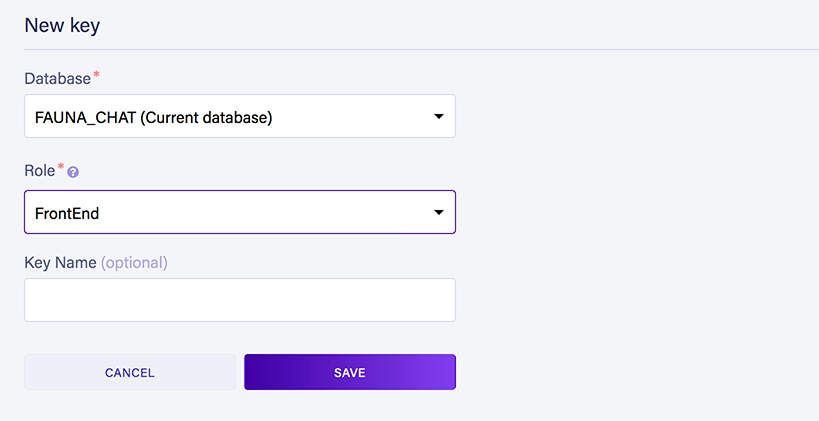
After creating the key, Fauna will show us the secret that we'll need later on to be able to execute queries from our application:
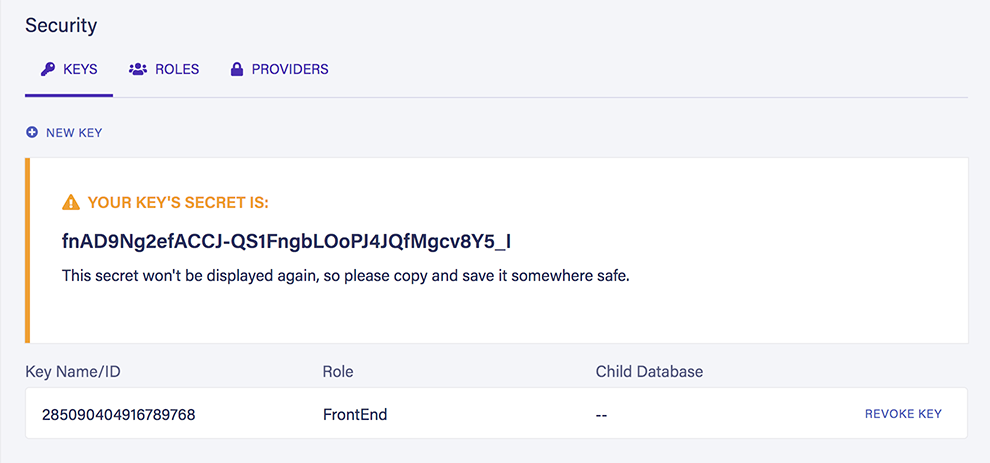
Save it somewhere safe. If you lose it you will need to create a new key to obtain its secret.
Configuring Rollup
Again, here's the repository with the final project so you can check the final folder structure.
As with any modern front end project, we're going to need NodeJS and NPM. If you don't have them installed, I recommend downloading the LTS version from the NodeJS official page.
Create a folder and open it with your terminal. Then init NPM with:
npm init -yThis will create a package.json file in your project folder.
We're going to use Rollup as our JavaScript bundler. You could also use Webpack if you prefer. It should be straightforward to configure following the official Webpack template for Svelte.
Configuring bundlers is a deep topic in itself. For this article I won't go into every detail, but I've explained the broad strokes in this section.
Let's now install Rollup and Sirv, a static file web server which we'll use to run our application locally during development:
npm i rollup sirv-cli --save-devThen install these Rollup plugins:
npm i rollup-plugin-terser rollup-plugin-svelte rollup-plugin-node-polyfills rollup-plugin-livereload rollup-plugin-css-only @rollup/plugin-node-resolve @rollup/plugin-commonjs @rollup/plugin-replace --save-devMost of these plugins come from the official Rollup template for Svelte. I've added two plugins that we're going to need later on:
- @rollup/plugin-replace will allow us to inject environment variables (such as our Fauna secret) into our front end app at compile-time.
- rollup-plugin-node-polyfills will insert polyfills for any needed NodeJS libraries. This is necessary to use the Fauna JavaScript driver in the browser.
If you're using Webpack, you can inject environment variables using DefinePlugin. Webpack v4 will include NodeJS polyfills by default, but with v5 you will need to configure that yourself.
We're now ready to create the rollup.config.js file at the root of our project. Copy the contents or download this file from the Github repository which, for the most part, follows the official template.
Be sure to replace the Fauna secret with your own in the configuration of the Replace plugin:
replace({
  FAUNA_SECRET: '"fnAD9Ng2efACCJ-QS1FngbLOoPJ4JQfMgcv8Y5_I"'
})
I committed that secret to the repository to serve as an example. In a real world scenario you should never commit a secret to a Git repository. It would be a great idea to put the secret in a .env file like we saw in a previous article.
As you can see from the config file, whenever Rollup bundles our code, it will create the resulting files in the public/bundle folder:
output: {
  sourcemap: true,
  format: 'iife',
  name: 'app',
  file: 'public/build/bundle.js'
}
Because we're using the rollup-plugin-svelte (which uses the Svelte compiler) Rollup will also output a bundle.css file with the CSS found in the Svelte components.
Now we need the public/index.html file with this content:
<!doctype html>
<html>
<head>
    <meta charset='utf8'>
    <meta name='viewport' content='width=device-width'>
    <title>Fauna chat</title>
  <link rel='stylesheet' href='global.css'>
    <link rel='stylesheet' href='build/bundle.css'>
</head>
<body>
<script src='build/bundle.js'></script>
</body>
</html>
And also a public/global.css file with any global CSS you might want. You can check the global CSS I used in the repository.
Finally, add these commands in the scripts section of the package.json file:
"scripts": {
  "build": "rollup -c",
  "dev": "rollup -c -w",
  "start": "sirv public"
}
This is what these commands do:
- rollup -c executes Rollup with the default config file (rollup.config.js). We'll use this to build our project in production mode.
- rollup -c -w adds the watch option which will rebuild our project in development mode automatically whenever we make changes.
- sirv public starts Sirv in our /public folder. Rollup will trigger this command automatically whenever it rebuilds our project during development.
With our project in place we can now start working on our front end code.
Remember to use the dev command which will fire up Rollup and Sirv for development:
npm run devThen open your browser at this URL:
http://localhost:5000
Fauna logic
Let's install our dependencies to be able to communicate with Fauna:
npm i faunadb mini-signalsmini-signals is a signals library in JavaScript. Signals are an implementation of the observer pattern and are very common in event-driven programming.
Create the src/fauna/index.js file in your project folder with this code:
import faunadb from 'faunadb';
import FaunaStream from "./FaunaStream.js";

// We do this so that our FQL code is cleaner
const {Paginate, Match, Range, Index, Create, Collection, Ref, Do, Update, ToMicros, Now, TimeSubtract} = faunadb.query;

const client = new faunadb.Client({
  secret: FAUNA_SECRET
});

const chatRoomRef = Ref(Collection('ChatRooms'), '1');

export const chatRoomStream = new FaunaStream(client, chatRoomRef);

export async function getLatestMessages (afterTs) {
  const result = await client.query(
    Paginate(
      Range(
        Match(
          Index("ChatMessages_by_chatRoomRef"),
          Ref(Collection("ChatRooms"), "1")
        ),
        afterTs ? afterTs : ToMicros(TimeSubtract(Now(), 3, 'hour')),
        []
      ),
      {
        size: 10000
      }
    )
  )

  return result.data;
}

export async function createMessage (authorName, authorColor, message) {
  const result = await client.query(
    Do(
      Update(
        chatRoomRef,
        {
          data: {
            lastUpdate: Now()
          }
        }
      ),
      Create(
        Collection('ChatMessages'),
        {
          data: {
            authorName,
            authorColor,
            message,
            chatRoomRef
          }
        }
      )
    )
  )

  return result;
}
Note that for simplicity's sake we will not be handling Fauna errors in this demo. You can check my previous article about using Fauna with NodeJS to see one possible approach.
Let's examine the relevant bits of this file step by step.
Initializing the client
We're only going to use a single secret (coming from our application key) so we can instantiate the Fauna client once and reuse it for all our queries:
const client = new faunadb.Client({
  secret: FAUNA_SECRET
});
As mentioned before, Rollup will replace the FAUNA_SECRET variable at compile-time with the configured secret.
Writing modular FQL
This variable contains a reference to our chat room document:
const chatRoomRef = Ref(Collection('ChatRooms'), '1');I admit it's not a very impressive example, but it showcases the modularity of using FQL in JavaScript.
Here's a better example:
function callMyIndex (param1, param2, param3) {
  return Match(
    Index('MyIndex'),
    [param1, param2, param3]
  );
}
By itself this function doesn't do much, other than returning a small FQL statement, but we can now use its return value into other FQL statements:
const result = await client.query(
  Paginate(
    callMyIndex('foo', 'bar', 'baz')
  )
);
This modular approach allows us to encapsulate and reuse our FQL statements, and also make them dynamic, validate input, write tests, etc. It's brilliant.
Getting the latest messages
To get the latest messages we'll be using this function. It has a single parameter afterTs to be able to get the messages after a certain point in time:
export async function getLatestMessages (afterTs) {
  const result = await client.query(
    Paginate(
      Range(
        Match(
          Index("ChatMessages_by_chatRoomRef"),
          Ref(Collection("ChatRooms"), "1")
        ),
        afterTs ? afterTs : ToMicros(TimeSubtract(Now(), 1, 'hour')),
        []
      ),
      {
        size: 10000
      }
    )
  )

  return result.data;
}
In terms of FQL, we're using the ChatMessages_by_chatRoomRef index we created earlier to get up to 10,000 messages in a single page. Do note the use of the chatRoomRef variable (which is actually a Ref() to a document) as the index term.
We're also doing a range query using Range() to only get messages after a certain point in time. This can either be the value of the afterTs function parameter or, if it is undefined, the time in microseconds one hour before executing the query:
ToMicros(TimeSubtract(Now(), 1, 'hour'))TimeSubtract() returns a Time() value, but we're using ToMicros() to actually get an integer of microseconds so that Range() can compare with the ts values.
To dig deeper into filtering with Fauna, check this article where we explored range queries and complex conditional statements with FQL.
Creating new messages
To create new message documents we'll use this function:
export async function createMessage (authorName, authorColor, message) {
  const result = await client.query(
    Do(
      // First update the chat room document
      Update(
        chatRoomRef,
        {}
      ),
      // Then create a new message document
      Create(
        Collection('ChatMessages'),
        {
          data: {
            authorName,
            authorColor,
            message,
            chatRoomRef
          }
        }
      )
    )
  )

  return result;
}
We're combining two FQL statements with the Do() function. Because Fauna is completely ACID, should any of these two statements fail, all changes will be reverted back and an error will be returned.
Our first statement triggers an empty update to the document of our chat room. Anyone subscribed to this document will now be notified that it has changed, even though only its ts (timestamp) has been updated.
The second statement creates a new document in the ChatMessages collection with the provided data.
Subscribing to a document
Let's now focus on the document streaming functionality of Fauna.
You may have noticed that in the src/fauna/index.js file there is an an instance of the FaunaStream class:
export const chatRoomStream = new FaunaStream(client, chatRoomRef);This is a small class I created to simplify working with streams in Fauna.
Create the src/fauna/FaunaStream.js file with this code:
import Signal from 'mini-signals';

export default class FaunaStream {
  constructor (client, documentRef) {
    this.documentRef = documentRef;
    this.client = client;
    this.onUpdate = new Signal();
    this.initStream();
  }

  initStream () {
    this.stream = this.client.stream.document(this.documentRef);

    this.stream.on('snapshot', (data, event) => {
      this.onUpdate.dispatch(data);
    });

    this.stream.on('version', (data, event) => {
      this.onUpdate.dispatch(data.document);
    });

    this.stream.on('error', (data, event) => {
      this.stream.close();
      setTimeout(() => {
        this.initStream();
      }, 250);
    });

    this.stream.start();
  }

  destroy () {
    this.stream.close();
    this.onUpdate.detachAll();
  }
}
The constructor accepts an instance of the Fauna client, and a reference to a document for the subscription.
To subscribe to a document we first need to create a subscription using the client.stream.document() method. We're doing that in the initStream method of our class:
this.stream = this.client.stream.document(this.documentRef);Then we can add handlers to a number of events. For this demo we're only interested in these three events:
- snapshot which will return the full document whenever the stream starts.
- version which will return the updated document whenever there is change.
- error which will be triggered if anything goes wrong. If an error happens, it's necessary to close the stream and create a new one after waiting a bit.
The idea is that whenever we receive a document in the stream, either from a snapshot or version event, we simply dispatch an update to the rest of our application using our signal.
I've also added a destroy() method, which we're not using in this demo, but serves as an example on how to prevent memory leaks.
Here's an article with more information on Fauna streams, including a complete list of events you could use.
Application state
All the logic to communicate with Fauna is in place. We now need to work on the logic that will manage the state of our small application.
Svelte provides a number of reactive primitives we can use. Components can subscribe automatically to these reactive primitives and update the DOM when the data changes.
Because Svelte is actually a compiler and not a runtime, like say Vue or React, the dependencies between data and components are analyzed at compile time, resulting in very small and efficient applications.
Here's the code for the src/store/index.js file:
import {writable} from 'svelte/store';
import {chatRoomStream, getLatestMessages} from '../fauna/index.js';

const names = ['Cat', 'Lion', 'Dog', 'Lemur', 'Squirrel', 'Walrus', 'Octopus', 'Shark', 'Elephant'];
const colors = ['blue', 'orange', 'green', 'blueviolet', 'coral'];

export const messages = writable([]);
export const authorName = names[Math.floor(Math.random() * names.length)];
export const authorColor = colors[Math.floor(Math.random() * colors.length)];

let lastUpdateTs;

async function updateMessages () {
  const faunaResults = await getLatestMessages(lastUpdateTs);

  const latestMessages = faunaResults.map(item => ({
    ts: item[0],
    authorName: item[1],
    authorColor: item[2],
    message: item[3],
    id: item[4].value.id,
  }));

  if (latestMessages.length) {
    messages.update(array => [...array, ...latestMessages]);
    lastUpdateTs = latestMessages[latestMessages.length - 1].ts + 1;
  }
}

chatRoomStream.onUpdate.add(updateMessages);
Our store is exporting three pieces of data to our application
- messages which is a reactive writable.
- authorName which is decided randomly when the application starts from a list of animal names (it's a Fauna chat after all!).
- authorColor which is also decided randomly when the application starts from a list of CSS color names.
We're also importing the instance of our FaunaStream class and subscribing to the onUpdate signal using:
chatRoomStream.onUpdate.add(updateMessages);In other words, whenever there is an update to the chat room document, the signal will execute our updateMessages function. This function, in turn, will fetch the latest messages from Fauna and update the messages reactive variable.
Whenever new messages are received, the timestamp (in microseconds) of the last message is stored into the lastUpdateTs variable:
lastUpdateTs = latestMessages[latestMessages.length - 1].ts + 1;We're adding one microsecond to this value so that whenever we query Fauna we don't get the last message back:
const faunaResults = await getLatestMessages(lastUpdateTs);Whenever a new user starts our chat, lastUpdateTs will be undefined, so instead it will receive the messages from the previous hour.
The Svelte user interface
Our user interface has two components:
- src/components/App.svelte which serves as an application shell and displays the list of messages.
- src/components/ChatForm.svelte the form where users submit messages to the chat.
App component
<script>
  import {afterUpdate} from 'svelte';
  import {messages, authorName, authorColor} from '../store/index.js';
  import ChatForm from "./ChatForm.svelte";

  let messagesDiv;

  afterUpdate(async () => {
    messagesDiv.scrollTop = messagesDiv.scrollHeight;
  });
</script>

<div id="App">
  <div class="messages" bind:this={messagesDiv}>
    {#each $messages as message}
      <div class="message">
        <strong style="color:{message.authorColor};">
          {message.authorName}
        </strong>: {message.message}
      </div>
    {/each}
  </div>
  <ChatForm/>
</div>
<div>
  You're writing as <strong style="color:{authorColor};">{authorName}</strong>
</div>

<style>
  #App {
    width: 30rem;
    margin-bottom: 1rem;
  }

  .messages {
    height: 20rem;
    overflow: hidden;
    padding: 1.5rem;
    overflow-y: scroll;
    box-sizing: border-box;
    background-color: white;
    margin-bottom: 1rem;
    border: 1px solid #aaa;
  }

  .message {
    margin-bottom: .75rem;
  }
</style>
This component is quite straightforward as it only displays the list of messages.
Remember that messages (defined in our store) is actually reactive. Because we're using the dollar sign in front of its name ($messages), Svelte will automatically subscribe to its changes and update the DOM accordingly. It will also unsubscribe from it when the component is destroyed.
We're also using the afterUpdate hook so that, whenever this component is updated, the <div> containing the messages is scrolled to the end:
afterUpdate(async () => {
  messagesDiv.scrollTop = messagesDiv.scrollHeight;
});
Instead of using this component hook, we could have also manually added a callback to our reactive value like this:
const unsubscribe = messages.subscribe(() => {
  messagesDiv.scrollTop = messagesDiv.scrollHeight;
});

onDestroy(() => {
  unsubscribe();
});
ChatForm component
Our ChatForm component is even simpler:
<script>
  import {createMessage} from '../fauna/index.js';
  import {authorName, authorColor} from "../store/index.js";

  let message;

  function onSubmit () {
    createMessage(authorName, authorColor, message);
    message = '';
  }
</script>

<form on:submit|preventDefault={onSubmit}>
  <input type="text" bind:value={message} required>
  <button type="submit">Send</button>
</form>

<style>
  form {
    display: flex;
  }

  input {
    width: 100%;
    margin-right: .25rem;
  }
</style>
It's essentially a <form> that triggers our createMessage function whenever it is submitted.
An interesting point to mention, is that component state in Svelte is always reactive. Whenever you use the assign operator (the equal sign) with one of the component variables, Svelte will update the relevant parts of the UI automatically.
For example, when we empty the message variable:
message = '';Svelte will automatically empty our input field because we have bound its value with the message variable:
<input type="text" bind:value={message} required>Remember, Svelte is a compiler. Before generating the final code of our app, it already knows which parts of the UI depend on which reactive variables. The compiler only needs to generate very simple and efficient JavaScript code to update the DOM in response to state changes.
Conclusion
If you've made it this far, good job!
Here are some articles you could check to keep on learning about Fauna:
Getting started with FQL
- Part 1: Fundamental Fauna concepts
- Part 2: Deep dive into indexes
- Part 3: Modeling data with Fauna
- Part 4: Running custom functions in Fauna
- Part 5: Authentication and authorization in Fauna
Core FQL concepts
- Part 1: Working with dates and times
- Part 2: Temporality in Fauna
- Part 3: Data aggregation
- Part 4: Range queries and advanced filtering
- Part 5: Joins
Thanks for reading and, as always, if you have any questions don't hesitate to hit me up on Twitter: @pierb
The Fauna service will be ending on May 30, 2025. For more information, read the announcement and the FAQ.
Subscribe to Fauna's newsletter
Get latest blog posts, development tips & tricks, and latest learning material delivered right to your inbox.