
Authenticating users with AWS Cognito in Fauna
⚠️ Disclaimer ⚠️
This post refers to a previous version of FQL.
This post refers to a previous version of FQL (v4). For the most current version of the language, visit our FQL documentation.
One of the main components of any modern application is user authentication. AWS Cognito is a popular auth provider from Amazon Web Services. It lets you add user sign-up, sign-in, and access control to your web and mobile apps. In this article, you learn how to use AWS Cognito to authenticate to Fauna, the data API for modern applications.
Get the complete code for this article in the following link
✔️ Pre-requisites
This article assumes that you have some basic understanding of AWS Cognito and Fauna Authentication. If either of these concepts is completely new to you, review the following tutorials before proceeding.Using Amazon Cognito Identity to authenticate usersUser Management with AWS CognitoFauna | User authentication
AWS Cognito and Fauna authentication architecture
AWS Cognito is a closed system that does not allow a JWT (JSON Web Token) handshake with external systems like Fauna. This prevents you from adding Cognito as an external provider in Fauna directly. However, Cognito follows an event-driven architecture pattern, providing you with specific triggers that you can execute in certain stages of authentication. You can use the Pre Token Generation trigger to wire up Cognito with Fauna’s native authentication.
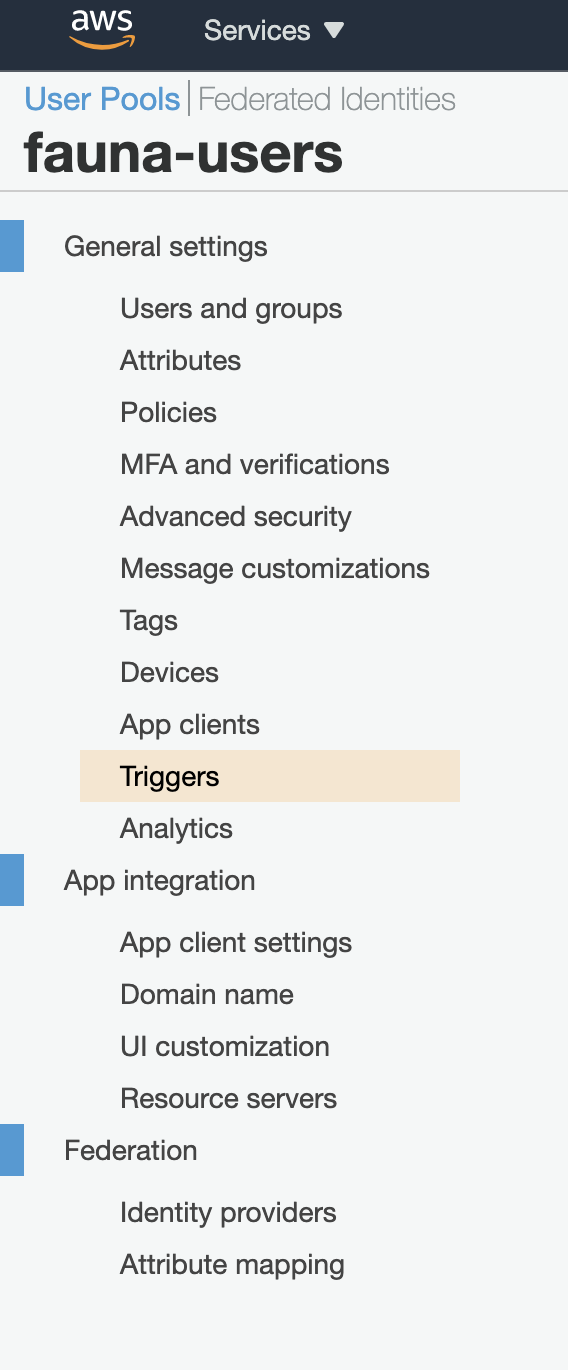
ℹ️ Review all the available triggers by logging into your AWS console and navigating to Cognito > User Pools > Name of your User pool > Triggers.
Authentication flow
Review the following diagram of the overall authentication flow that demonstrates how a user authenticates with AWS Cognito and receives an auth token from Fauna.
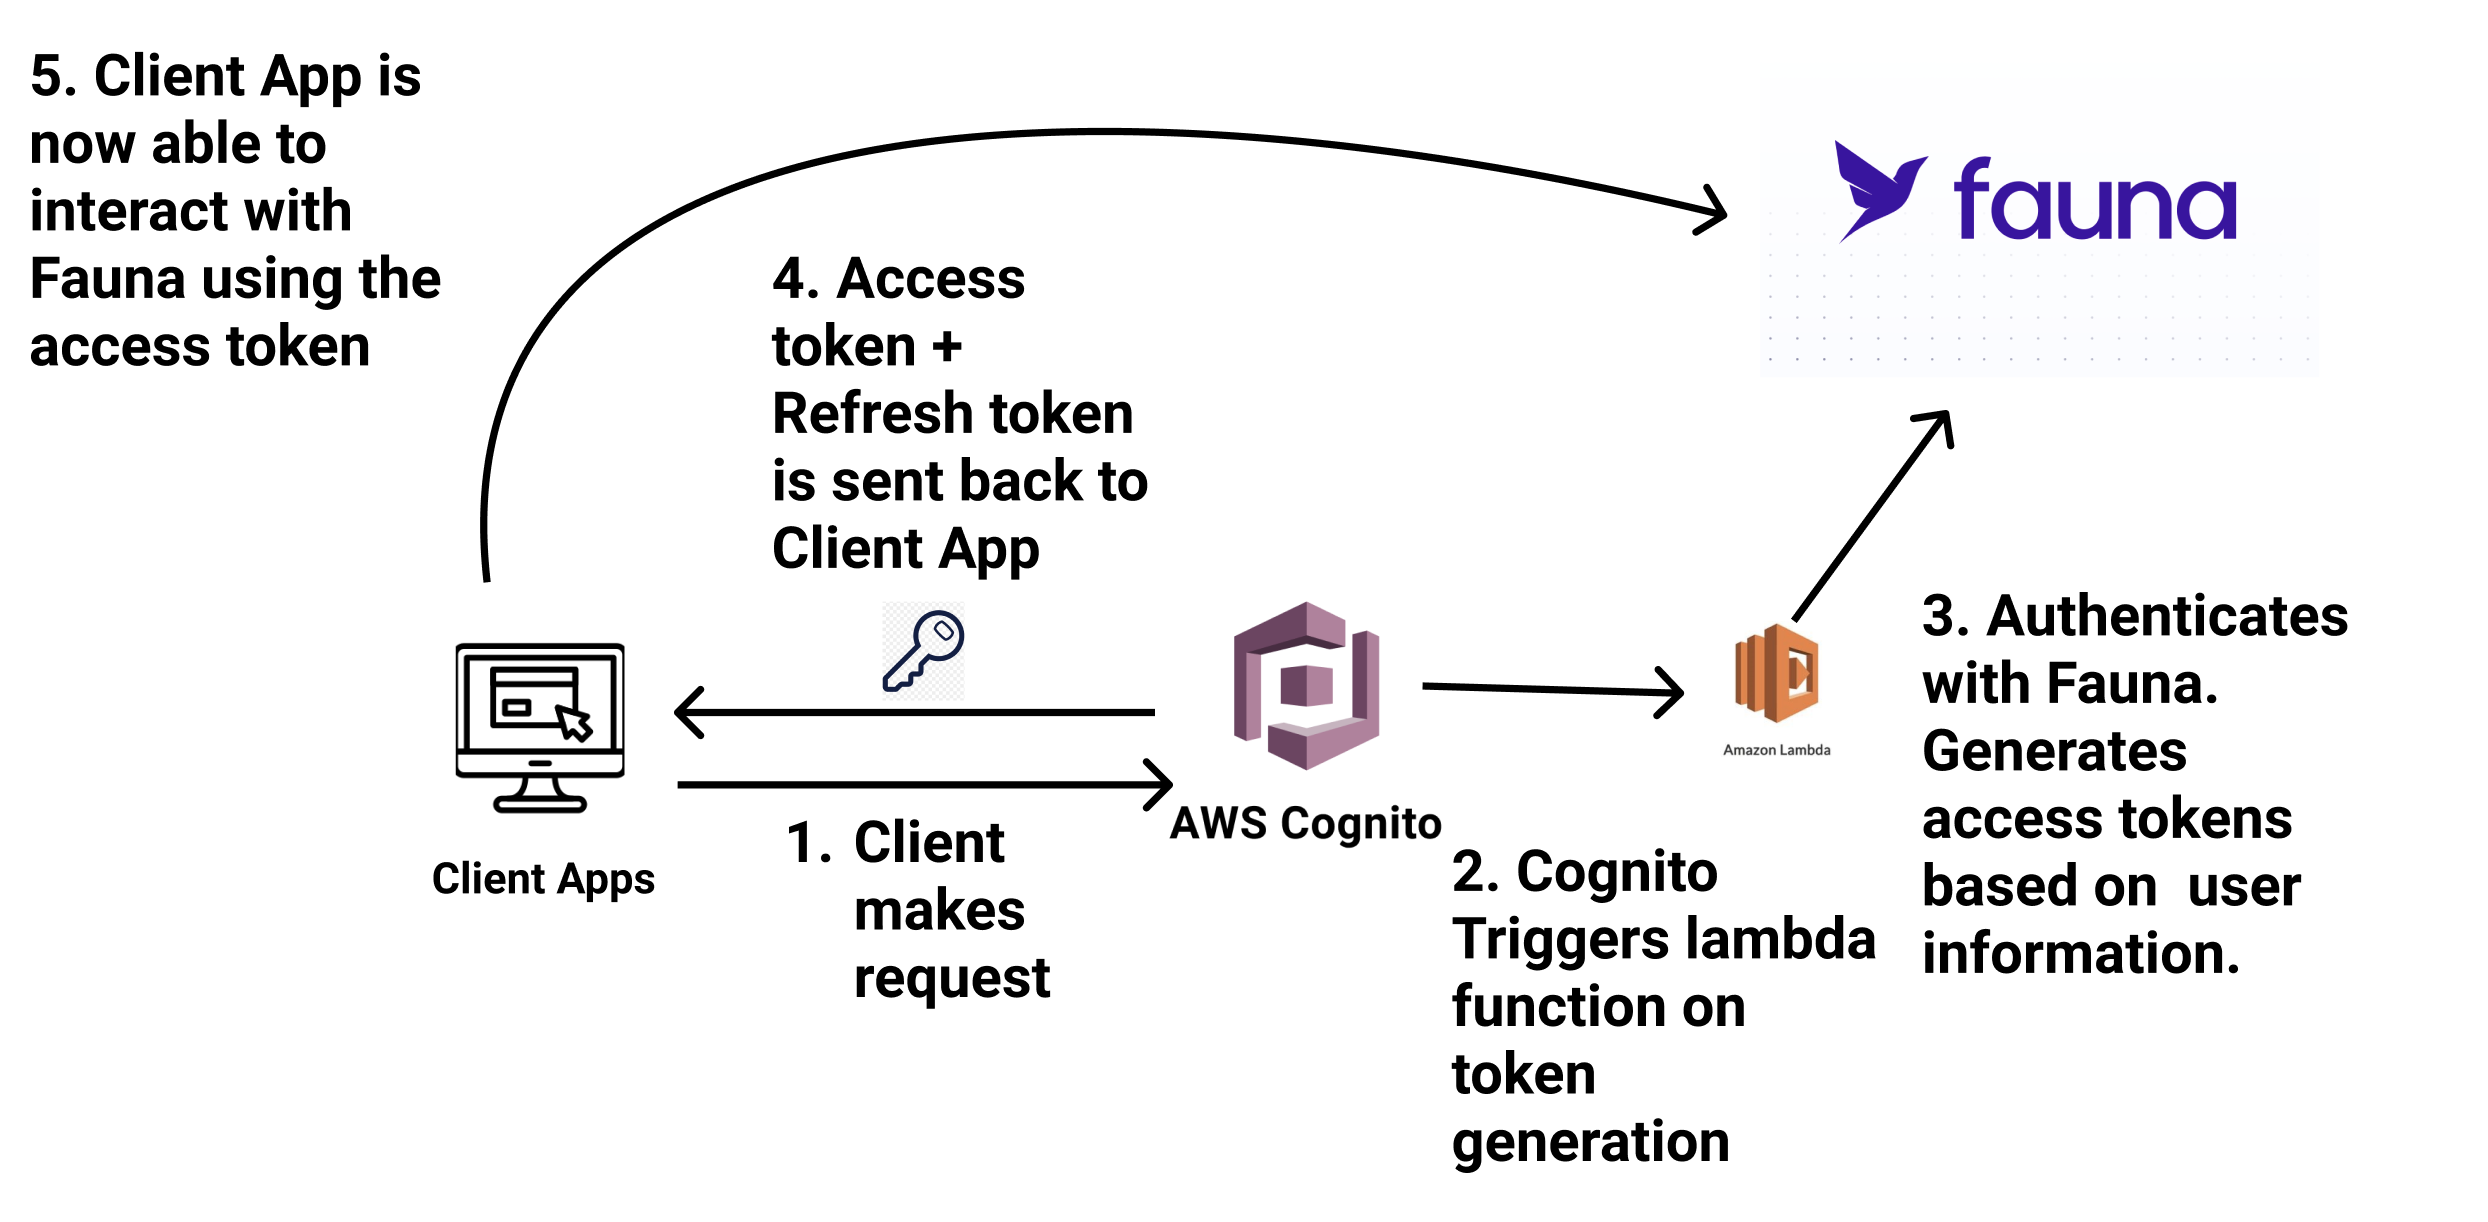
The authentication events happen in the following order.
- The client application (React app) sends a request to Cognito.
- Cognito invokes an AWS Lambda function in the token generation phase.
- The Lambda function generates a user-based access_token and refresh_token for Fauna. These tokens auto-expire after a specified time.
- Cognito returns all the tokens to the client application.
- The client application uses the tokens to communicate with Fauna database.
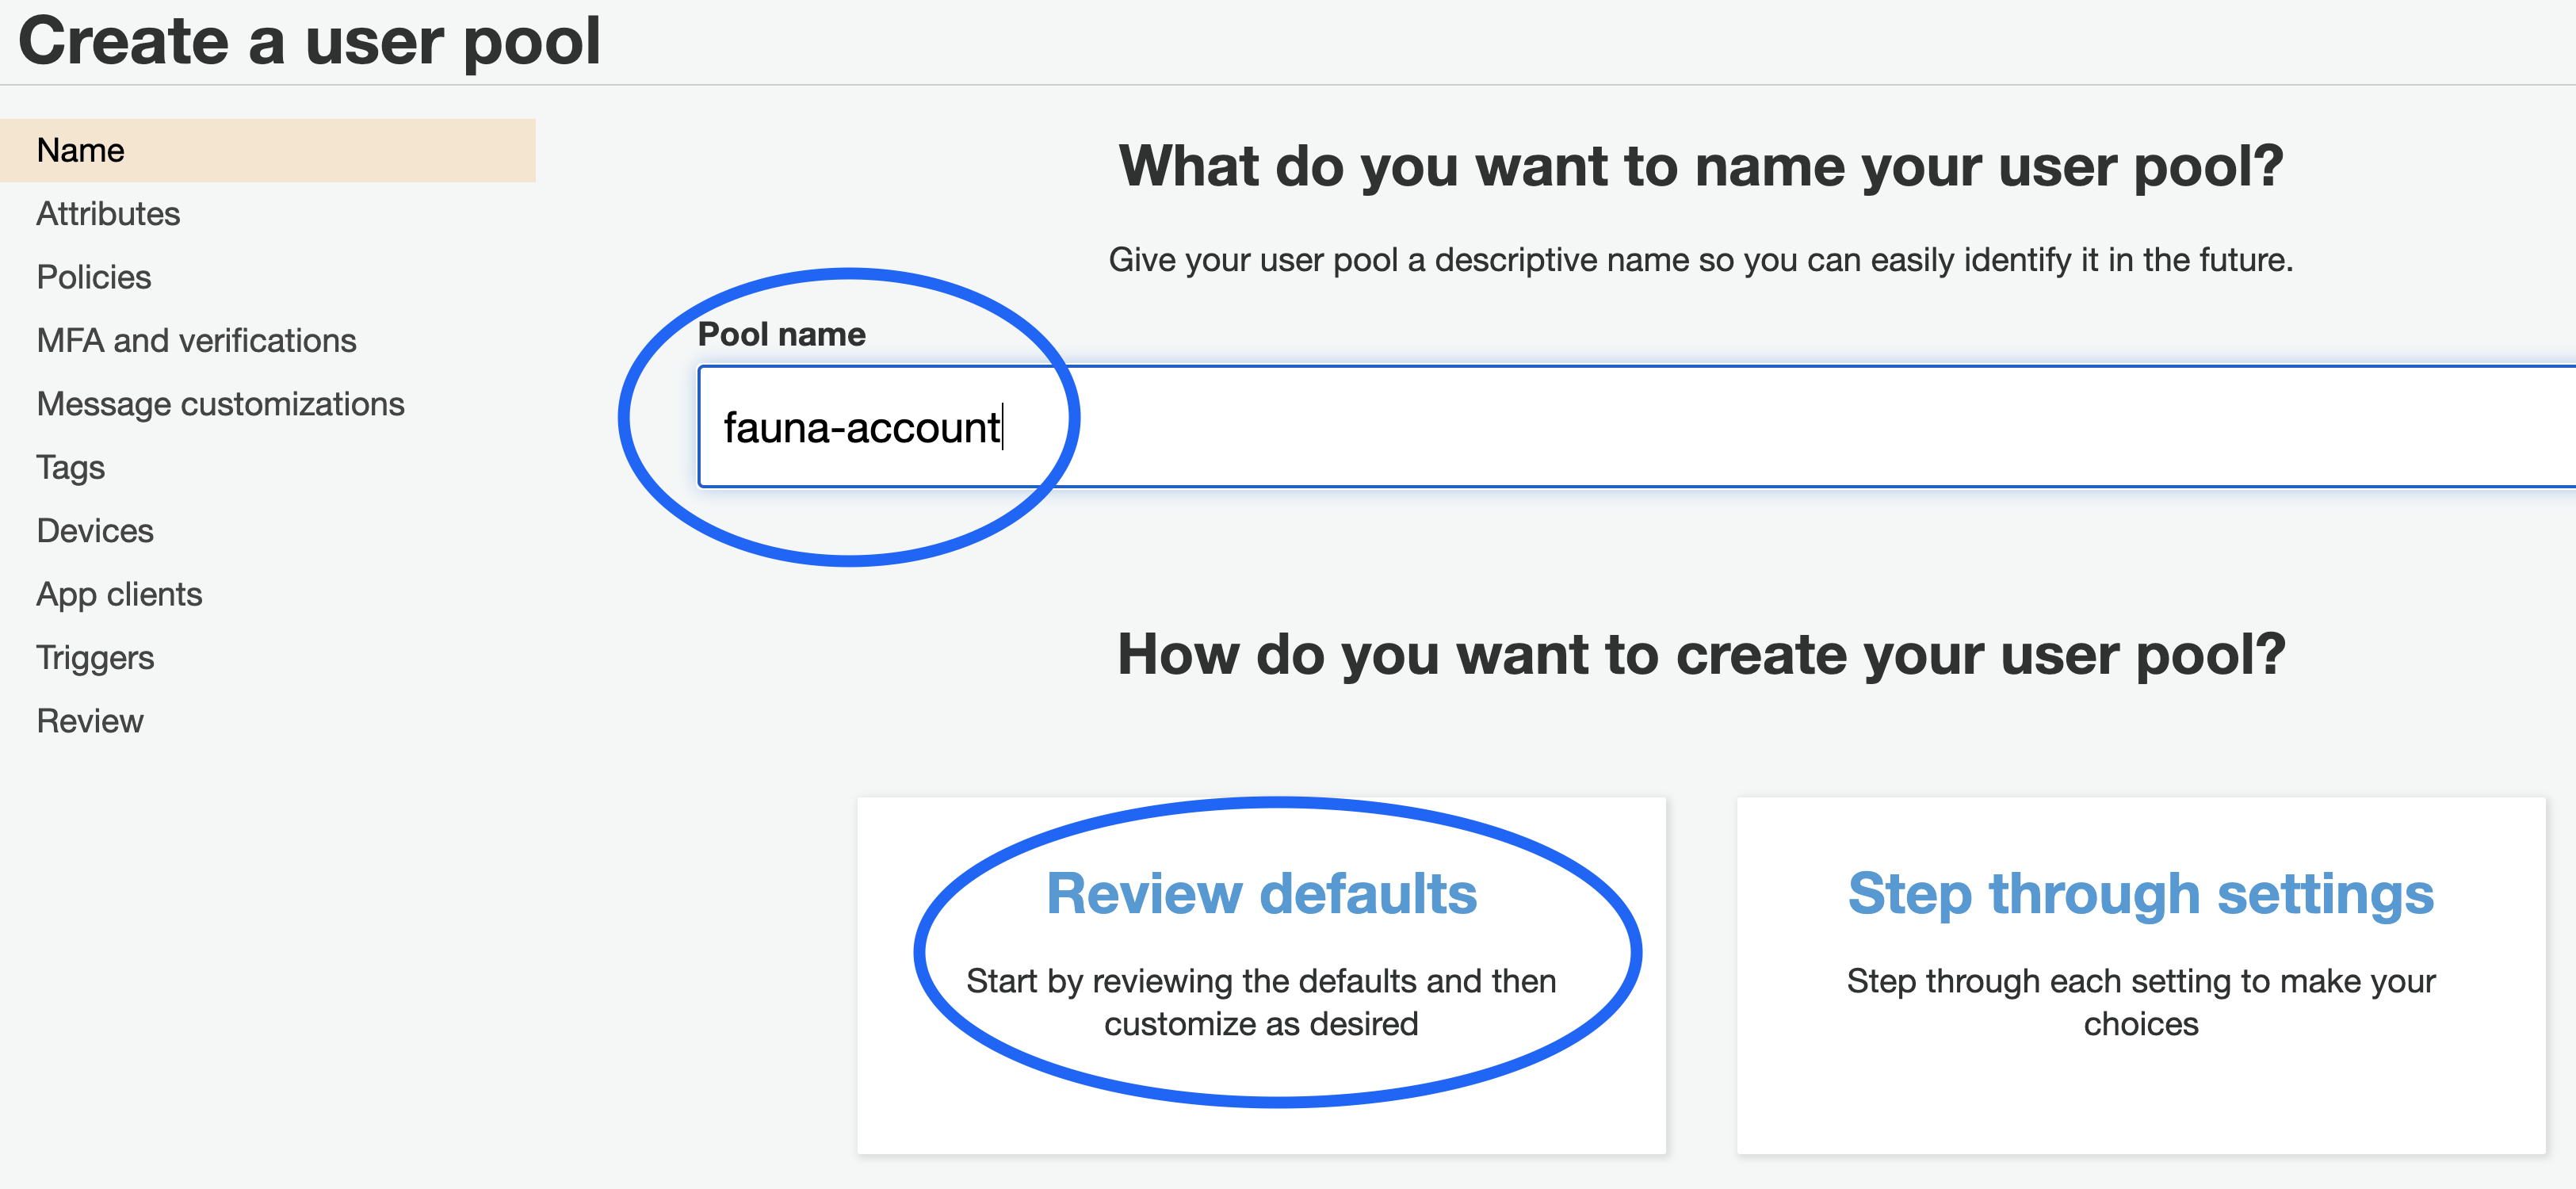
Creating a new Cognito App
Create a new Cognito User Pool from AWS Console. You must provide a name for your Cognito User Pool. You can choose to step through all the settings of Cognito or accept the defaults.
Once the User Pool is created, take note of the
Pool Id; you need this to connect your client application with Cognito.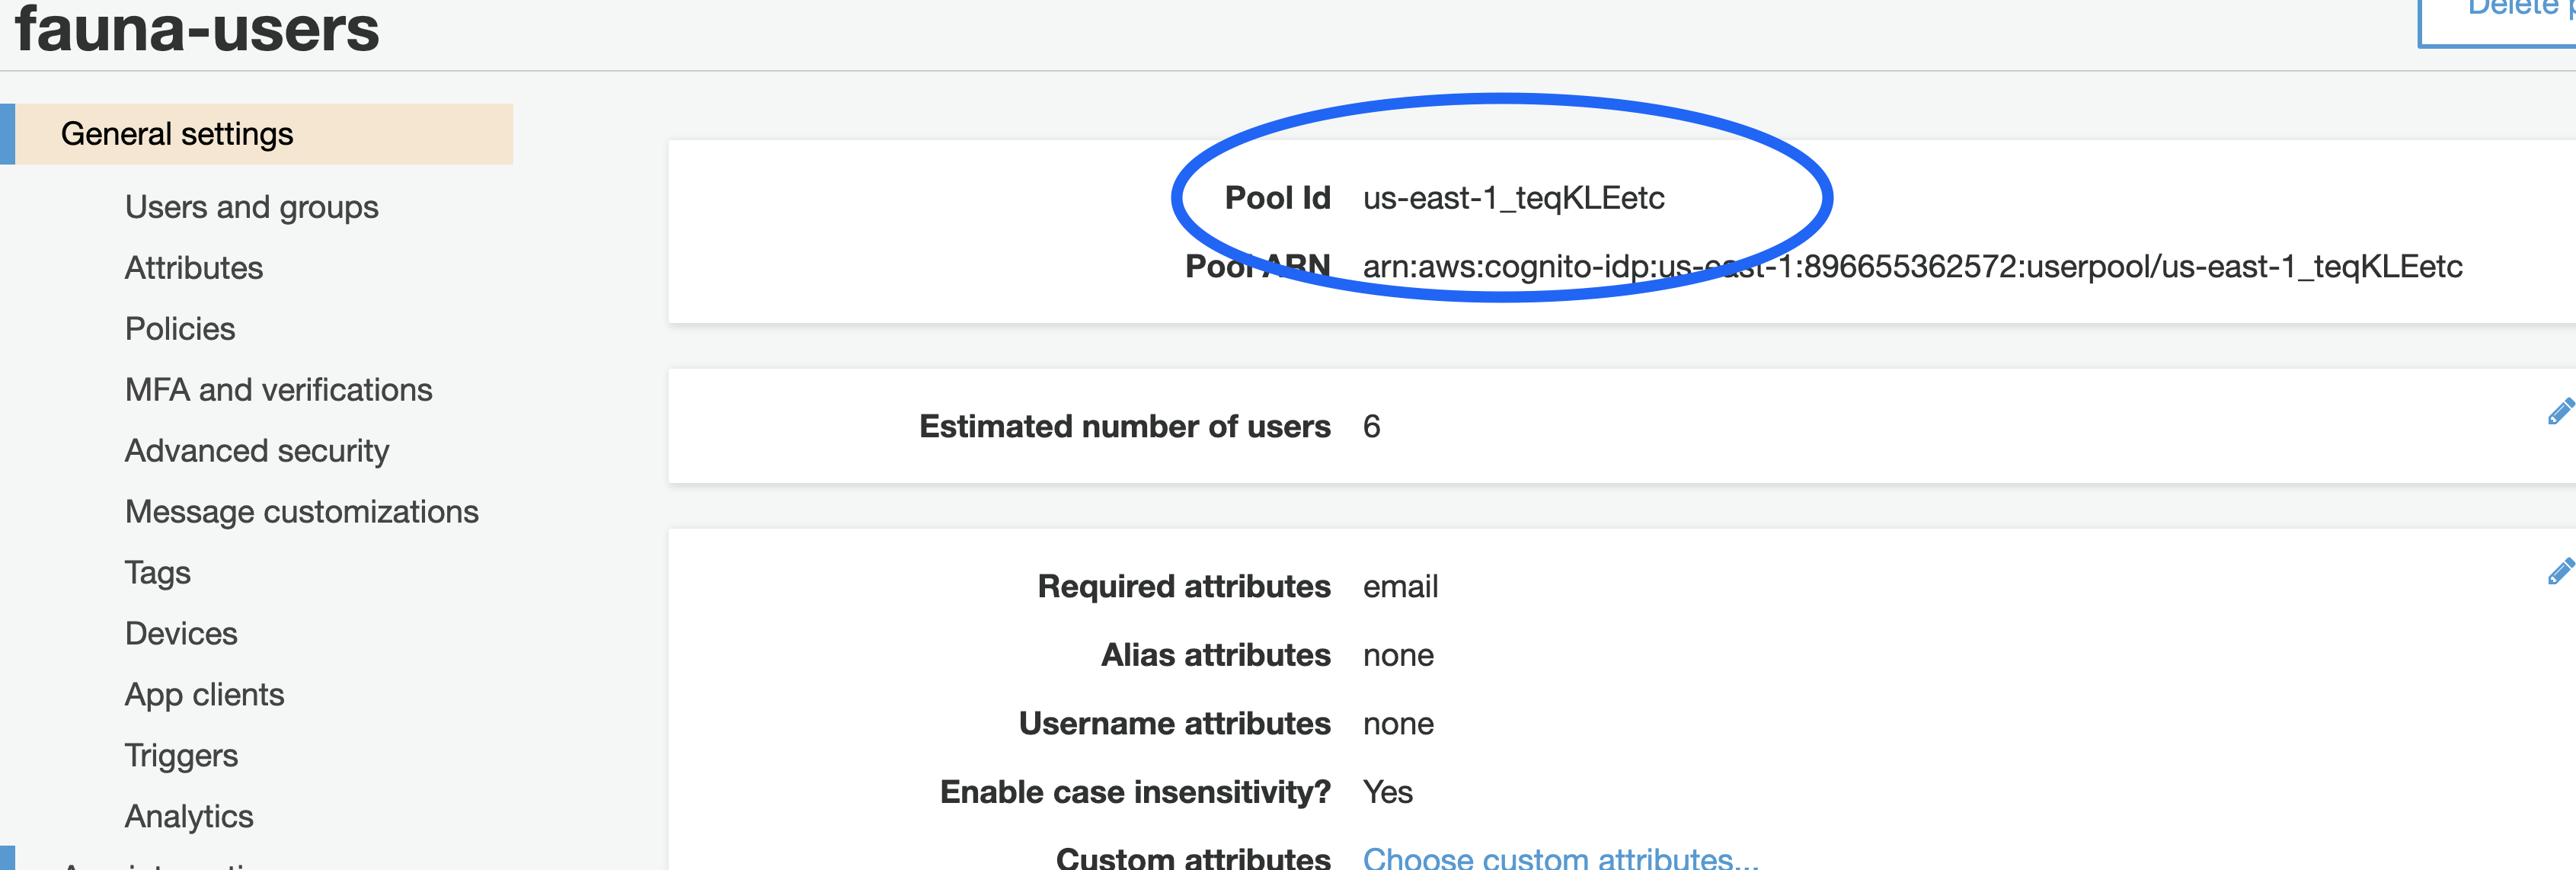
Select App client from the menu and create a new app client. Define your token expirations based on your application requirements and uncheck generate client secret.
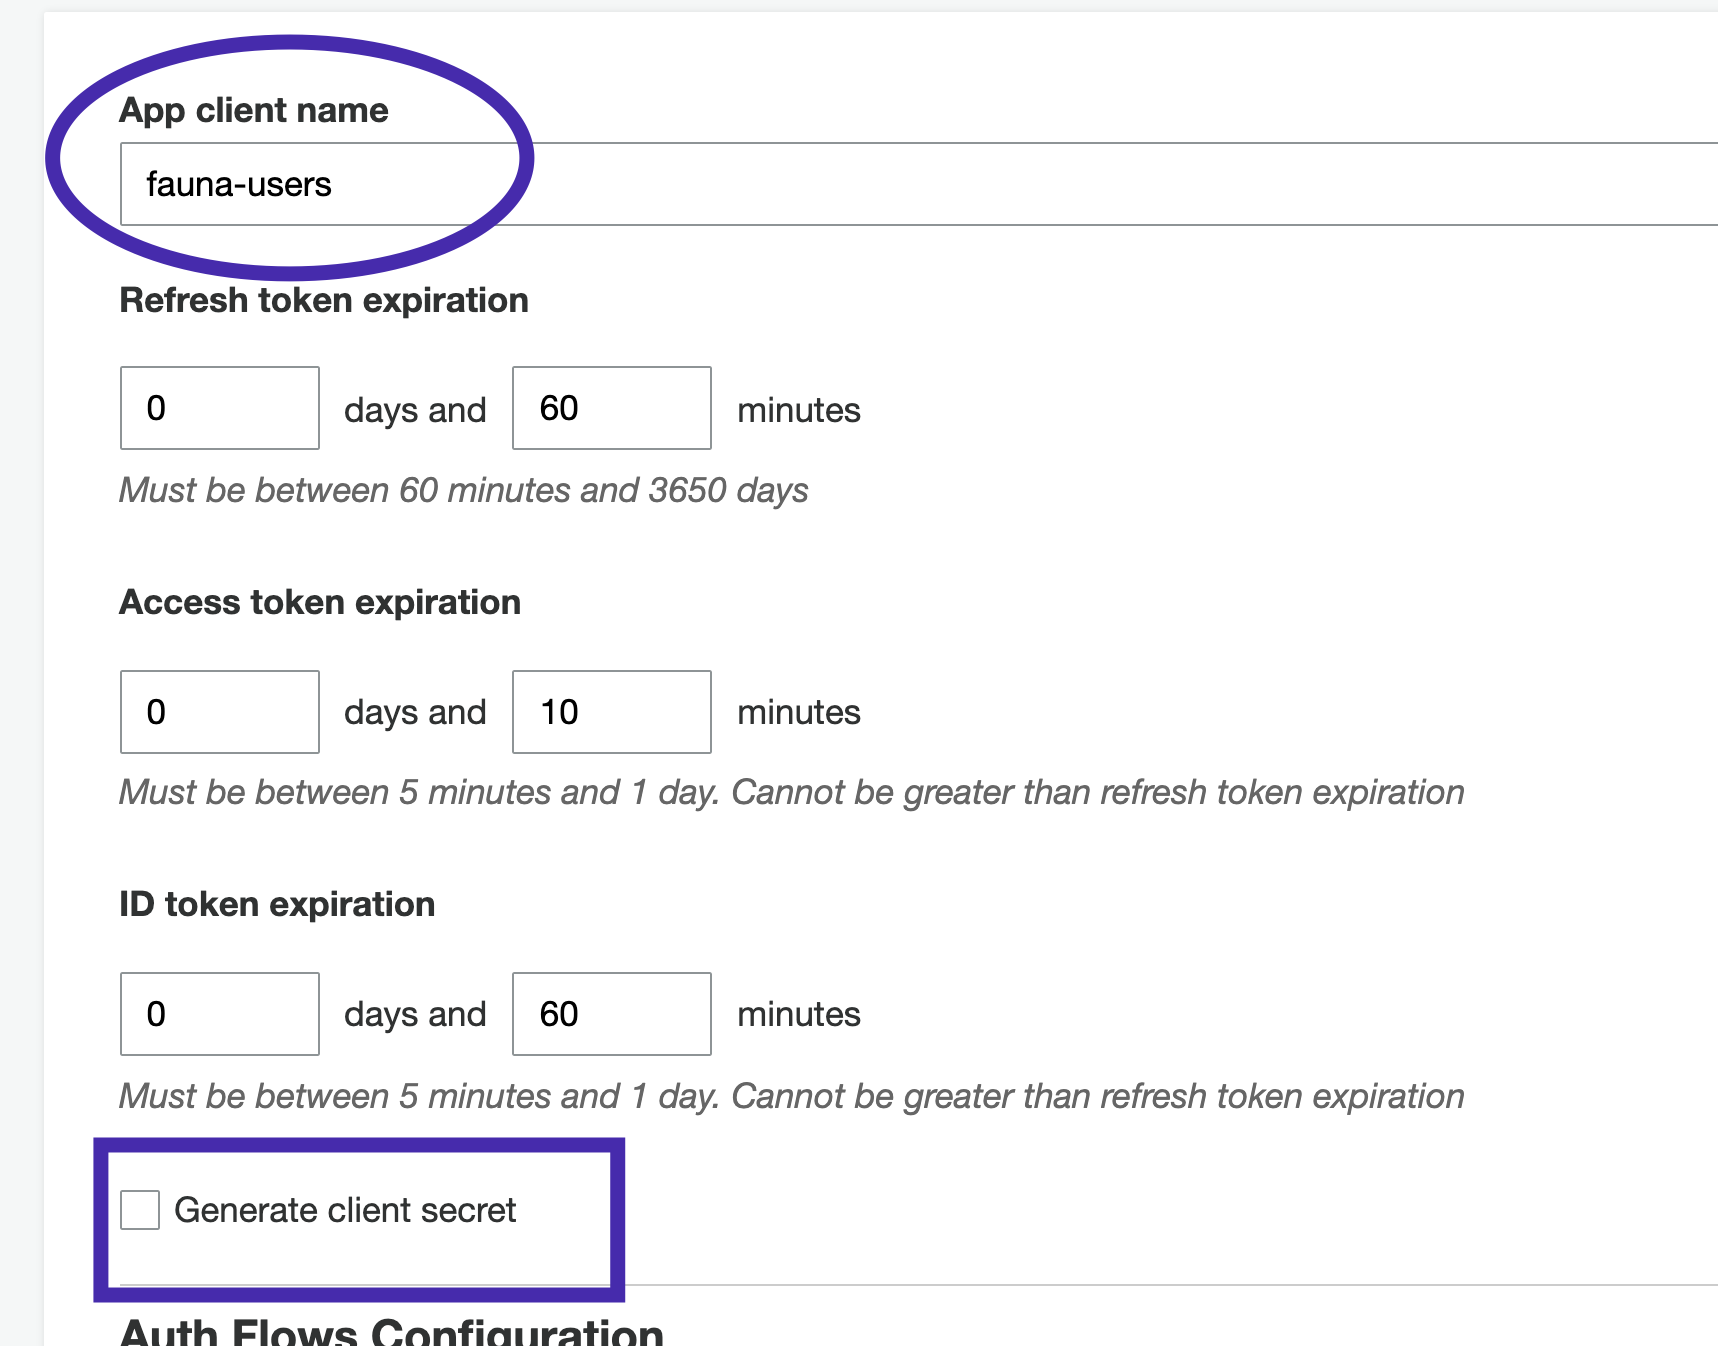
The client secret is an optional parameter that provides an extra layer of security. For simplicity, this tutorial is not utilizing this feature. Review the AWS Cognito documentation for more information.
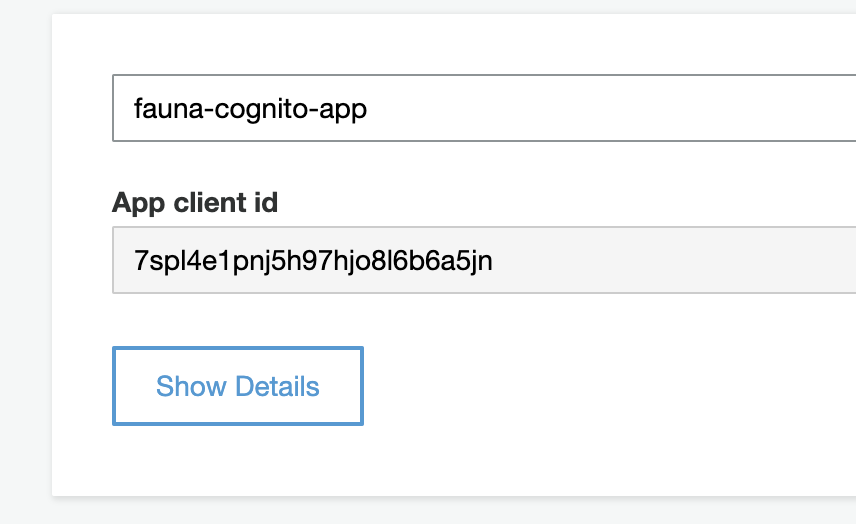
Once the app client is created, take a note of the App client id. You need this App client id to configure your client application with Cognito.
Adding Cognito to the client application
Clone the Cognito-Fauna-React starter sample from git by running the following command.
git clone https://github.com/fauna-labs/fauna-cognito-authThe template provides basic functionality including forms, routing, and cookie storage so that you don’t have to set up everything from scratch.
Open src/config.js. Fill in the UserPoolId with your Cognito Pool id and ClientId with your App client id that you generated in the previous steps.
export const config = {
    UserPoolId: 'us-east-1_teqKLEjjjc',
    ClientId: '7spl4e1pnj5h97jjh8l6b6a5jn'
}
Install the dependencies and start the application by running the following commands.
npm install
npm start
Visit your application at http://localhost:3000. At this point, you should be able to sign up, confirm your account, and login with the sample application.
Fauna configuration
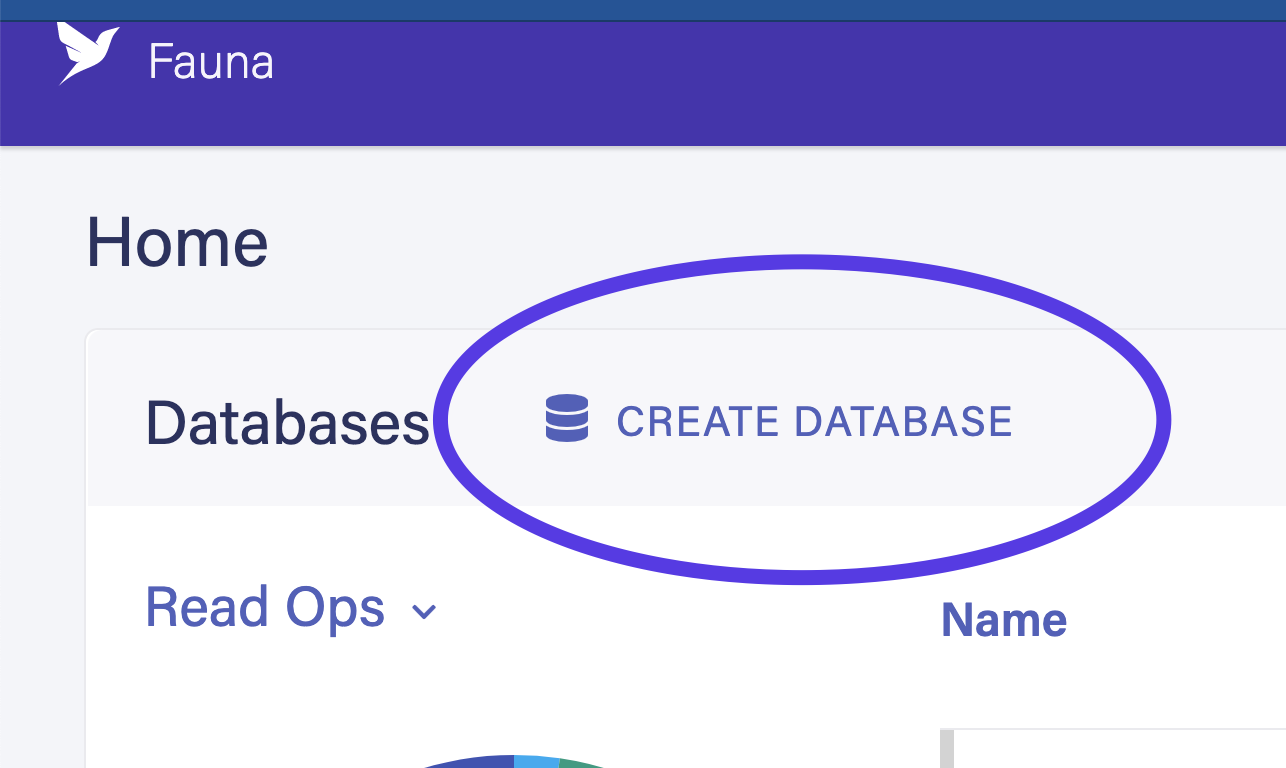
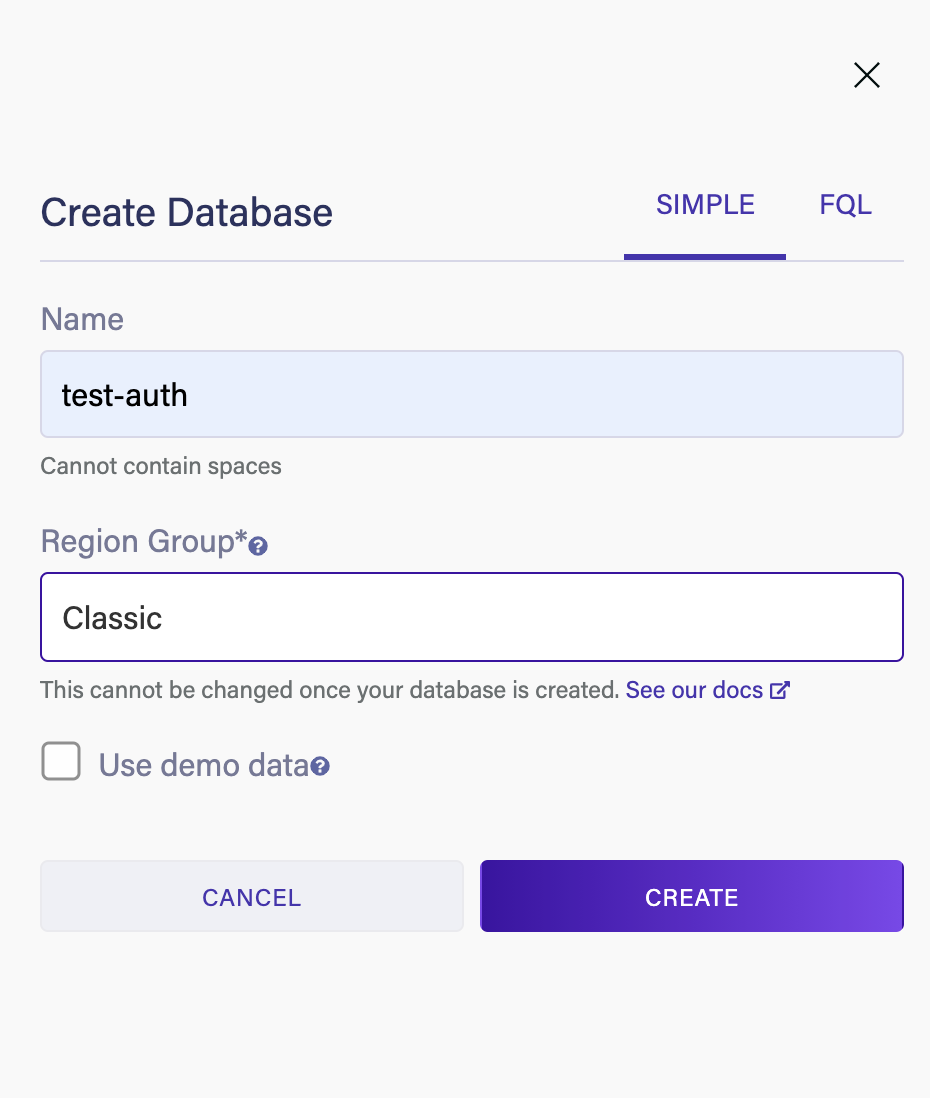
The next step is to configure Fauna. Open the Fauna dashboard and create a new database. Be sure to choose the Classic Region Group.
Next, navigate to the Collections tab in the dashboard and create a new collection called Account. This collection holds the user information for your application.
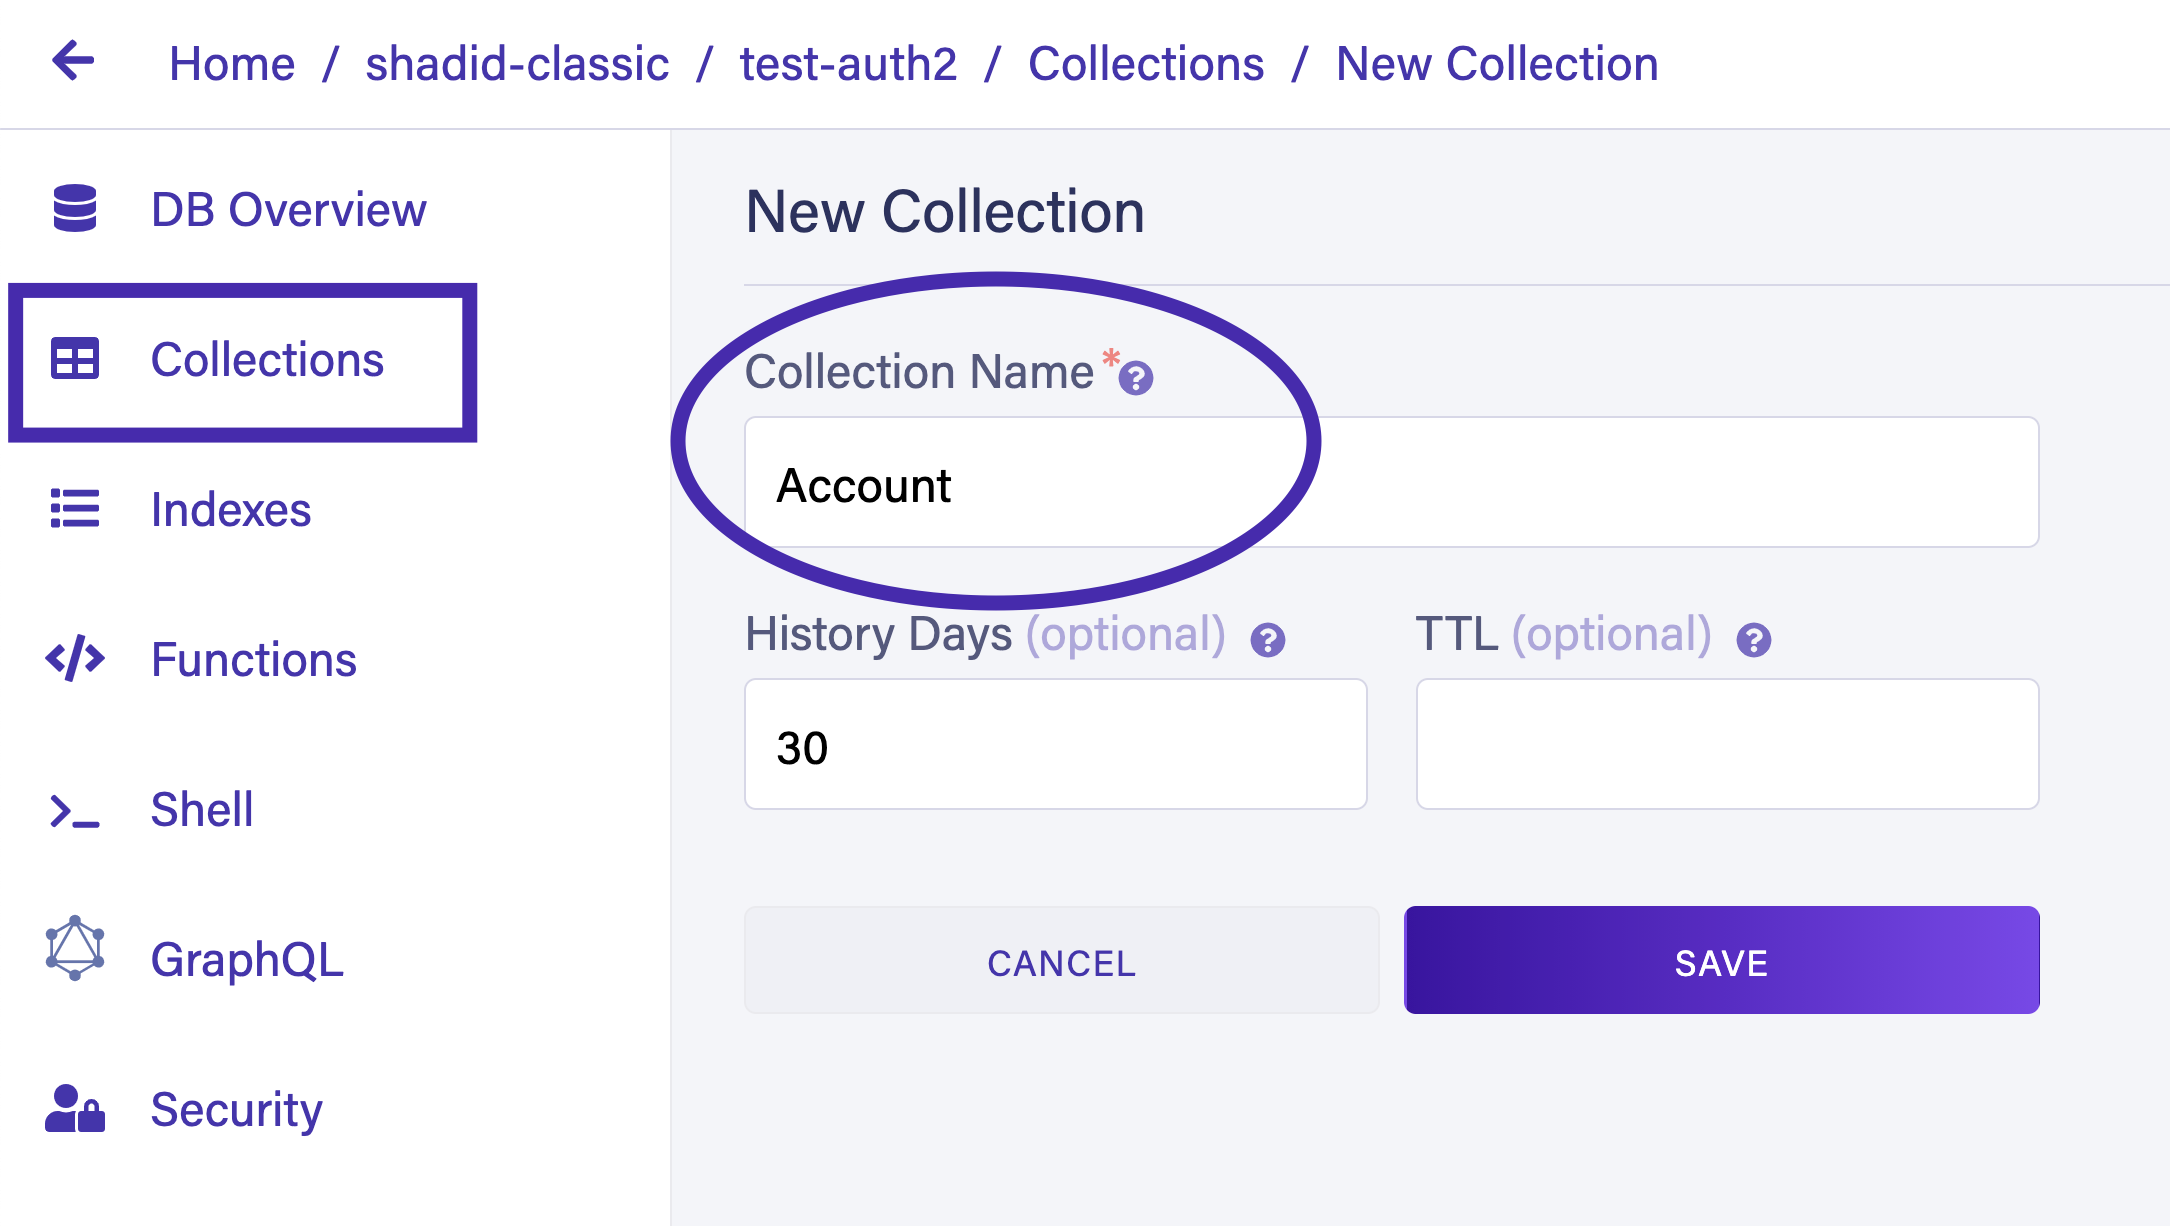
You can also create a collection from the Fauna shell by running the following command.
// Create accounts Collection
CreateCollection({ name: 'Account' })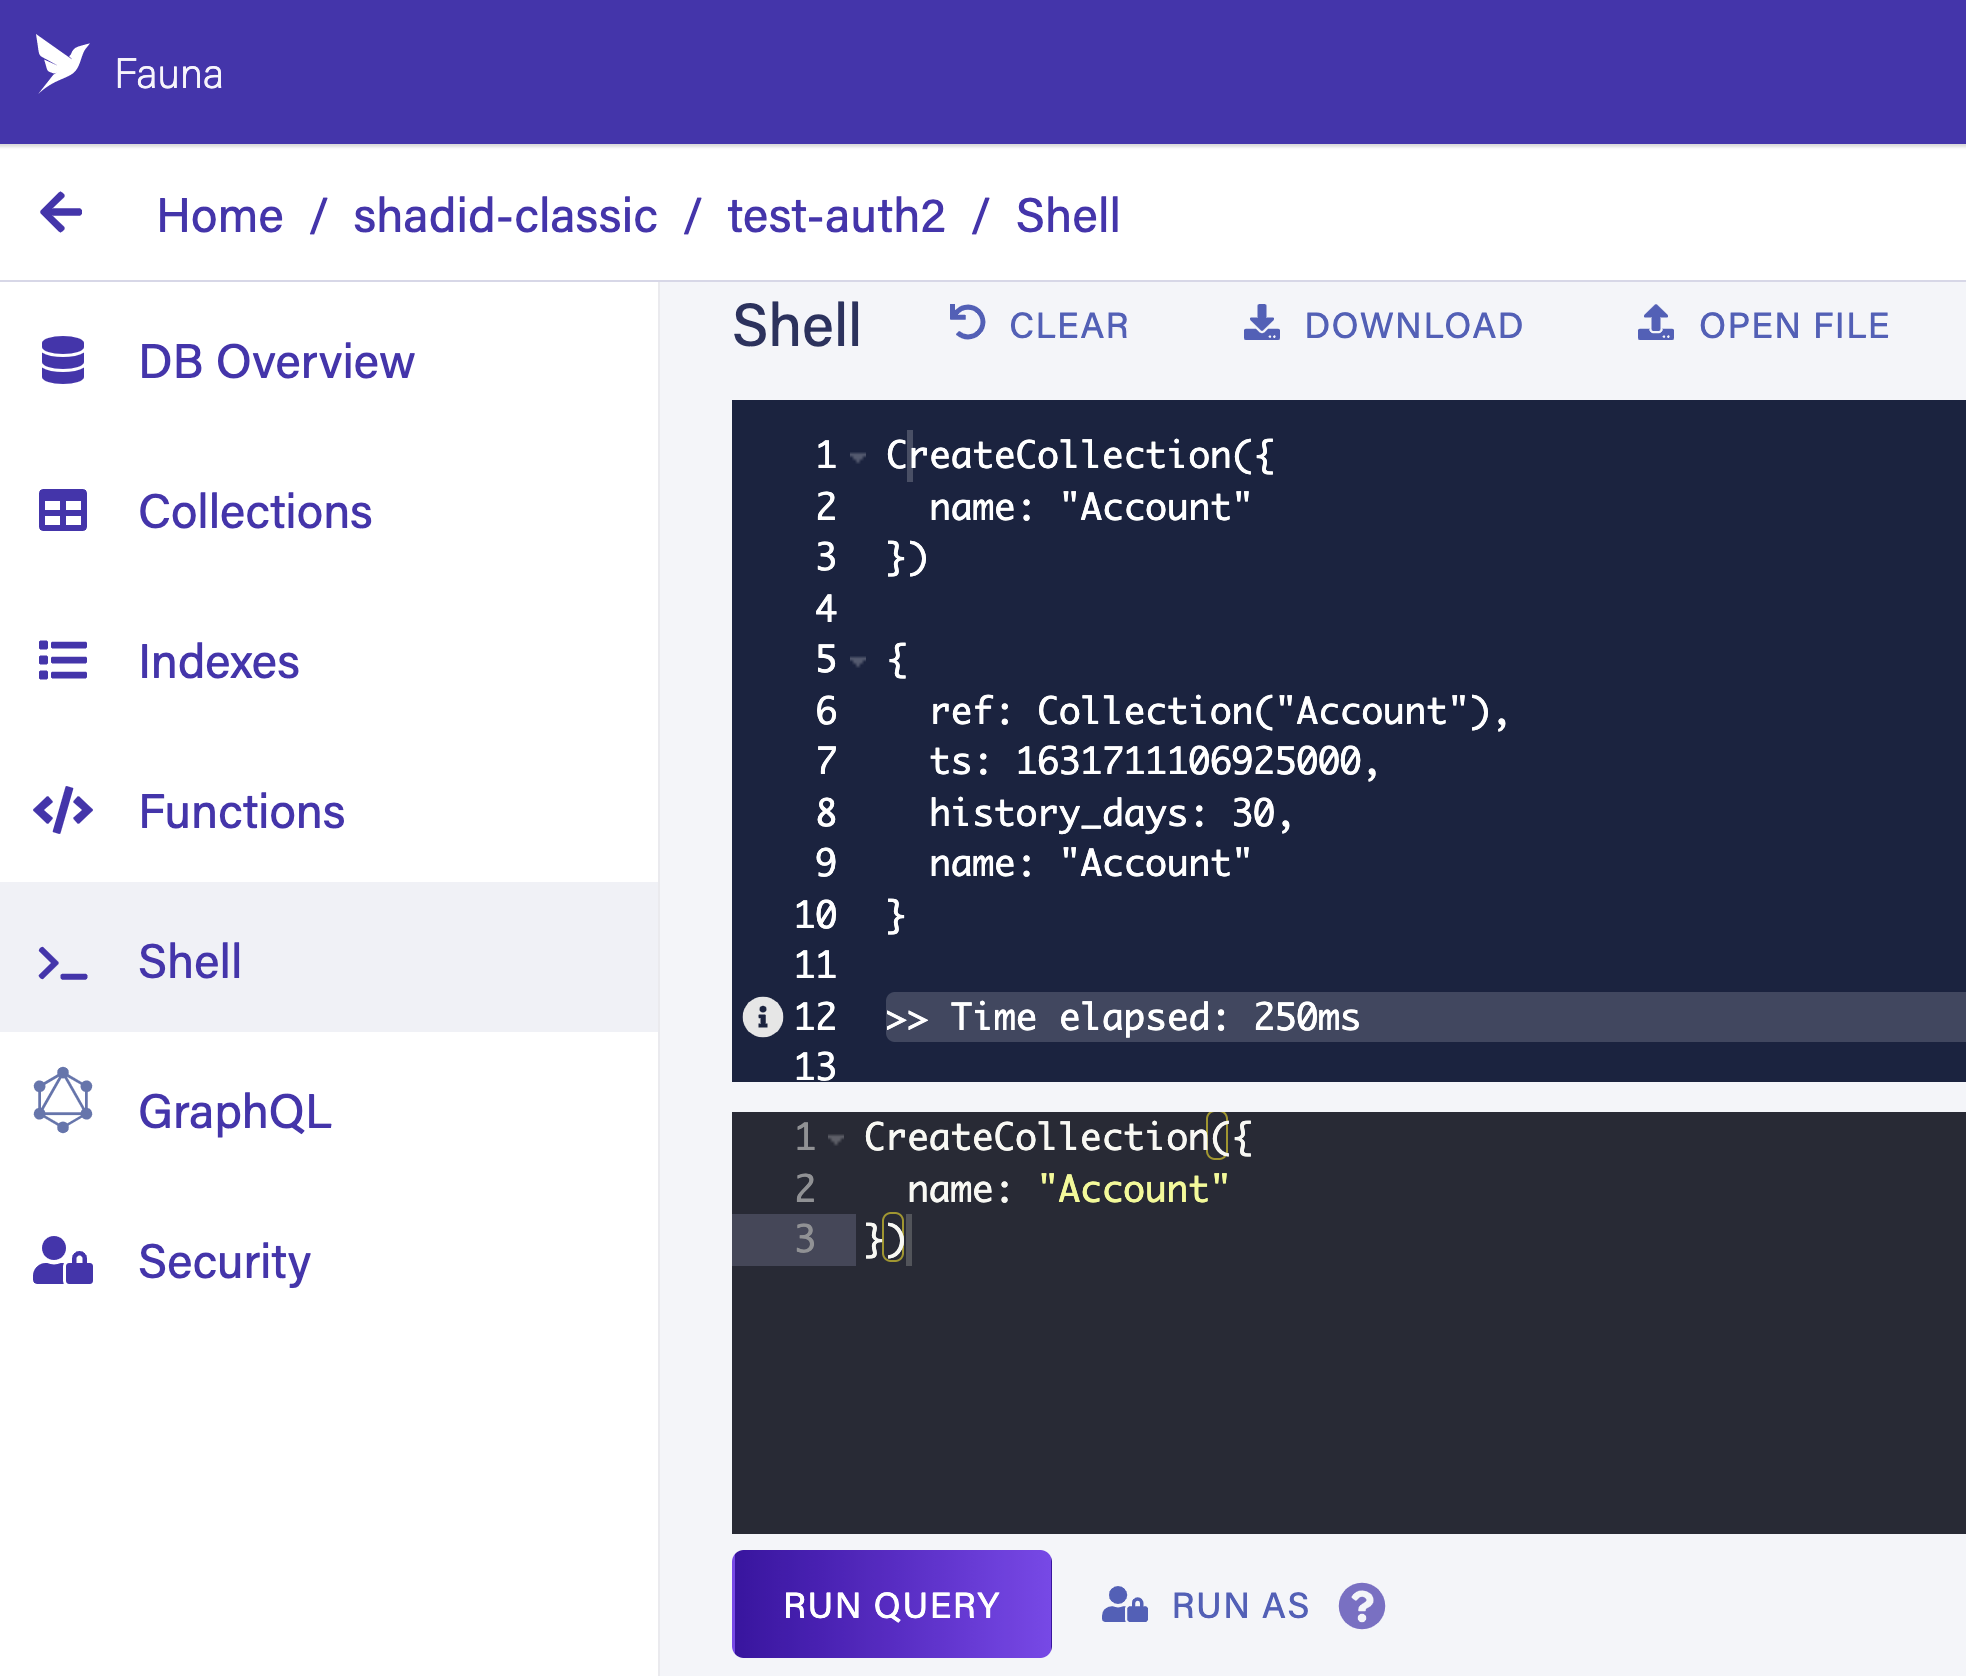
Navigate to the Indexes tab in your Fauna dashboard and choose New Index. This creates a new index that allows AWS Cognito to query users from your Fauna database by email.
Name your index accounts_by_email. Make sure to define Accounts as the source collection and email as a term. Also, check the unique and serialized checkboxes. This ensures that only one user is allowed per email address.
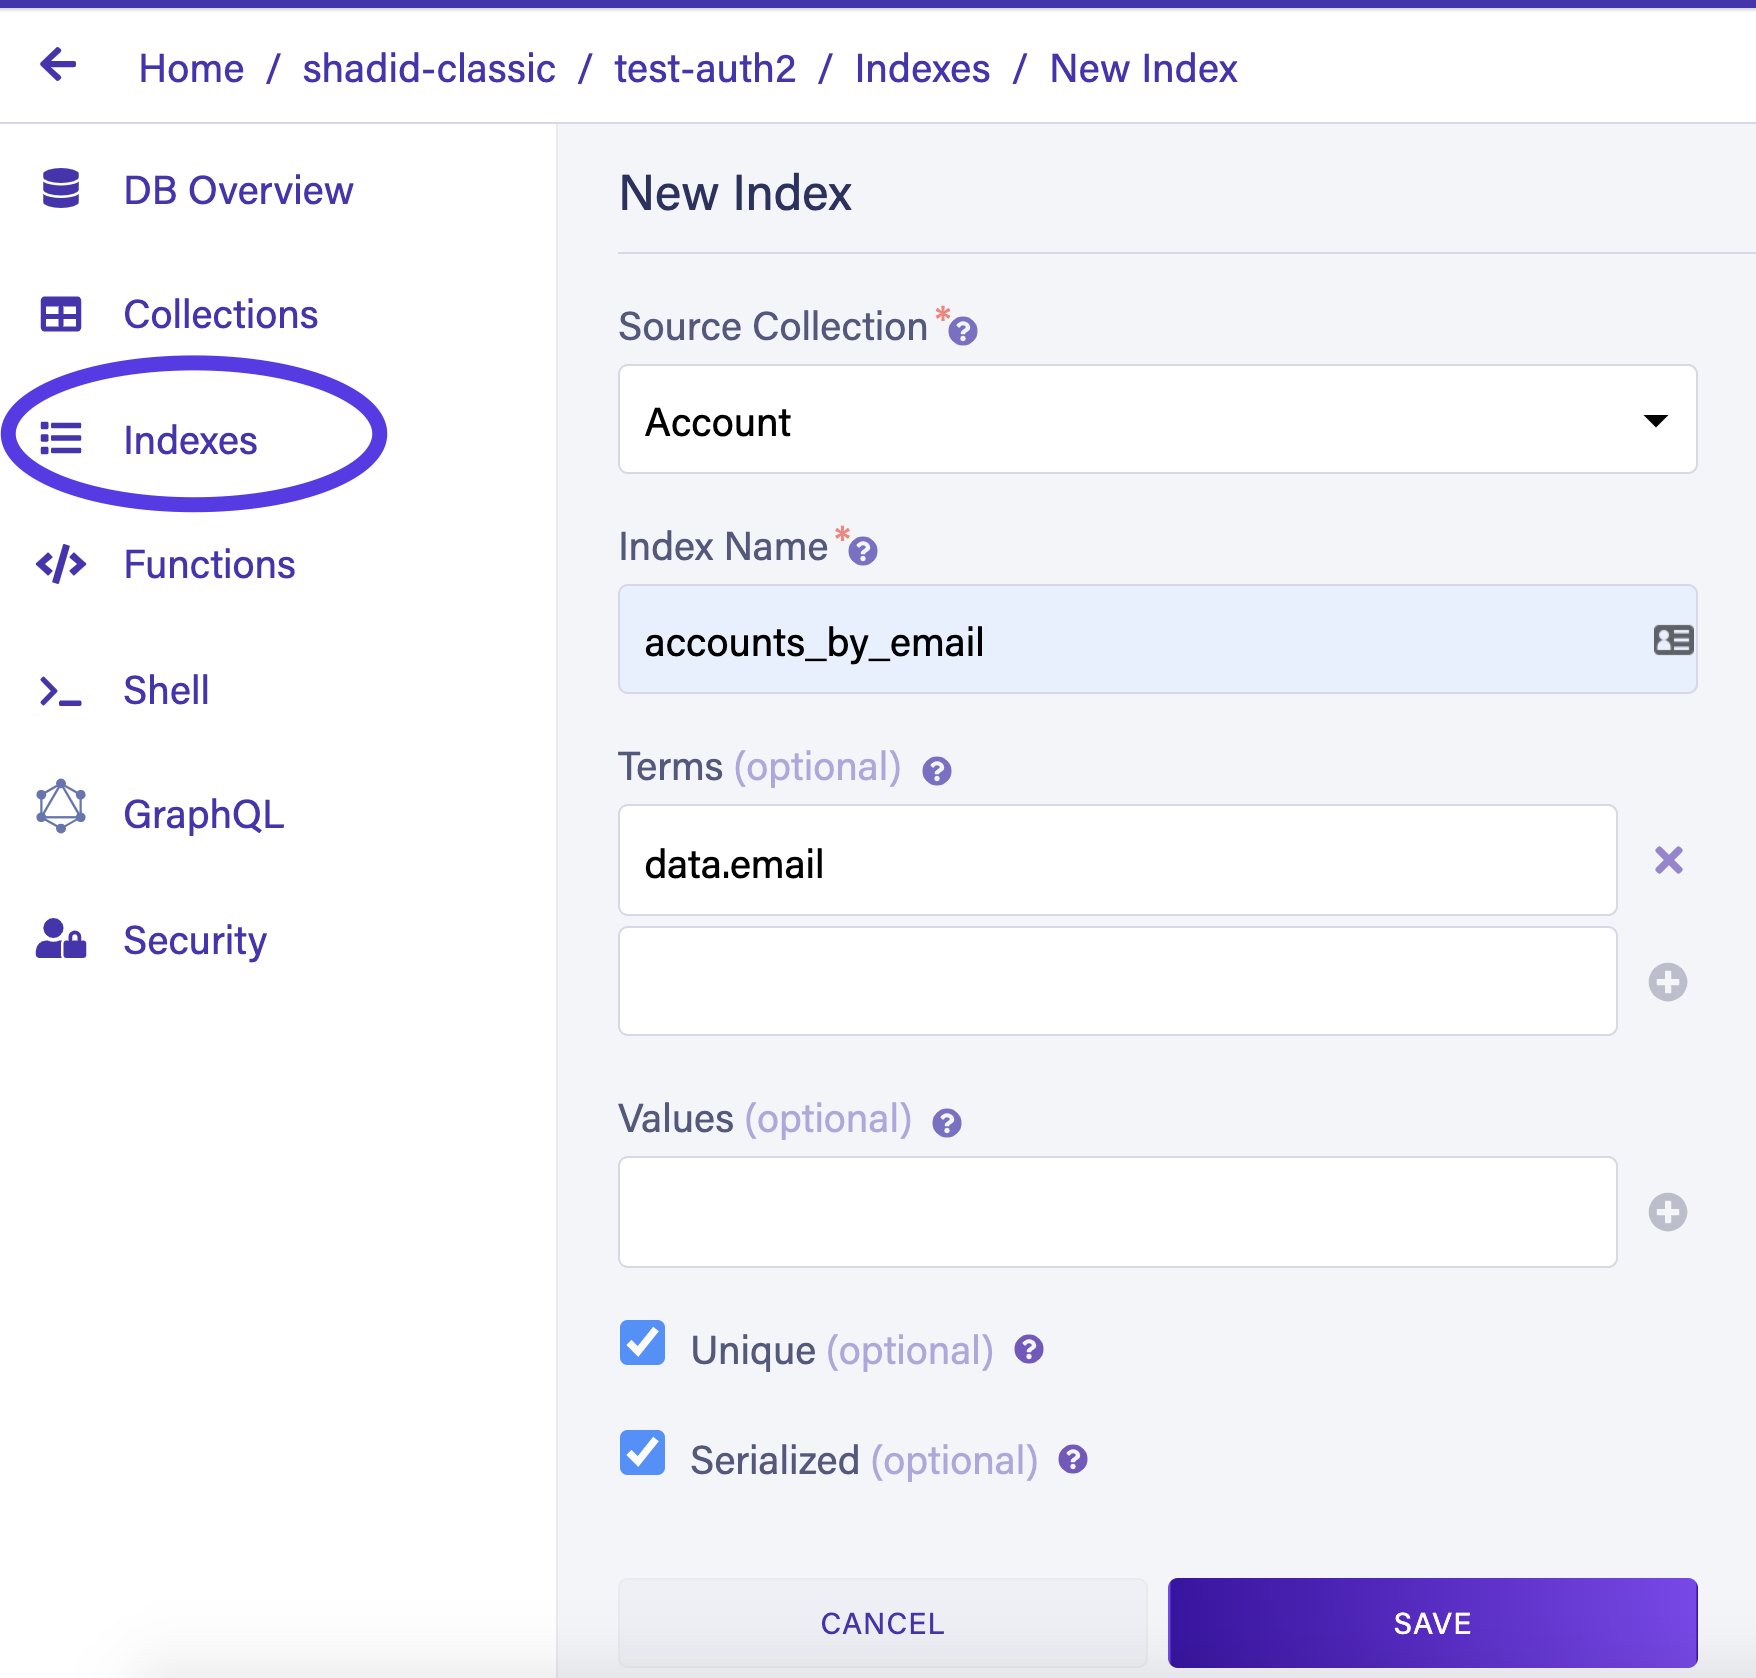
You can also create an index by running the following command in the shell.
CreateIndex({
  name: 'accounts_by_email',
  source: Collection('Account'),
  // We will search on email
  terms: [
    {
      field: ['data', 'email']
    }
  ],
  unique: true,
  serialized: true
})
Create another collection called Movie. Only authenticated users will have permission to perform CRUD (Create, Read, Update, Delete) operations on the Movie collection. Populate the Movie collection with some sample data. Select Collection > Movie > NEW DOCUMENT and insert the following test data.

{
    "title": "The Hateful Eight",
    "director": "Quentin Tarantino",
    "release": "December 25, 2015"
}
{
"title": "Once Upon a Time in Hollywood",
"director": "Quentin Tarantino",
"release": "July 26, 2019"
}You must create an access role to allow only logged-in users to perform CRUD on the Movie collection.
To create a new role, select Security > Roles > New Role in the dashboard. Give your new role a name and specify the appropriate permissions for each collection.
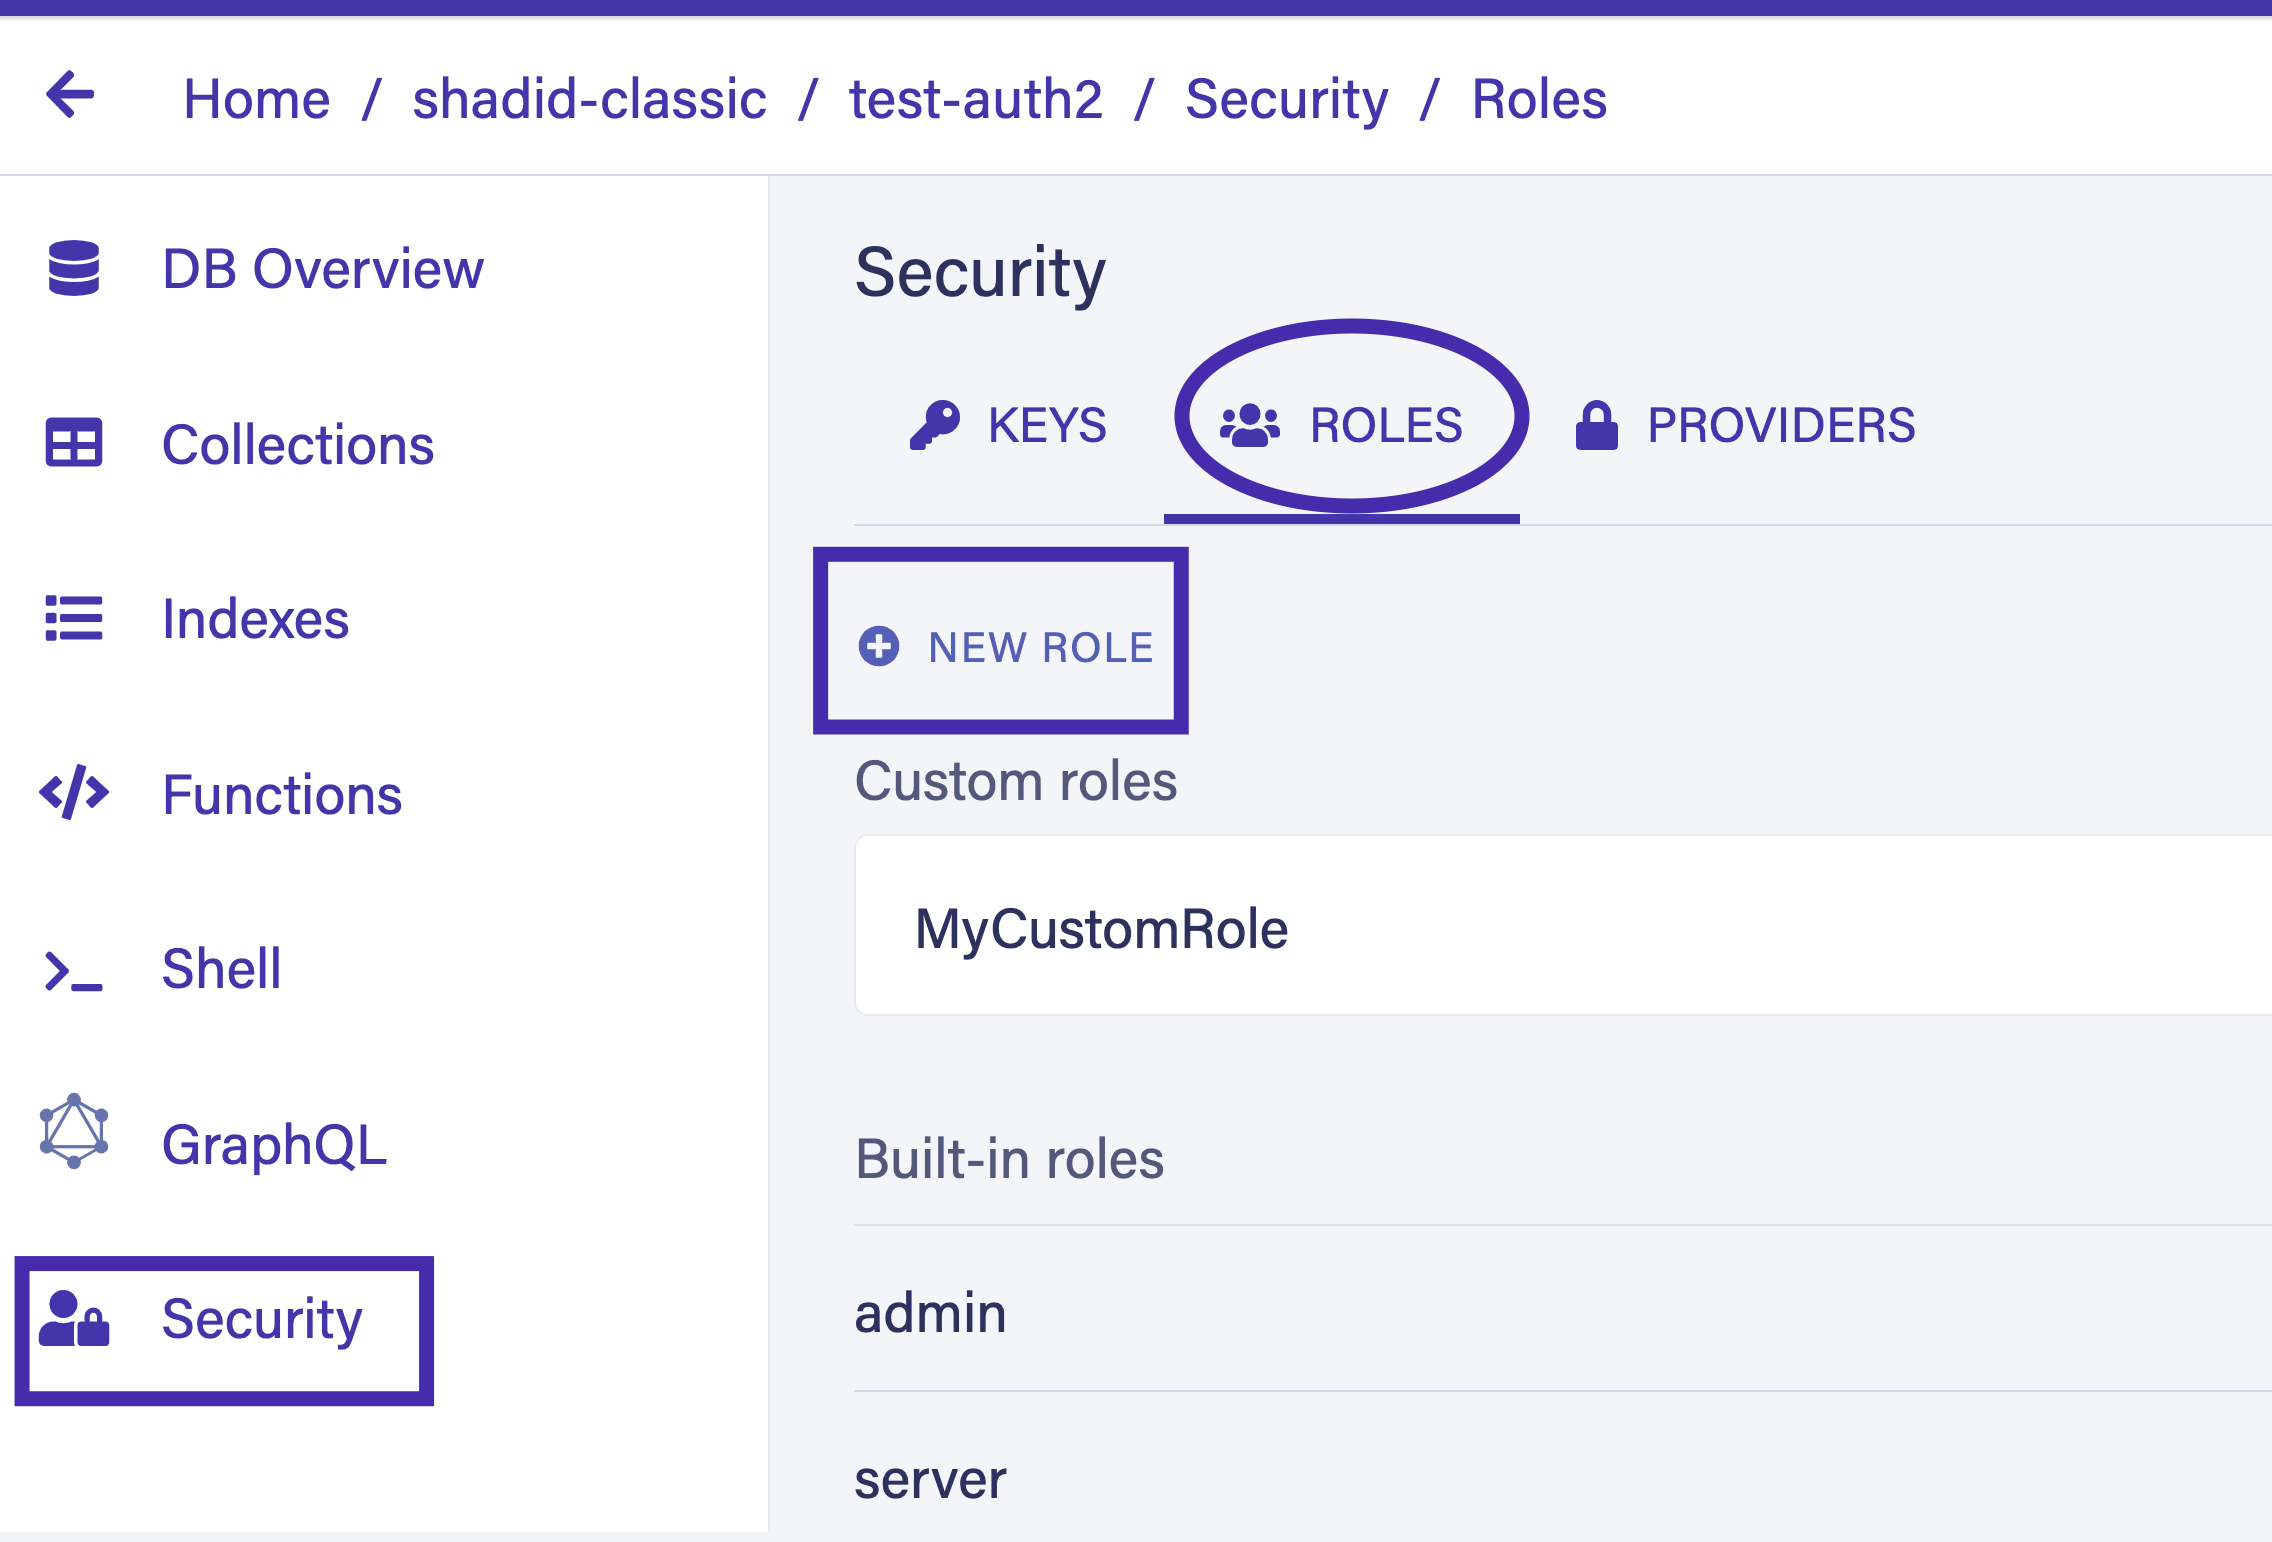
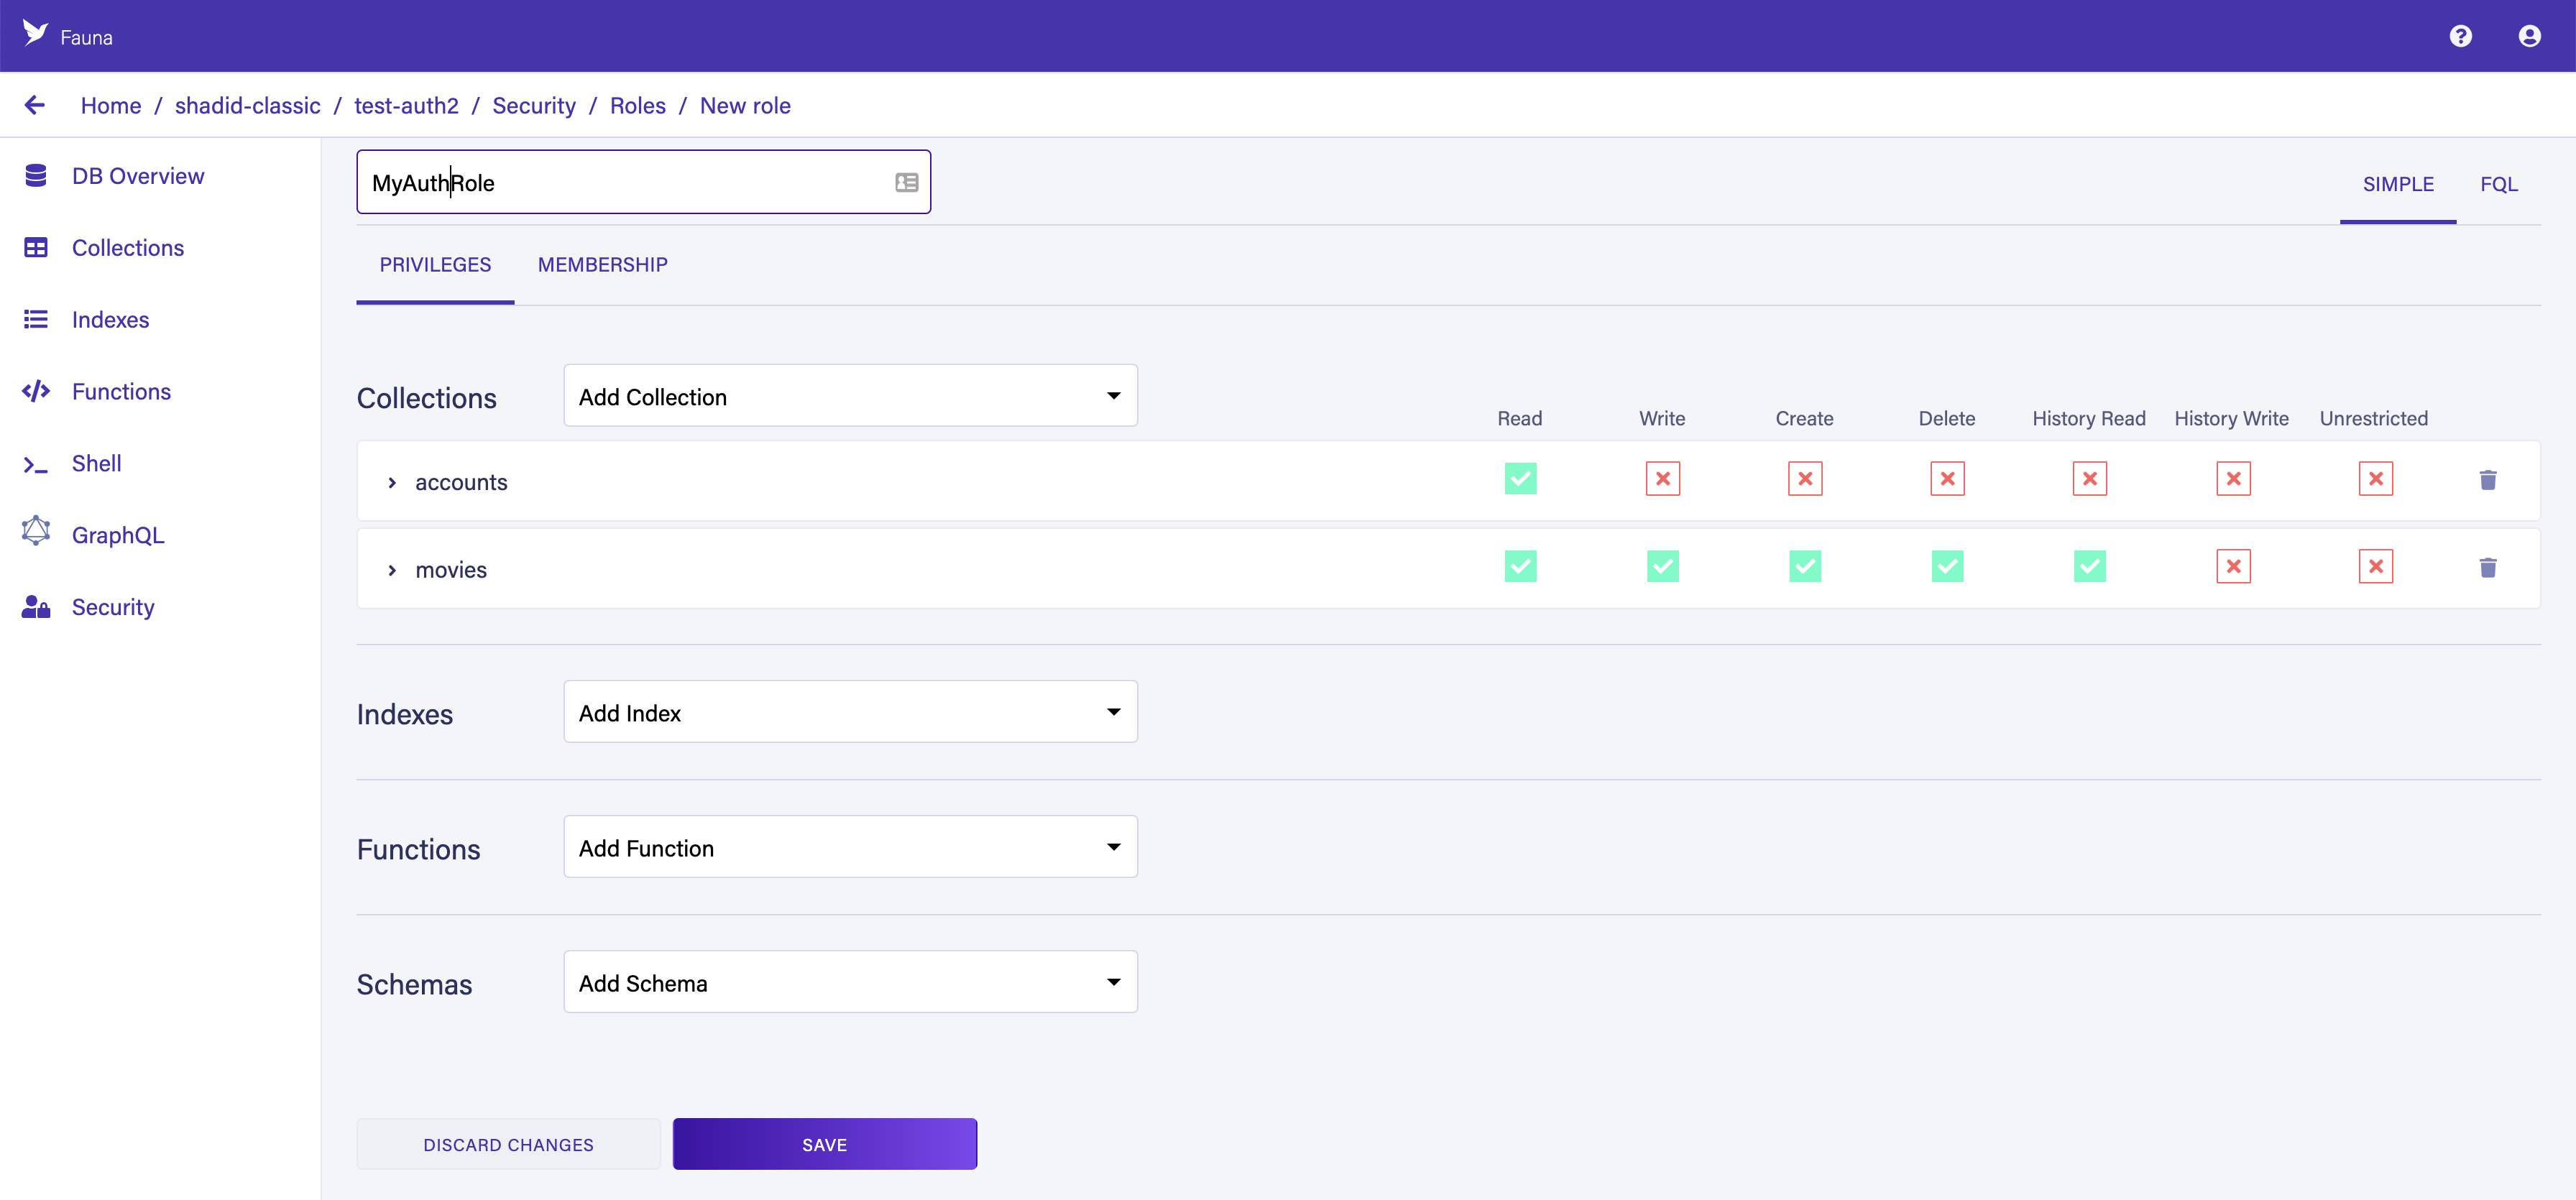
Provide
Read Write Create and Delete permission to the Movies collection. Switch to the membership tab and add the Accounts collection as a member.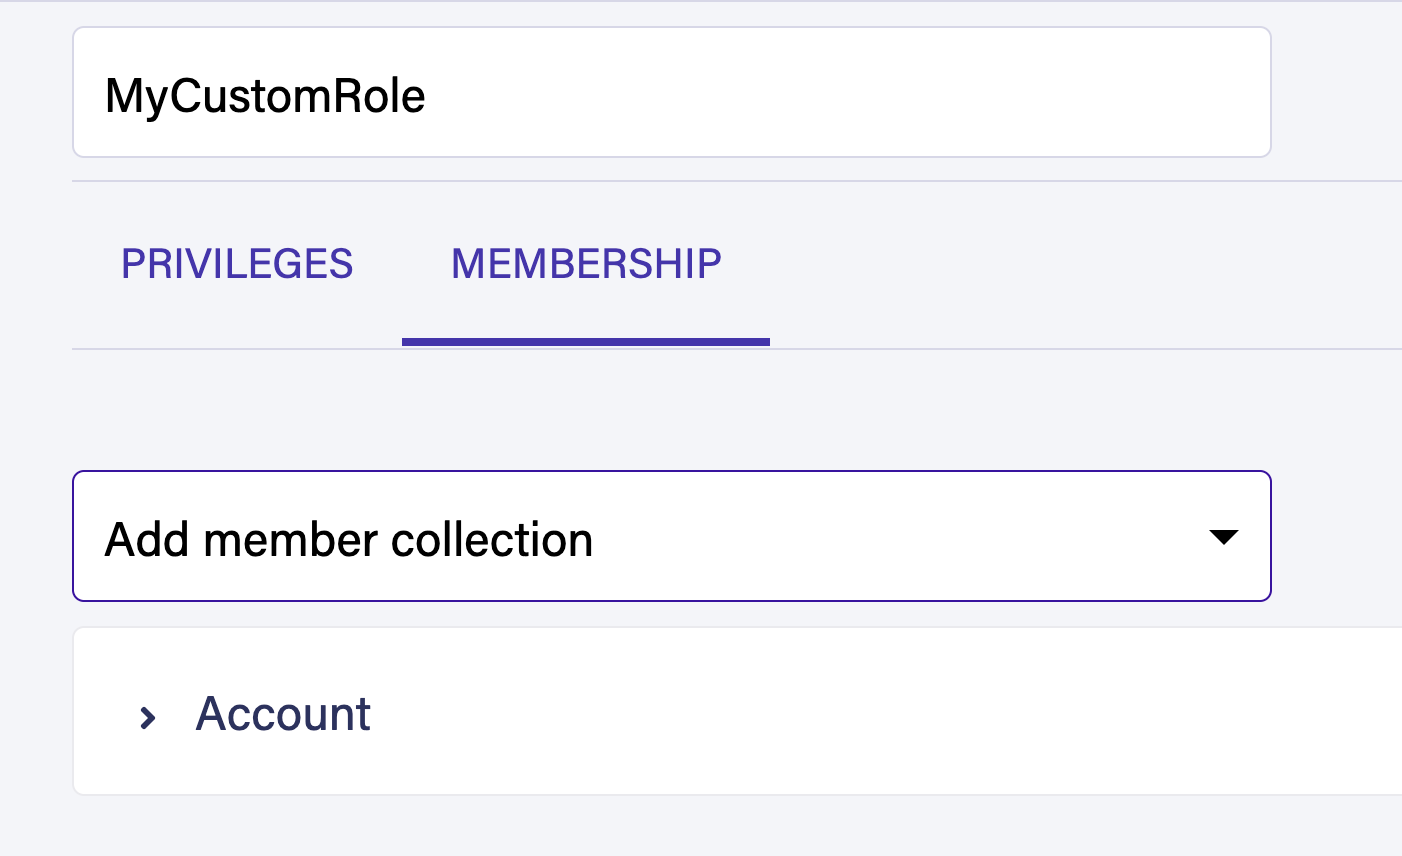
Provide Read Write Create and Delete permission to the Movies collection. Switch to the membership tab and add the Accounts collection as a member.
Choose Save to create your new role. Because your role is dynamic, it implements attribute-based access control (ABAC). Every record in the Accounts collection is able to generate a token with the necessary privileges to query the collections defined in the Privilege tab.
Finally, create a new Fauna server key from the Security tab. You will need this key for AWS Lambda to communicate with Fauna.

Creating a Lambda function
In the starter code, we included a sample Lambda function to get started. Let’s explore the code together.
Examine
aws/lambdas/faunaAuthToken/users.js. The functions in this file are self-explanatory. These helper functions are used by the Lambda service. For instance, the registerUser function inserts new users into the database....
// Registers a new User in FaunaDB
const registerUser = (email) => {
return serverClient.query(
q.Create(
q.Collection('accounts'),
{ data: { email } },
)
);
};The
getUserByEmail function retrieves a particular user by email.// Get a user
const getUserByEmail = (email) => {
return serverClient.query(
q.Get(
q.Match(q.Index('accounts_by_email'), email)
)
);
};The
createRefreshToken function creates a new refresh token using a user ref. The createAccessToken function is responsible for creating an access token.const createRefreshToken = (ref, ttl) => {
return serverClient.query(
q.Create(q.Tokens(), {
instance: q.Ref(q.Collection("accounts"), ref),
data: {
type: "refresh"
},
ttl: q.TimeAdd(q.Now(), ttl, "seconds"),
})
);
};
const createAccessToken = (accountRef, refreshTokenRef, ttl) => {
return serverClient.query(
q.Create(q.Tokens(), {
instance: q.Ref(q.Collection("accounts"), accountRef),
data: {
type: 'access',
refresh: refreshTokenRef
},
ttl: q.TimeAdd(q.Now(), ttl, 'seconds')
})
);
};💡 On line 4, you have to define the Fauna server key secret (Generated in the previous step). Please be advised that hardcoding this value is not recommended. You must use a secret manager to maintain this key.💡 Please refer to the following article to learn more about how to manage secrets inside your Lambda functions.
const faunadb = require('faunadb');
const q = faunadb.query;

const serverClient = new faunadb.Client({ secret: '<Your Fauna Server Secrect>' });
// In production do not hardcode this value.
...
Next, take a look at the
aws/lambdas/faunaAuthToken/index.js file. This is the main file that runs during the Lambda function invocation from Cognito. The Lambda function has access to the Cognito event. The following code snippet retrieves the email from the Cognito event used in login.const email = event.request.userAttributes['email'];Using this email, you can retrieve the user from Fauna. If the user doesn’t exist, this is the first time this user is logging in. In that case, you can create a new user entry in the Fauna database.
try {
    const foundUser = await getUserByEmail(email);
    userId = foundUser.ref.id;

} catch (e) {
    console.log('Error: %s', e);
    const newUser = await registerUser(email);
    userId = newUser.ref.id;
}
Using the user reference, you can generate an access token and a refresh token for Fauna. The following code snippet demonstrates this.
try {
    const faunaRefreshToken = await createRefreshToken(userId, 3600);
    fauna_refresh_token = faunaRefreshToken.secret;
    console.log('fauna_refresh_token', fauna_refresh_token);
    const rret = await createAccessToken(userId, fauna_refresh_token, 600);
    fauna_access_token = rret.secret;
    console.log('fauna_access_token', rret.secret);
} catch (e) {
  console.log('Token Generation Error: %s', e);
}
Finally, you can attach the tokens to the Cognito response object and send the response back to the client application.
event.response = {
"claimsOverrideDetails": {
"claimsToAddOrOverride": {
fauna_access_token,
fauna_refresh_token,
},
"claimsToSuppress": ["email"]
}
};
context.done(null, event);
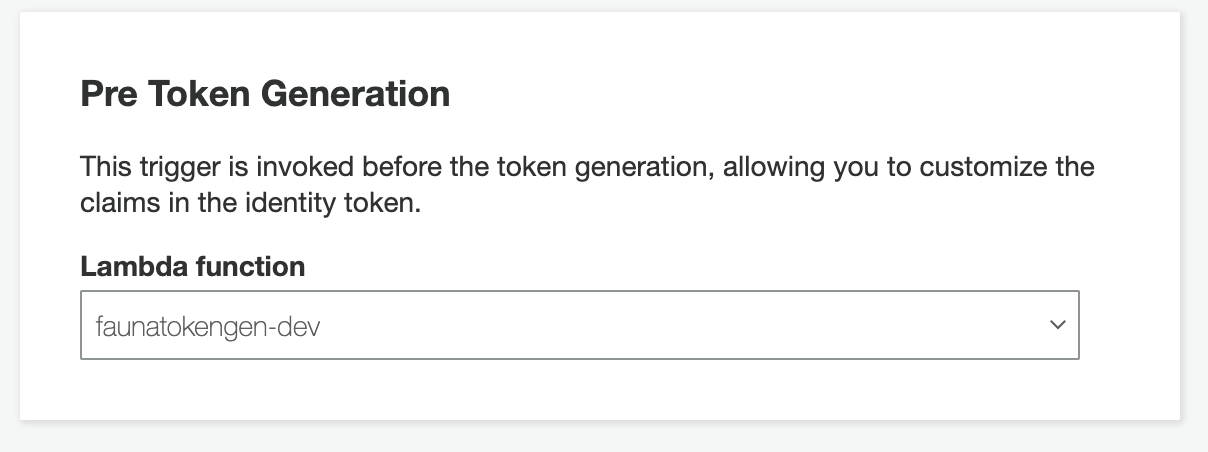
return event;Once you create and upload the Lambda function you must attach it to the Pre Token Generation trigger in AWS Cognito. Go to your User Pool in AWS Console and navigate to Triggers.
Attach your Lambda function to the Pre Token Generation trigger and save changes.
Test the client application
Run the client application with the following command.
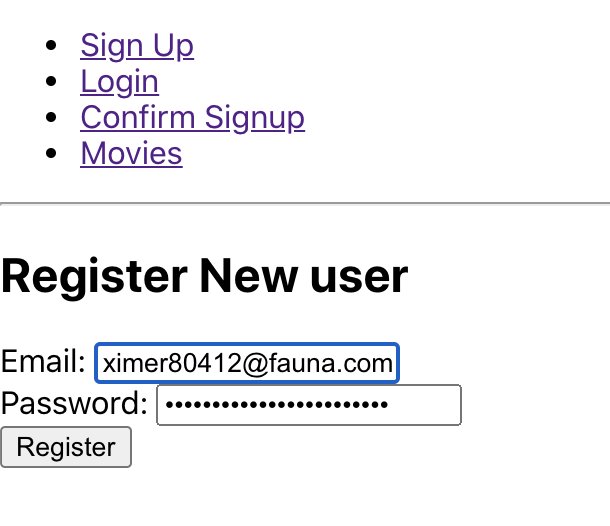
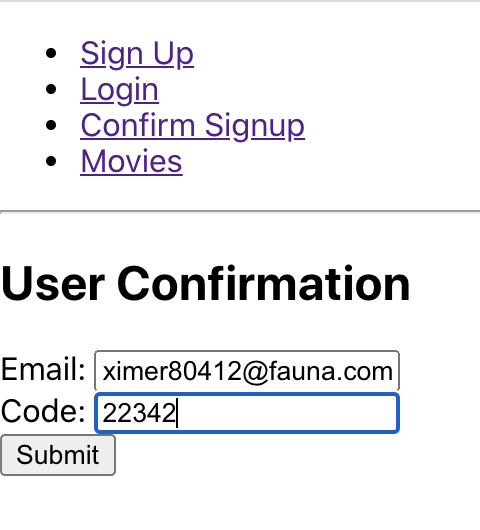
npm startRegister and confirm a new user.
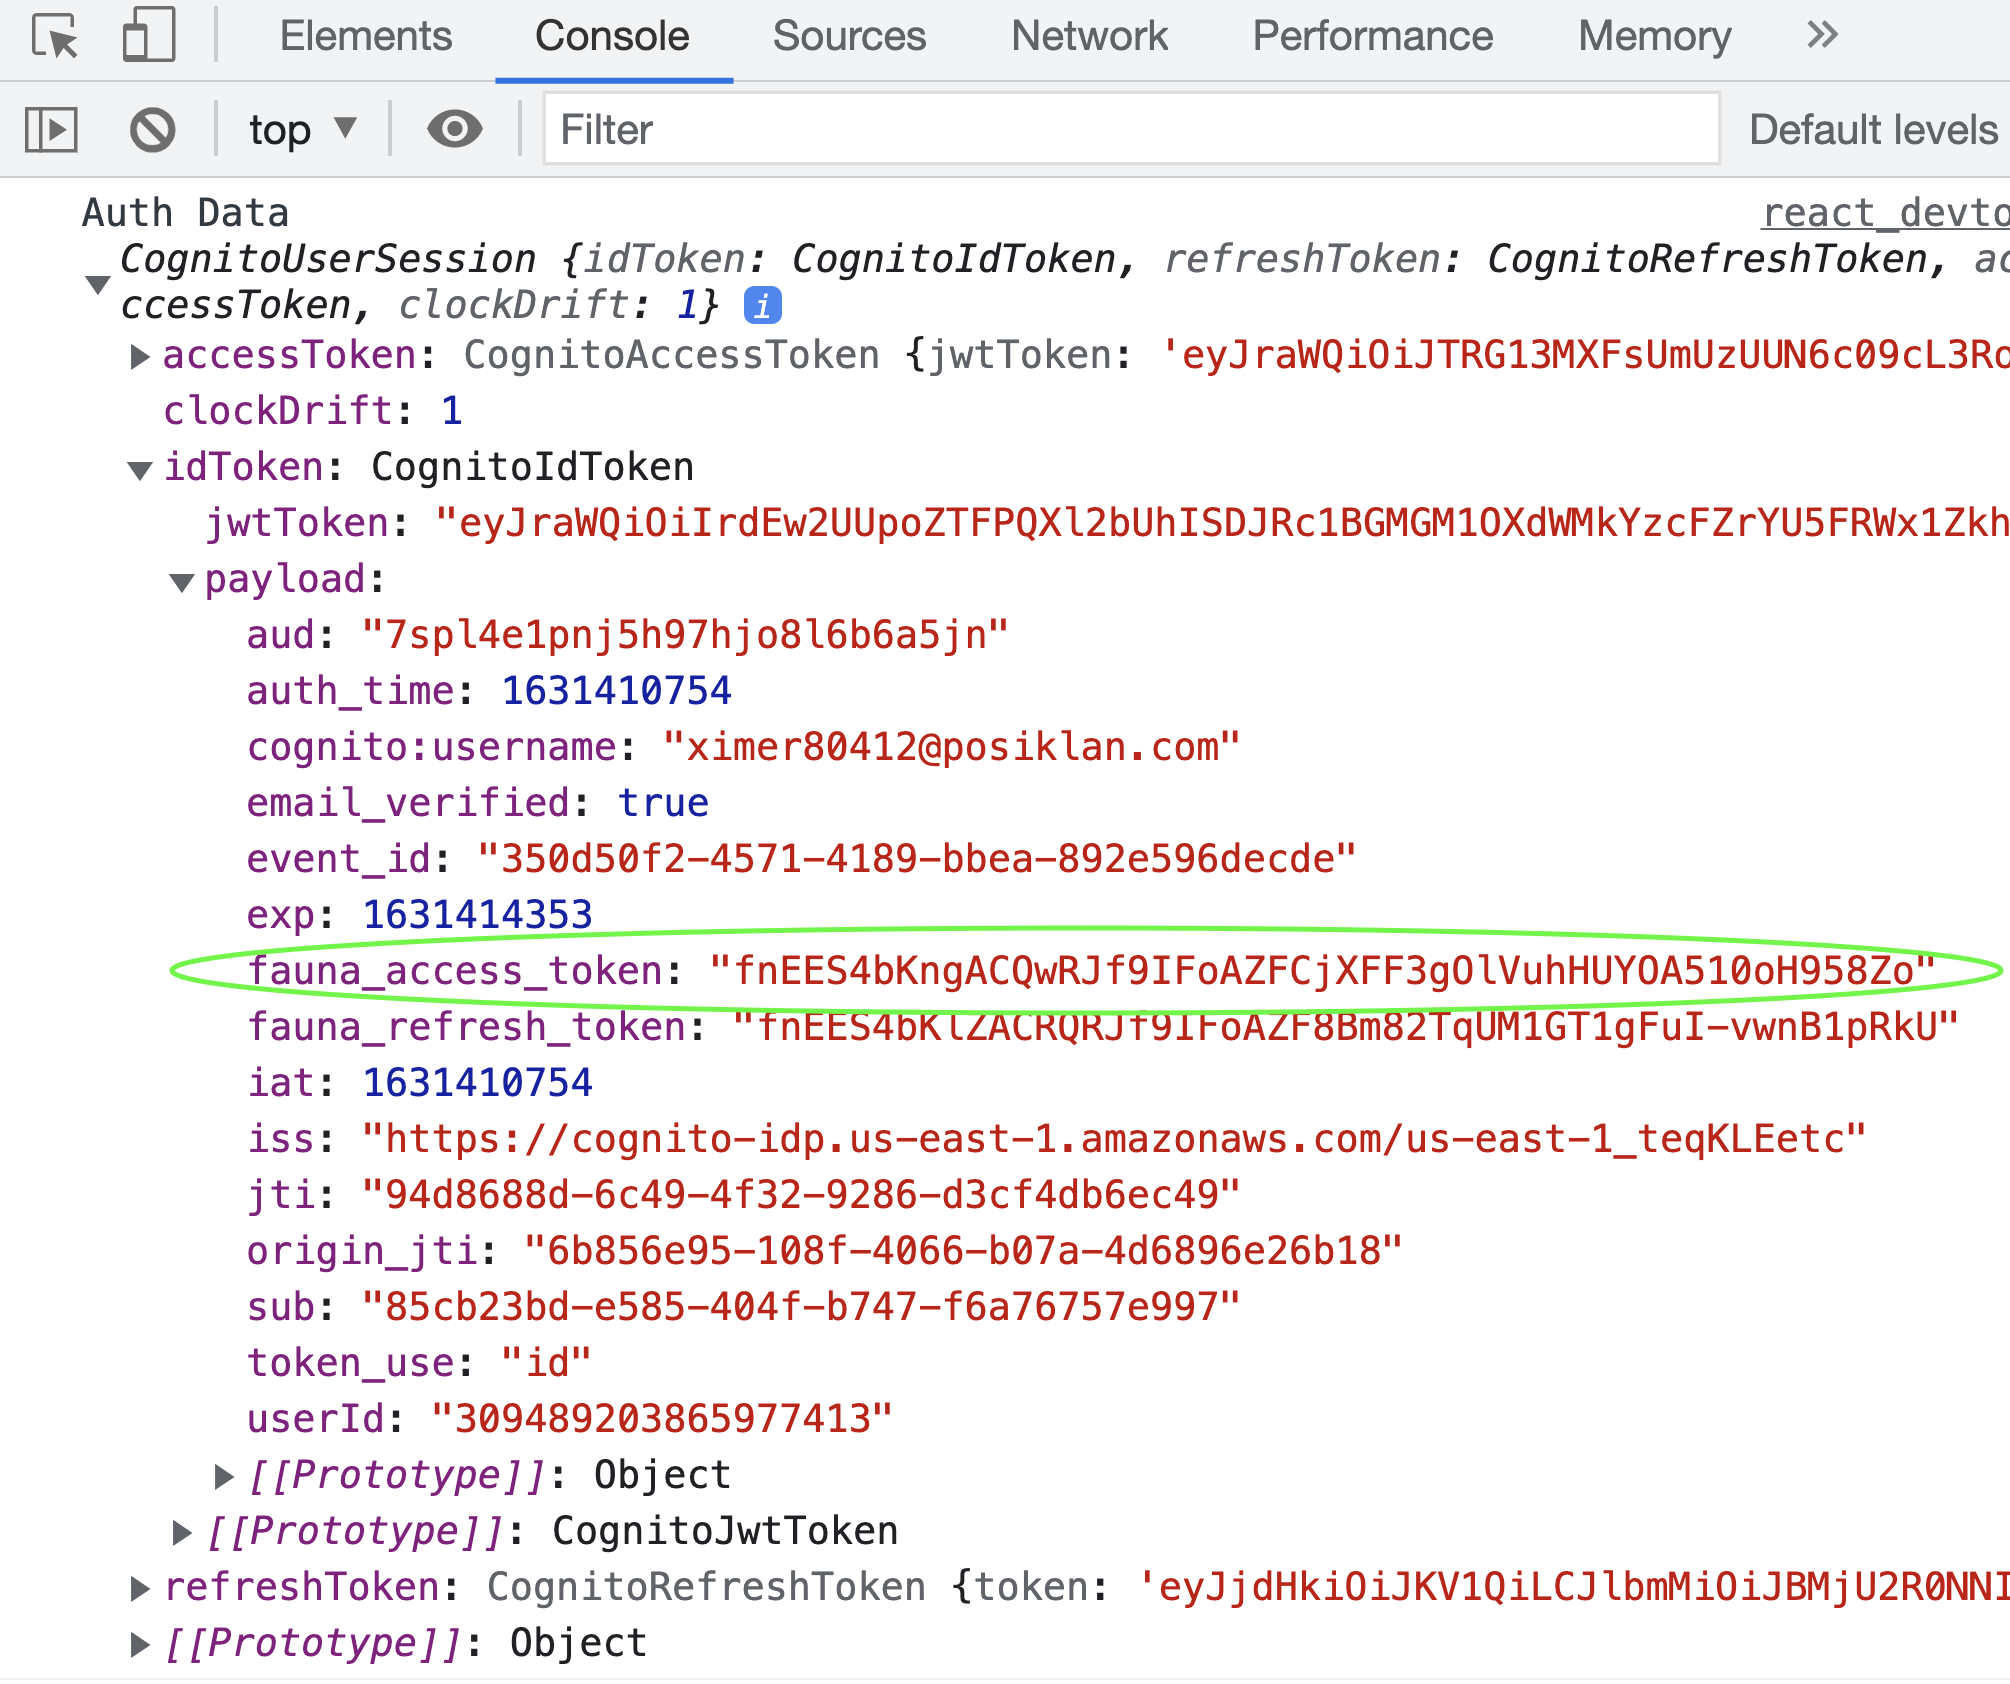
Now, try logging in with your newly registered user. Open up your dev tools in the browser, and you will notice that a Fauna Access token has been generated along with standard Cognito information.
Take a look at the
src/components/Login.js file. On form submission, the onSubmit function is executed.const onSubmit = async e => {
e.preventDefault();
console.log('State', state);
const cognitoUser = new CognitoUser({
Username: state.username,
Pool: userPool,
});
const authenticationDetails = new AuthenticationDetails({
Username: state.username,
Password: state.password,
});
cognitoUser.authenticateUser(authenticationDetails, {
onSuccess: data => {
setCookie('fauna_access_token', data.getIdToken().payload.fauna_access_token)
setCookie('cognito_refresh', data.getRefreshToken().getToken())
setCookie('cognito_username', data.getAccessToken().payload.username)
console.log('Auth Data', data);
alert('User Login Successful');
history.push('/movies');
},
onFailure: err => {
console.log('Failed', err)
},
newPasswordRequired: newPass => {
console.log('New Pass Required', newPass)
}
})
}On button click,
authenticateUser function from AWS identity library is executed. On successful authentication, the fauna_access_token is retrieved from the IdToken and saved into cookies. You can now use this token to query Fauna.Head over to http://localhost:3000/movies in your browser and click the “Get Movies” button. You should be able to see the queried data in the console.
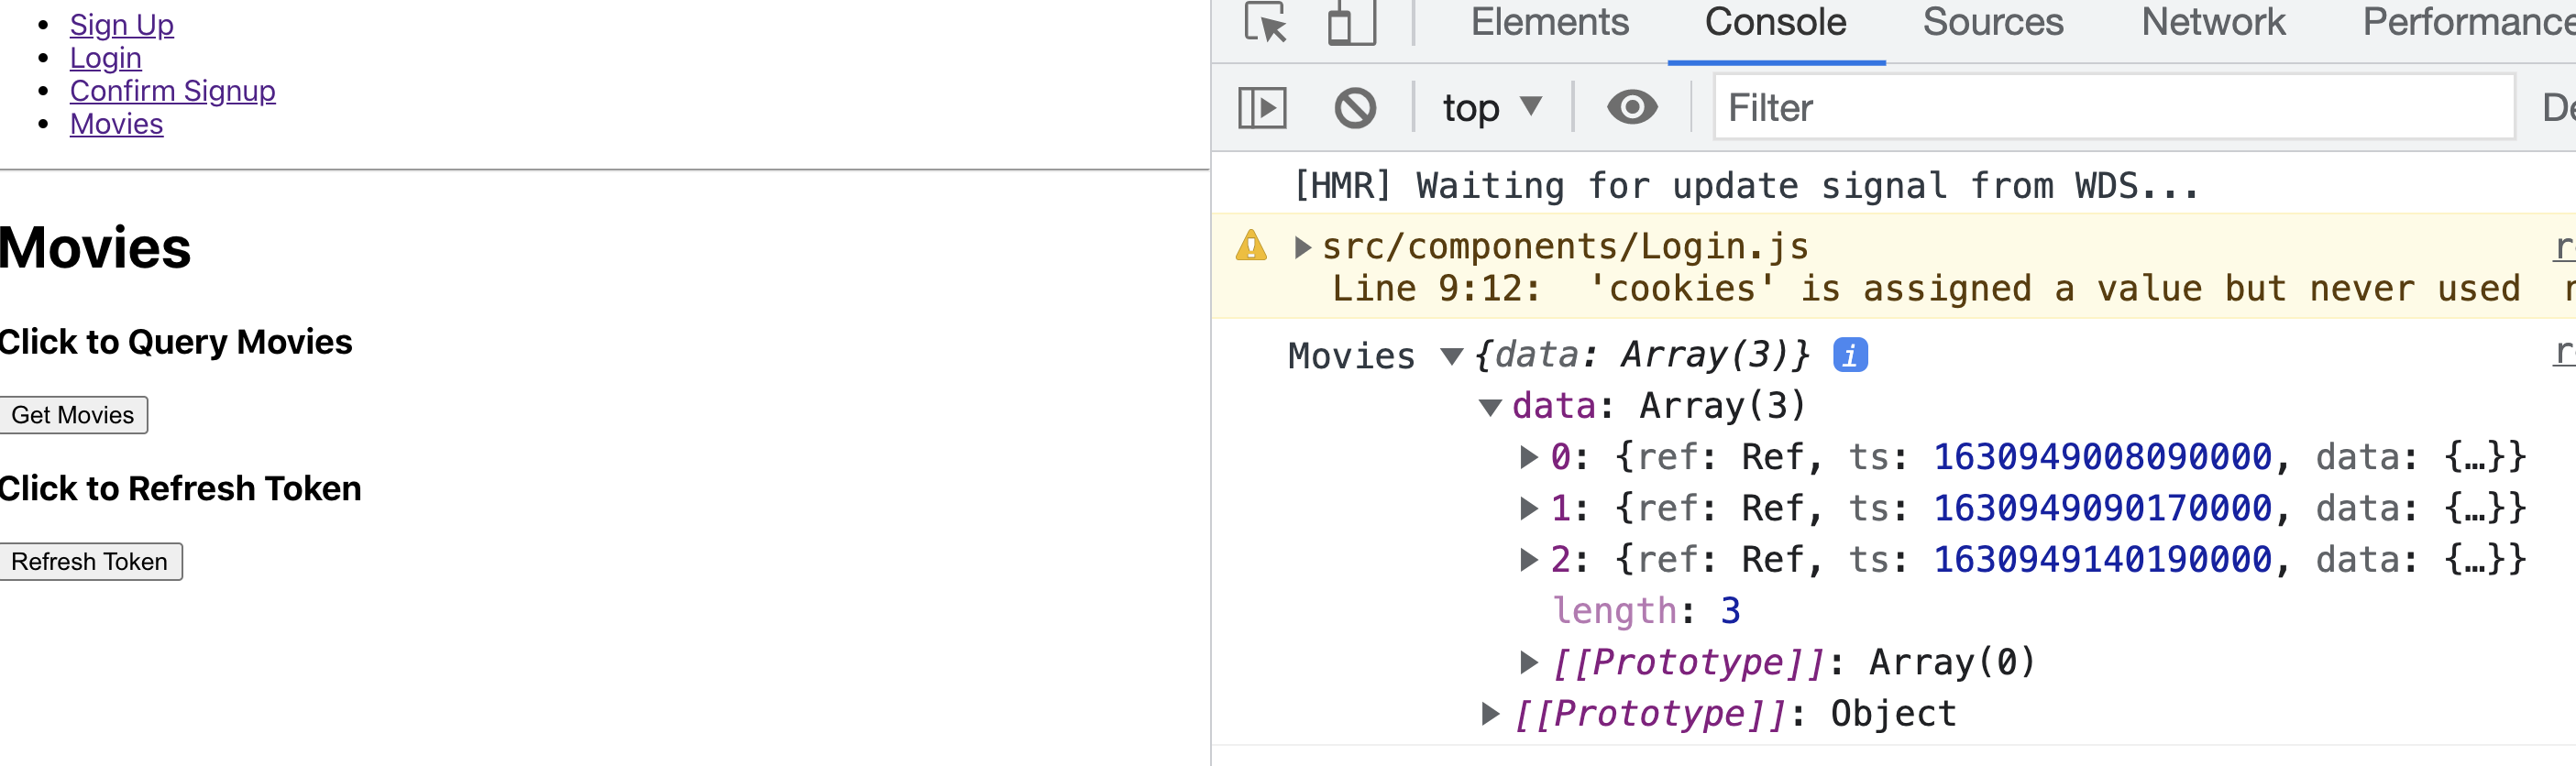
The following code demonstrates how the data is being queried using the
fauna_access_token.const queryMovies = async () => {
const serverClient = new faunadb.Client({ secret: cookies.fauna_access_token });
try {
const movies = await serverClient.query(
q.Map(
q.Paginate(q.Documents(q.Collection("movies"))),
q.Lambda("X", q.Get(q.Var("X")))
)
)
console.log('Movies', movies);
} catch (error) {
console.log('error', error);
if(error.name === "Unauthorized") {
// Refresh Tokens
alert('Token Expired! Refresh Token or Log in again')
}
}
}Take look at the
src/components/Movies.js file to check out the entire example. The file also contains a refresh token example.import { CognitoUserPool, CognitoUser, CognitoRefreshToken } from 'amazon-cognito-identity-js';
...
const refreshTokens = () => {
const cognitoUser = new CognitoUser({
Username: cookies.cognito_username,
Pool: userPool,
});
const cognito_refresh_token = new CognitoRefreshToken({ RefreshToken: cookies.cognito_refresh })
cognitoUser.refreshSession(cognito_refresh_token, (err, session) => {
if (err) {
console.error(err);
}
setCookie('fauna_access_token', session.getIdToken().payload.fauna_access_token);
alert('Token Refreshed')
});
}When you call the CognitoRefreshToken function, it reruns the Cognito Lambda trigger and refreshes the Fauna access token.
Conclusion
Follow this GitHub link to find the complete code for this article. In this article, you learned how to integrate Fauna and Cognito authentication. If you are interested in learning more about Fauna authentication and various strategies to authenticate Fauna then check out the fauna-blueprints repository in Fauna Labs on GitHub.
The Fauna service will be ending on May 30, 2025. For more information, read the announcement and the FAQ.
Subscribe to Fauna's newsletter
Get latest blog posts, development tips & tricks, and latest learning material delivered right to your inbox.