

How to use Fauna with Django
⚠️ Disclaimer ⚠️
This post refers to a previous version of FQL.
This post refers to a previous version of FQL (v4). For the most current version of the language, visit our FQL documentation.
This guide demonstrates how to use Fauna with Django.
Django is one of the most popular frameworks for building full-stack applications with Python. Django supports a number of databases and third-party database plugins. But that doesn’t mean you’re only limited to these database choices. You can use requests to connect your Django application to Fauna, a serverless database.
Why use Fauna as a database with Django:
- Ease of use: With Fauna you can get up and running with a database in seconds. It is easy to manage your data with the Fauna dashboard.
- Serverless and delivered as an API: Fauna is serverless and you pay per usage. Fauna is a database delivered as an API, which means it feels like you are interacting with an API rather than dealing with complex database logic.
- Document-relational: Fauna saves and retrieves data in JSON format while giving you the flexibility to do SQL-like joins (relationship). Fauna combines best of both NoSQL and SQL.
Configure Fauna
Head over to dashboard.fauna.com and create a database.

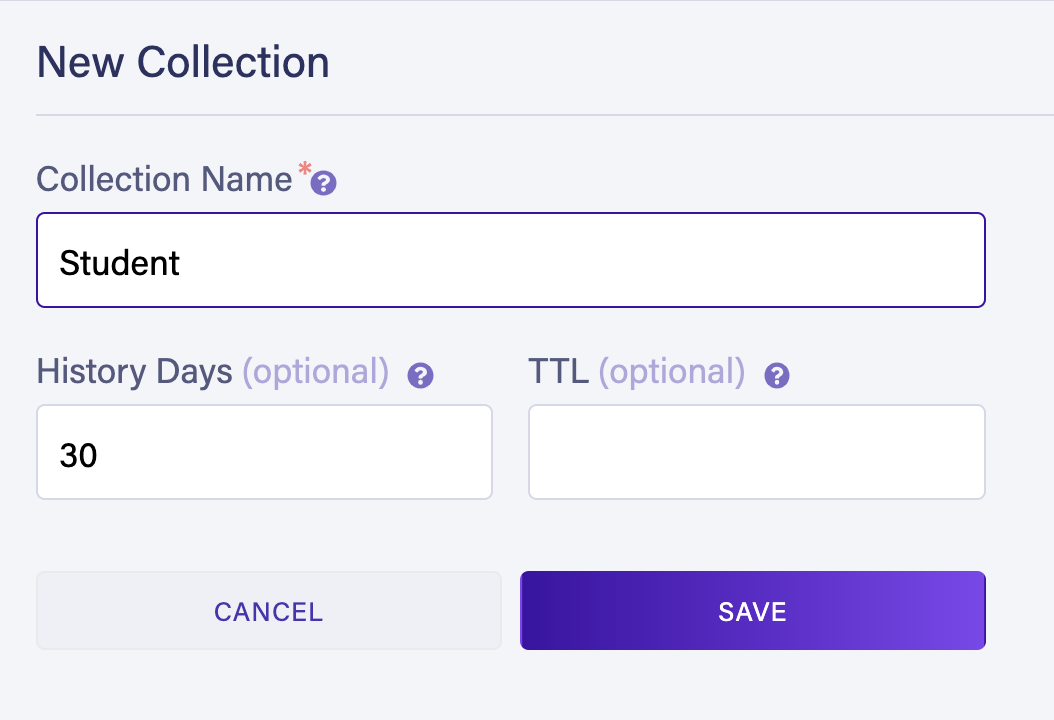
Inside your database, create a new collection called
Student. 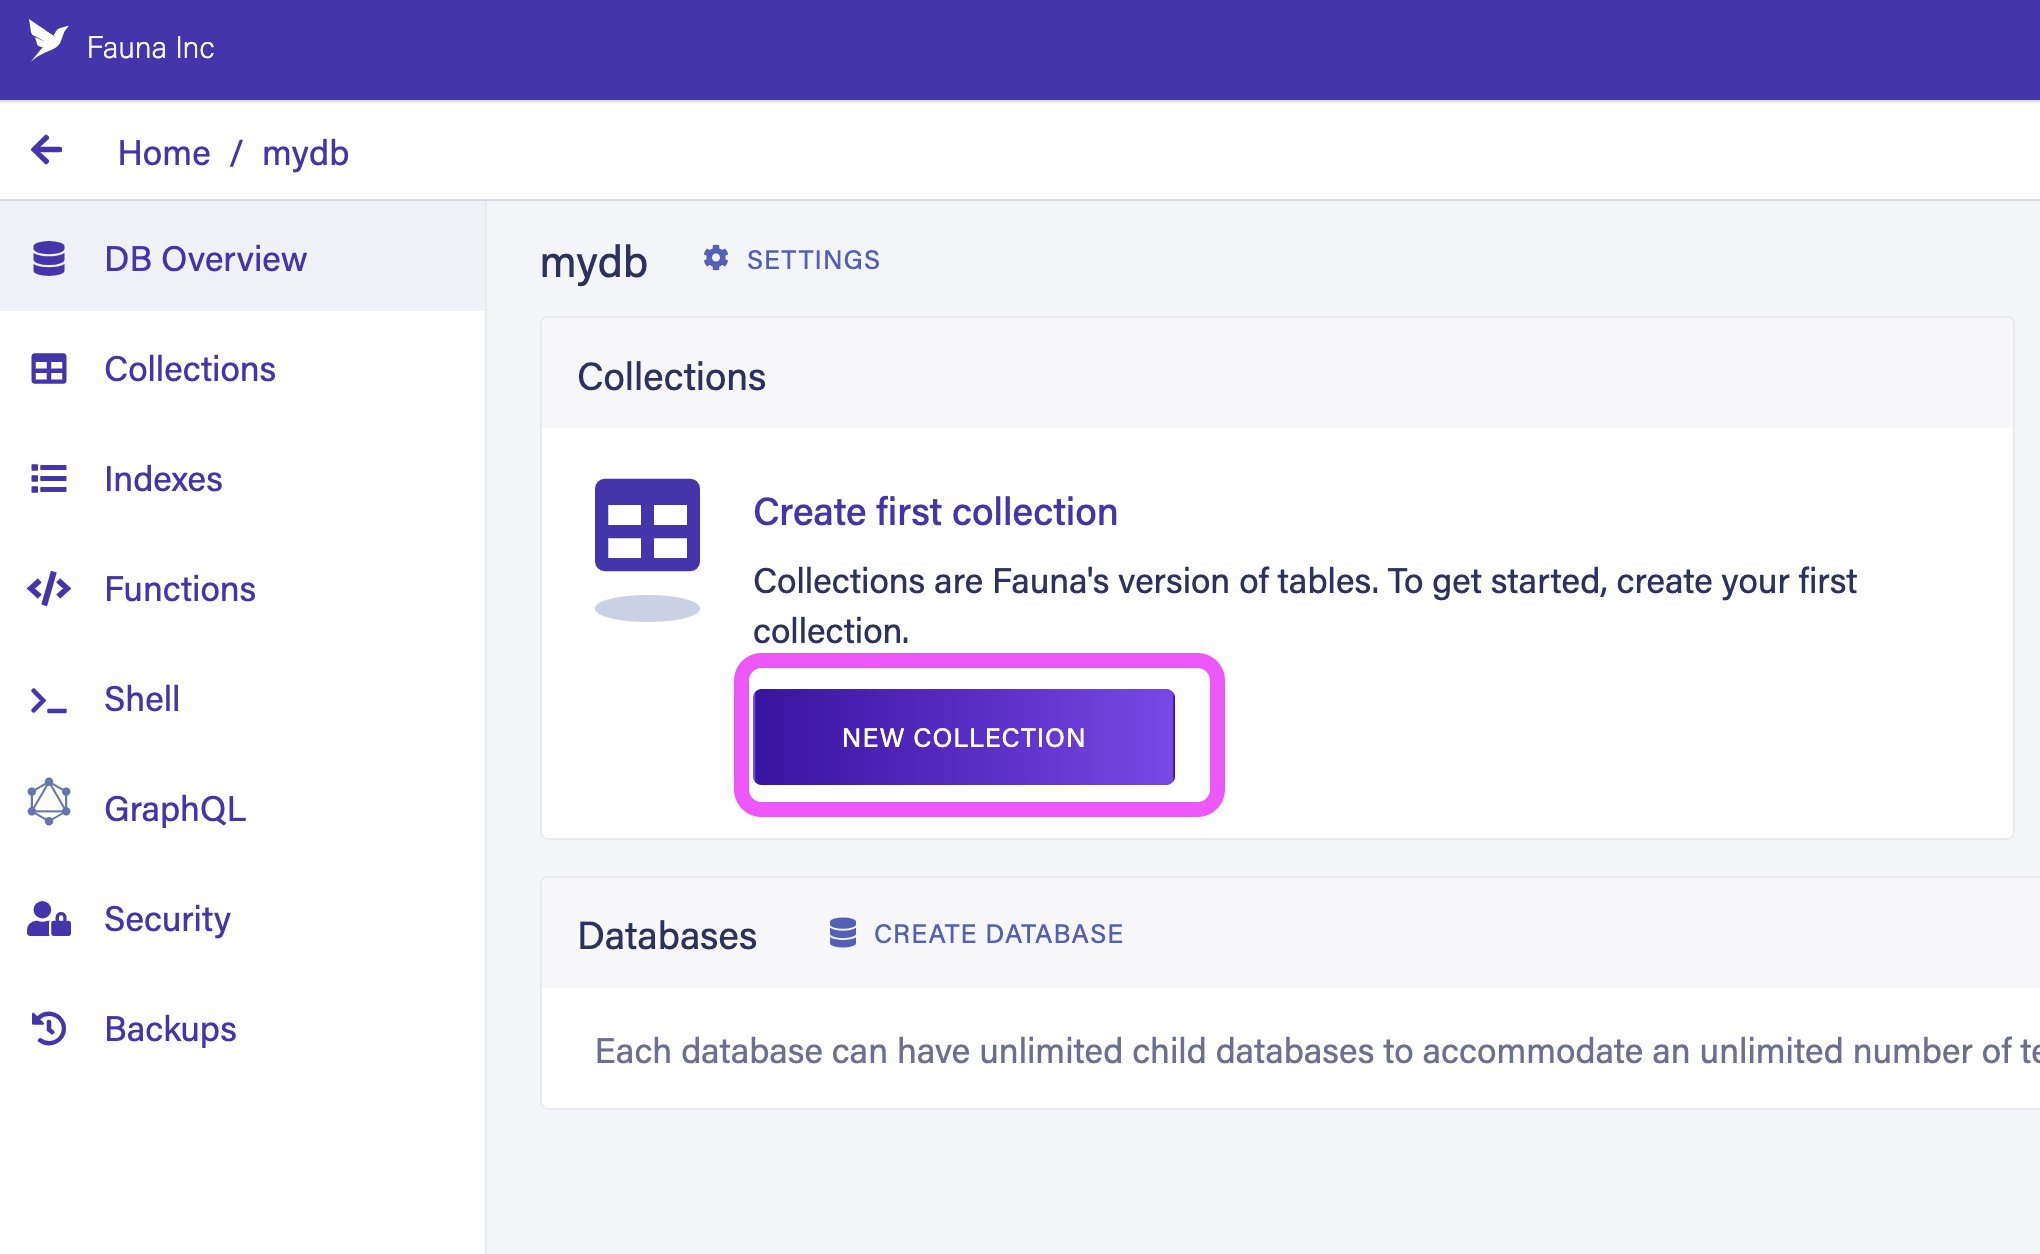
Next, select security keys and generate a new server key for your database.
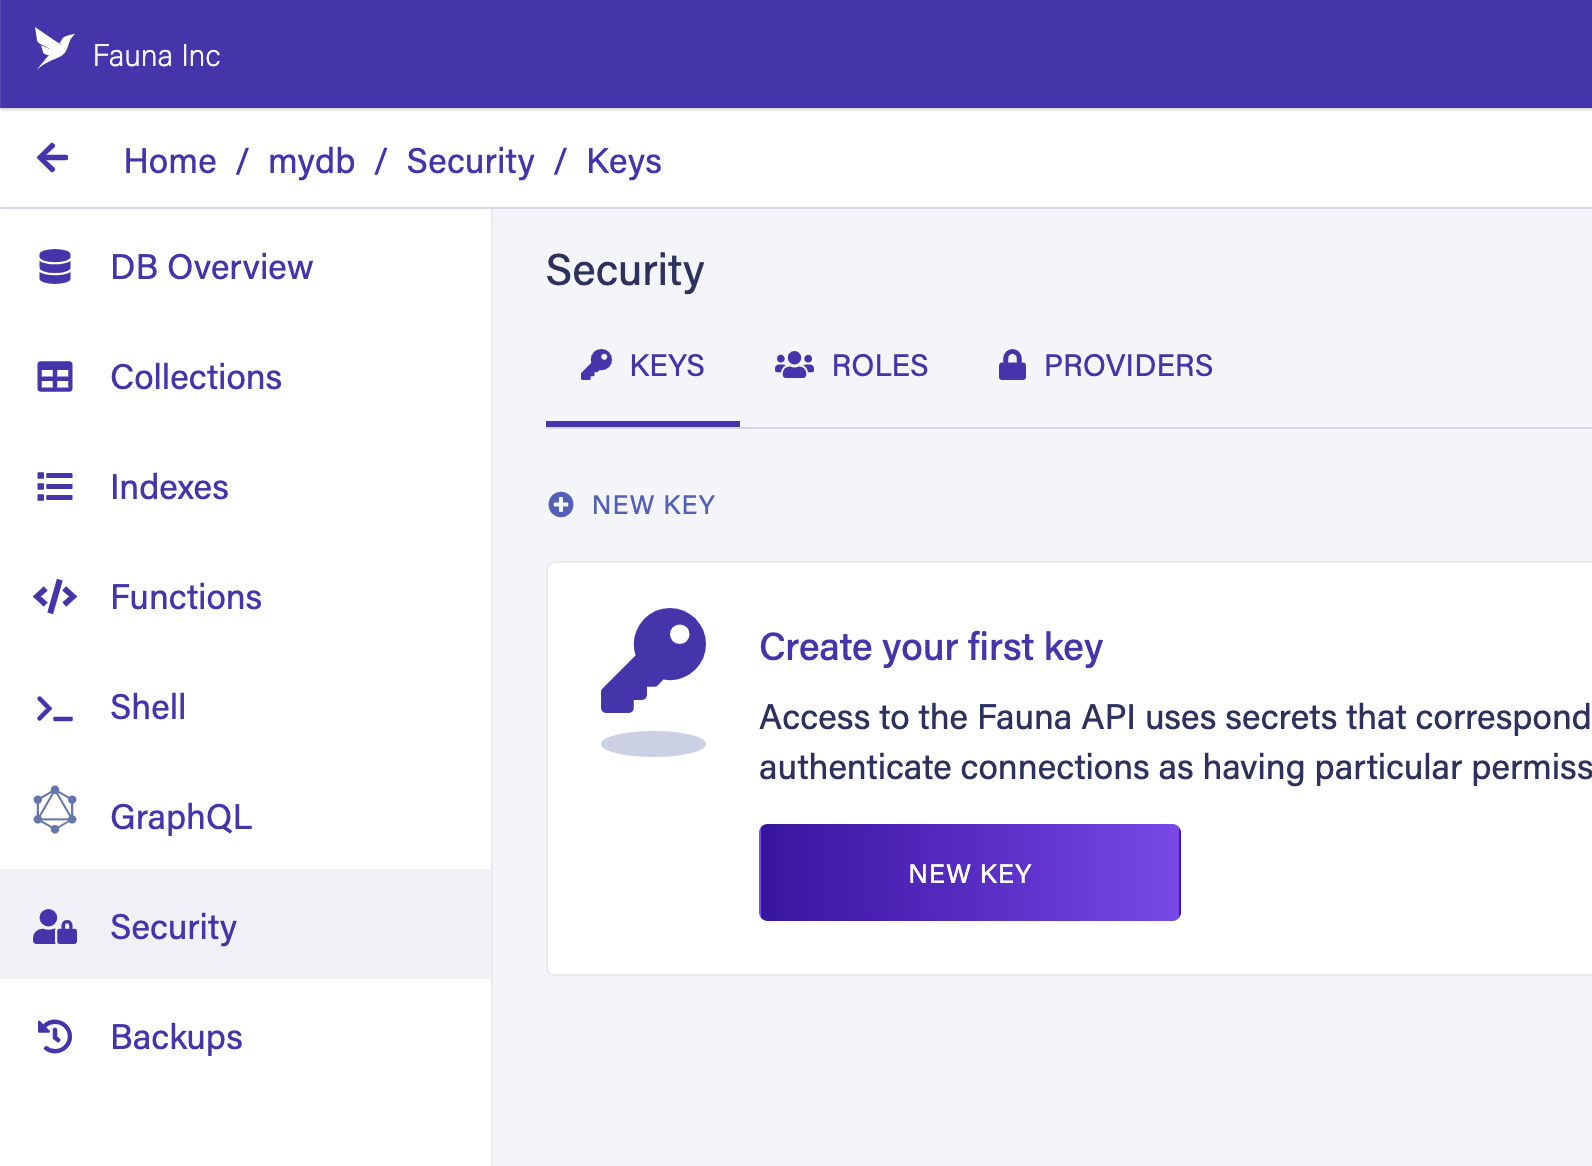
Copy this secret key and keep it safe as you will be needing this to connect to Fauna.
Add Fauna driver
Next, navigate to your Django project and install the Fauna open source Python driver with the following command.
pip install faunadbIf you are using a
requirements.txt then simply add faunadb package as a requirement.Using Fauna in the code
You can import and initiate a new database with the following code.
from faunadb import query as q
from faunadb.objects import Ref
from faunadb.client import FaunaClient

client = FaunaClient(secret="<Your Fauna Key>")
The following code demonstrates how to perform create, read, update, and delete functions with Fauna.
# myapp/views.py

from django.shortcuts import render
from faunadb import query as q
from faunadb.objects import Ref
from faunadb.client import FaunaClient
from django.http import HttpResponse
from django.shortcuts import redirect

client = FaunaClient(secret="<Your-Fauna-Key>")

# Create your views here.
def home(request):
    student_data = []
    dat = client.query(q.paginate(q.match(q.index("id"))))
    for i in dat["data"]:
        data = client.query(q.get(i))
        all_data = {"id": data["ref"].id(), "info": data["data"]}
        student_data.append(all_data)

    return render(request, "home.html", {"data": student_data})

def AddStudent(request):
    if request.method == "POST":
        fname = request.POST["first"]
        lname = request.POST["last"]
        student_card = request.POST["card"]
        created = client.query(
            q.create(
                q.collection("Student"),
                {
                    "data": {
                        "fname": f"{fname}",
                        "lname": f"{lname}",
                        "student_card": f"{student_card}",
                    }
                },
            )
        )
        return redirect("home")

def UpdateStudent(request, id):
    if request.method == "POST":
        fname = request.POST["first"]
        lname = request.POST["last"]
        student_card = request.POST["card"]
        data = client.query(
            q.update(
                q.ref(q.collection("Student"), f"{id}"),
                {
                    "data": {
                        "fname": f"{fname}",
                        "lname": f"{lname}",
                        "student_card": f"{student_card}",
                    }
                },
            )
        )
    return render(request, "update.html", {"url": f"{id}", "data": data["data"]})

def DeleteStudent(request, id):
    data = client.query(q.delete(q.ref(q.collection("PersonalData"), f"{id}")))
    return redirect("http://127.0.0.1:8000/")
You can find a complete example of a Django project with Fauna in this link, created by one of our community contributors.
If you are looking for a step-by-step tutorial for building a Django application with Fauna from scratch then follow this blog post.
Using Django Models and Fauna
You can easily integrate the Fauna driver into your Django model. Fauna is schema-less, therefore you don’t have to apply migration when using Fauna with Django models. Below is an example implementation of Django model.
# polls/models.py

from django.db import models
from faunadb import query as q
from faunadb.objects import Ref
from faunadb.client import FaunaClient

client = FaunaClient(
  secret="fnAxx...",
  endppoint="https://db.fauna.com/",
)

class Question(models.Model):
  question_text = models.CharField(max_length=200)
  pub_date = models.DateTimeField('date published')

  def __init__(self, question_text, pub_date):
    self.question_text = question_text
    self.pub_date = pub_date
    self.id = None

  def __str__(self):
    return self.question_text

  def save(self):
    response = client.query(
      q.create(
          q.collection("questions"),
          {
              "data": {
                  "question_text": self.question_text,
                  "pub_date": self.pub_date
              }
          }
      )
    )
    self.id = response["ref"].id()

  def update(self):
    client.query(
      q.update(
        q.ref(q.collection("questions"), self.id),
        {
          "data": {
            "question_text": self.question_text,
            "pub_date": self.pub_date
          }
        }
      )
    )

  def delete(self):
    client.query(
      q.delete(
        q.ref(q.collection("questions"), self.id)
      )
    )

  @staticmethod
  def get(id):
    response = client.query(
      q.get(
        q.ref(q.collection("questions"), id)
      )
    )
    return Question(
      response["data"]["question_text"],
      response["data"]["pub_date"]
    )

  @staticmethod
  def all():
    result = client.query(
      q.paginate(
        q.documents(q.collection("questions")),
        size=50
      )
    )
    return [Question.get(ref.id()) for ref in result["data"]]
You can interact with this model in your Python shell. Run
python manage.py shell to start the shell. Run the following commands to create a new record in the database using the model.
>>> from polls.models import Question
>>> from django.utils import timezone
>>> q = Question(question_text="What's new?", pub_date=timezone.now())
>>> q.save()
A new record will be created in your Fauna database.
Where to go from here
Checkout the Fauna Python driver and Fauna documentation to learn more. Have questions or suggestions? We would love to hear from you. Join us in our forum or our Discord channel and be a part of our growing community of builders.
The Fauna service will be ending on May 30, 2025. For more information, read the announcement and the FAQ.
Subscribe to Fauna's newsletter
Get latest blog posts, development tips & tricks, and latest learning material delivered right to your inbox.